
Features | 4K native generation, Touch-to-edit components, Layout-first architecture |
Rating | Arena - Text-to-Image: #2 |
Pros | Strong text/typography rendering, fast, coherent multi-reference blending |
Cons | Struggles with scale/proportion, edit prompt fidelity weakens, no visible credit tracker |
Pricing | Free (daily energy allowance); Lite $7.99/mo; Pro $19.99/mo |
Alternatives | Midjourney, Krea AI, Magnific, Nano Banana, GPT Image 2 |
What is Reve AI Image?
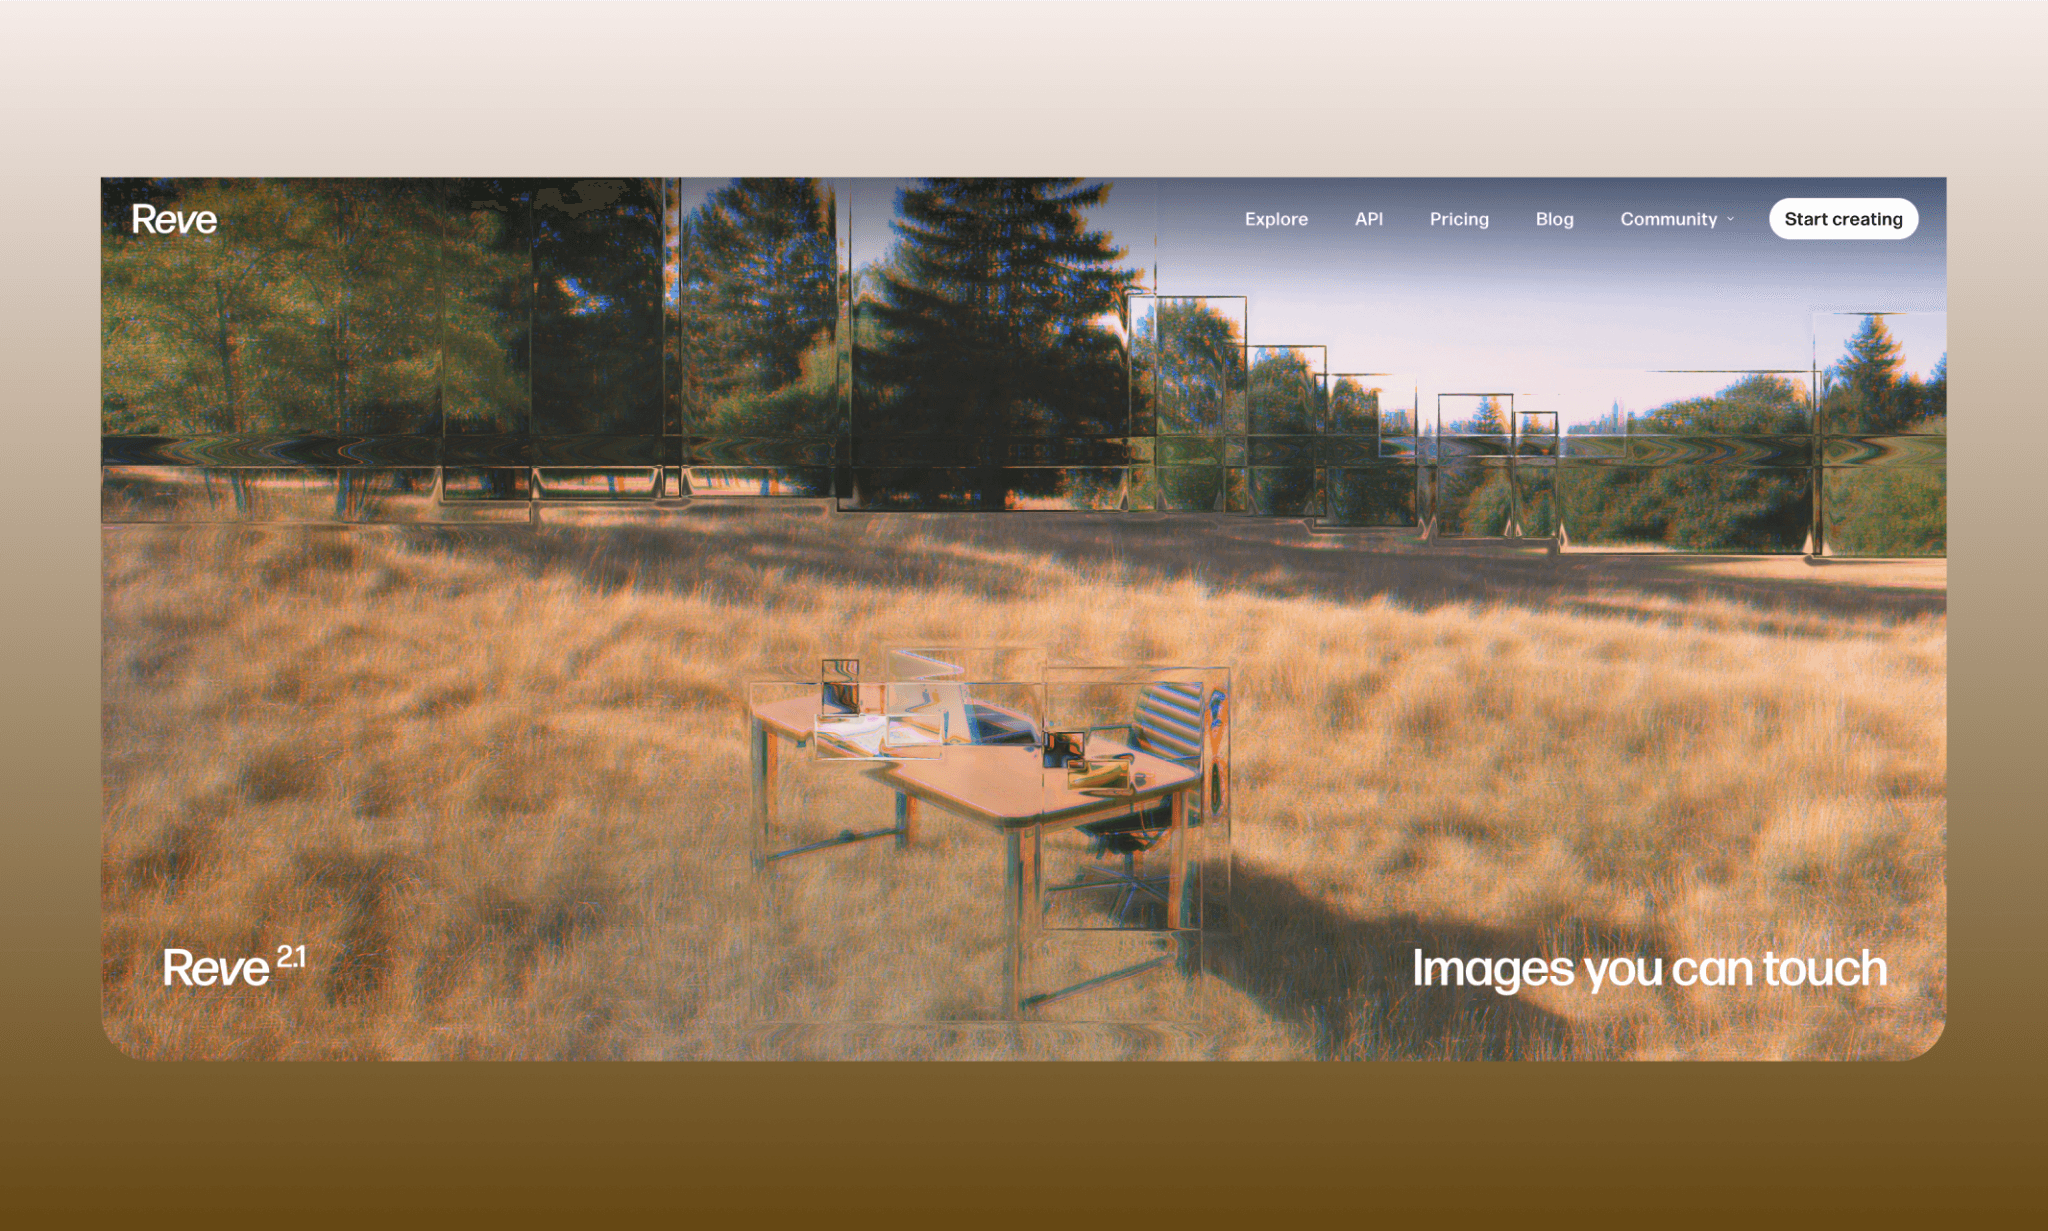
Reve AI is an AI image and video generator[1]. Launched in March 2025, under the codename Reve Halfmoon, its latest version – Reve 2.1 – ranks among the top 4k image models so far[2].
Key Features of Reve AI in 2026
Layout-first architecture separates image planning from rendering
Native 4K resolution generation, no separate upscaling step needed
Touch-to-edit lets you revise individual image components directly
Strong text and typography rendering within generated compositions
Multi-reference image blending with coherent lighting and shadows
Freepik’s Evolution to Magnific AI >
Using Reve Image Generator for UI
To review Reve AI images for product teams, I decided to design website assets for an imaginary clip-on lens for iPhone, Lenzz. The idea is to show the product, its visual outputs, and its features on a landing page.
My Experience of Krea AI for Try-on App Assets >
Generating the hero image
Draft 1: Text-to-image
I didn’t have a specific visual in mind for the Lenzz opening image and also wanted to see a one-shot ability of design intelligence of Reve AI. So I first asked it to generate from text-to-image (instead of a reference image) with a vague prompt.
"A hero image for a clip-on iPhone lens. Show the product in use at a vibrant local fair, with energy, color, and movement in the background."
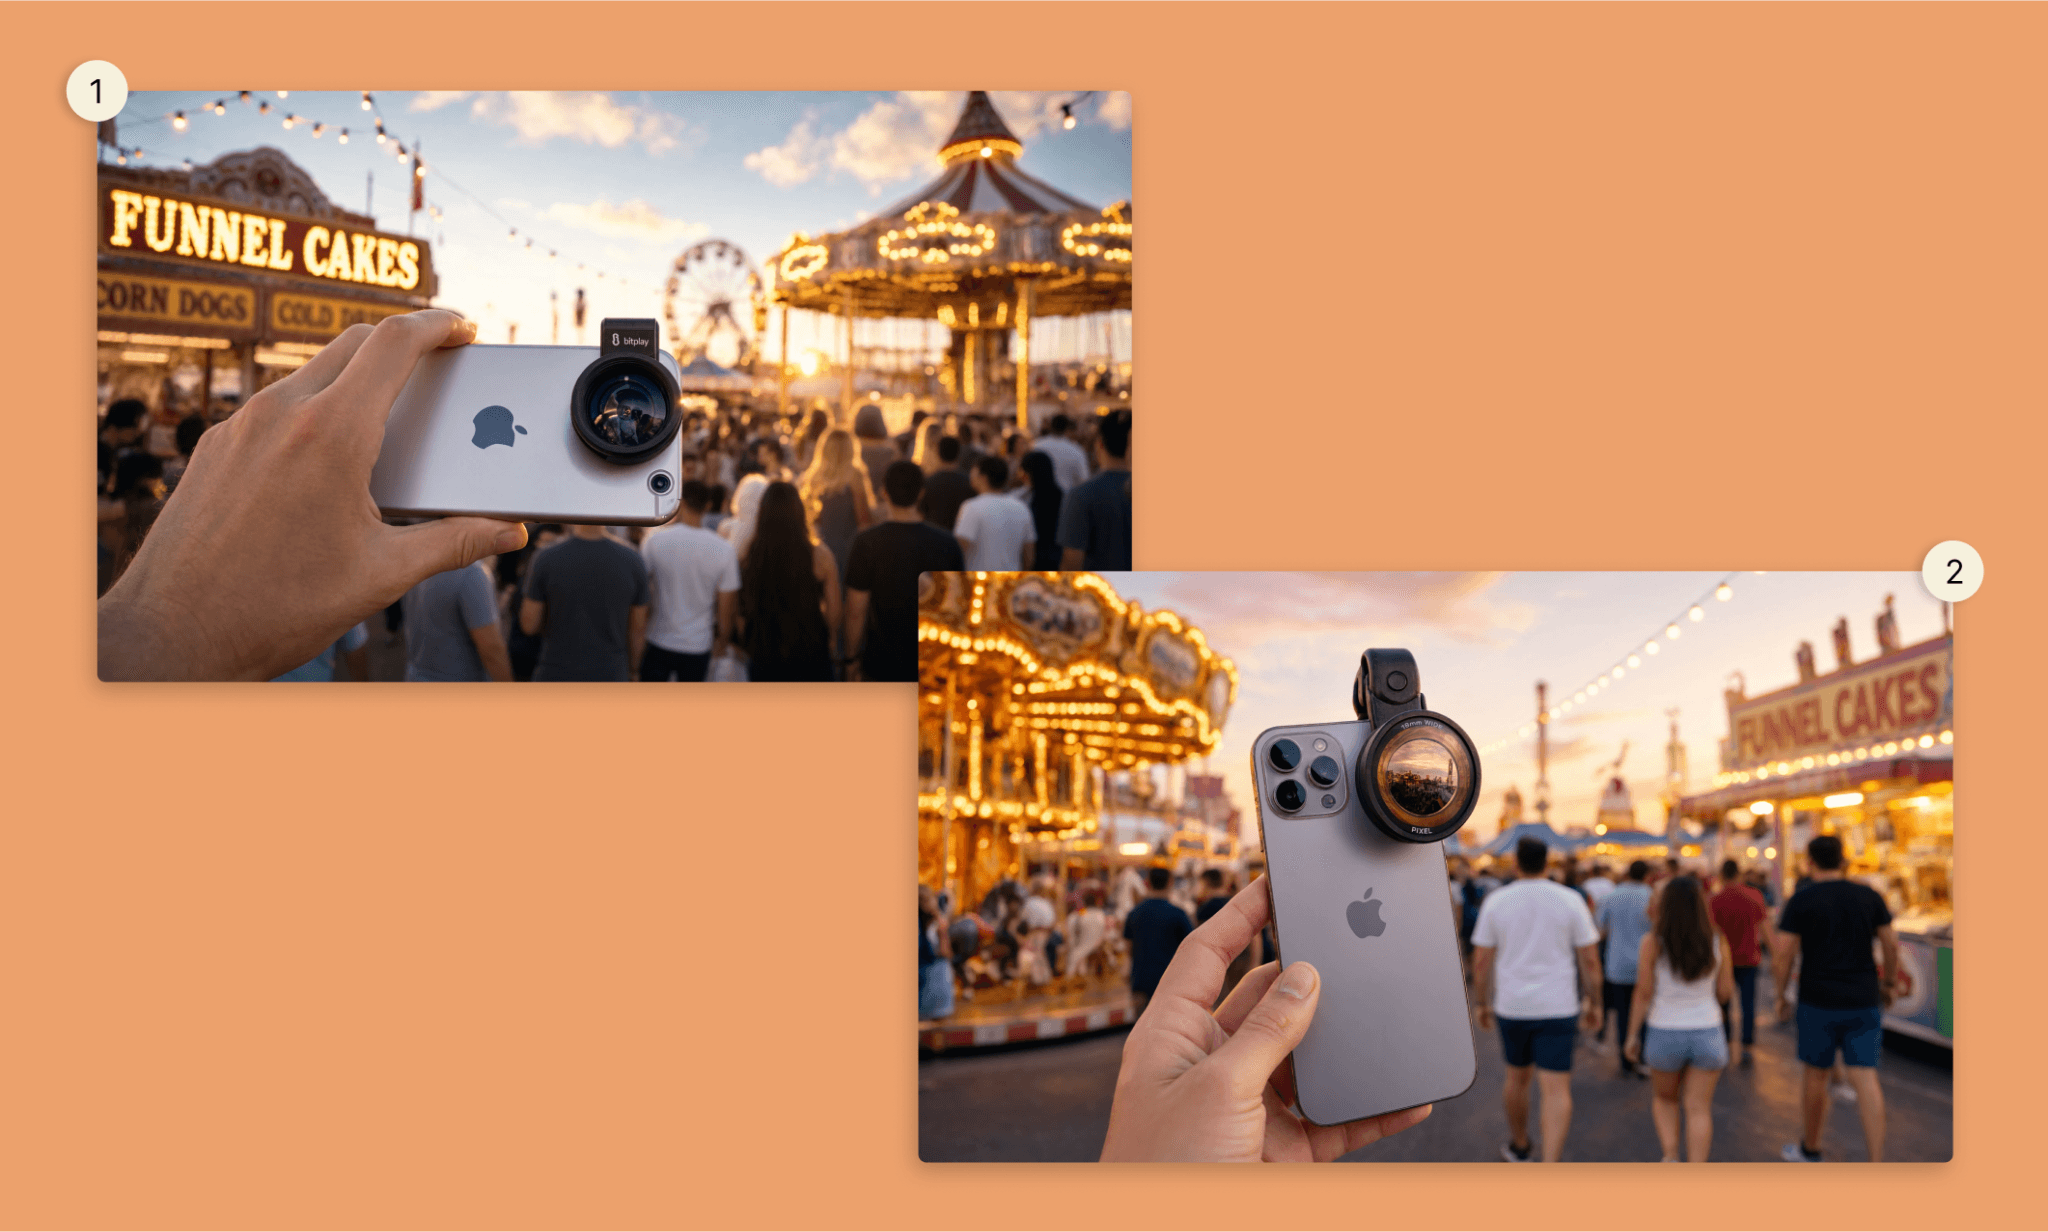
The two outputs took ~1 minute to be generated. (It was set to Count = Auto and decided to create two versions.) And both the versions are quite decent for the first draft. I like the hand posture, text legibility, and background is also not bad. However, the product itself is misplaced - should be over the phone’s lens. I’ll let it pass though.
Draft 2: Image-to-image
Getting inspired by the first image, I decided to take a couple of images and remix them with Reve AI for the homepage.
“Create a hero product shot of a clip-on lens for iPhone using the reference images: two iPhones face each other screen-to-screen, and lenses attached and pointing outward in opposite directions. The phones meet at the center of the frame, sharp and in focus. Ensure that the rim of the lens says 'Lenzz'
For background use the image attached of the carnival at dusk.
Soft hazy bokeh and lens glare on either side of the frame. Cinematic, editorial product photography style.”
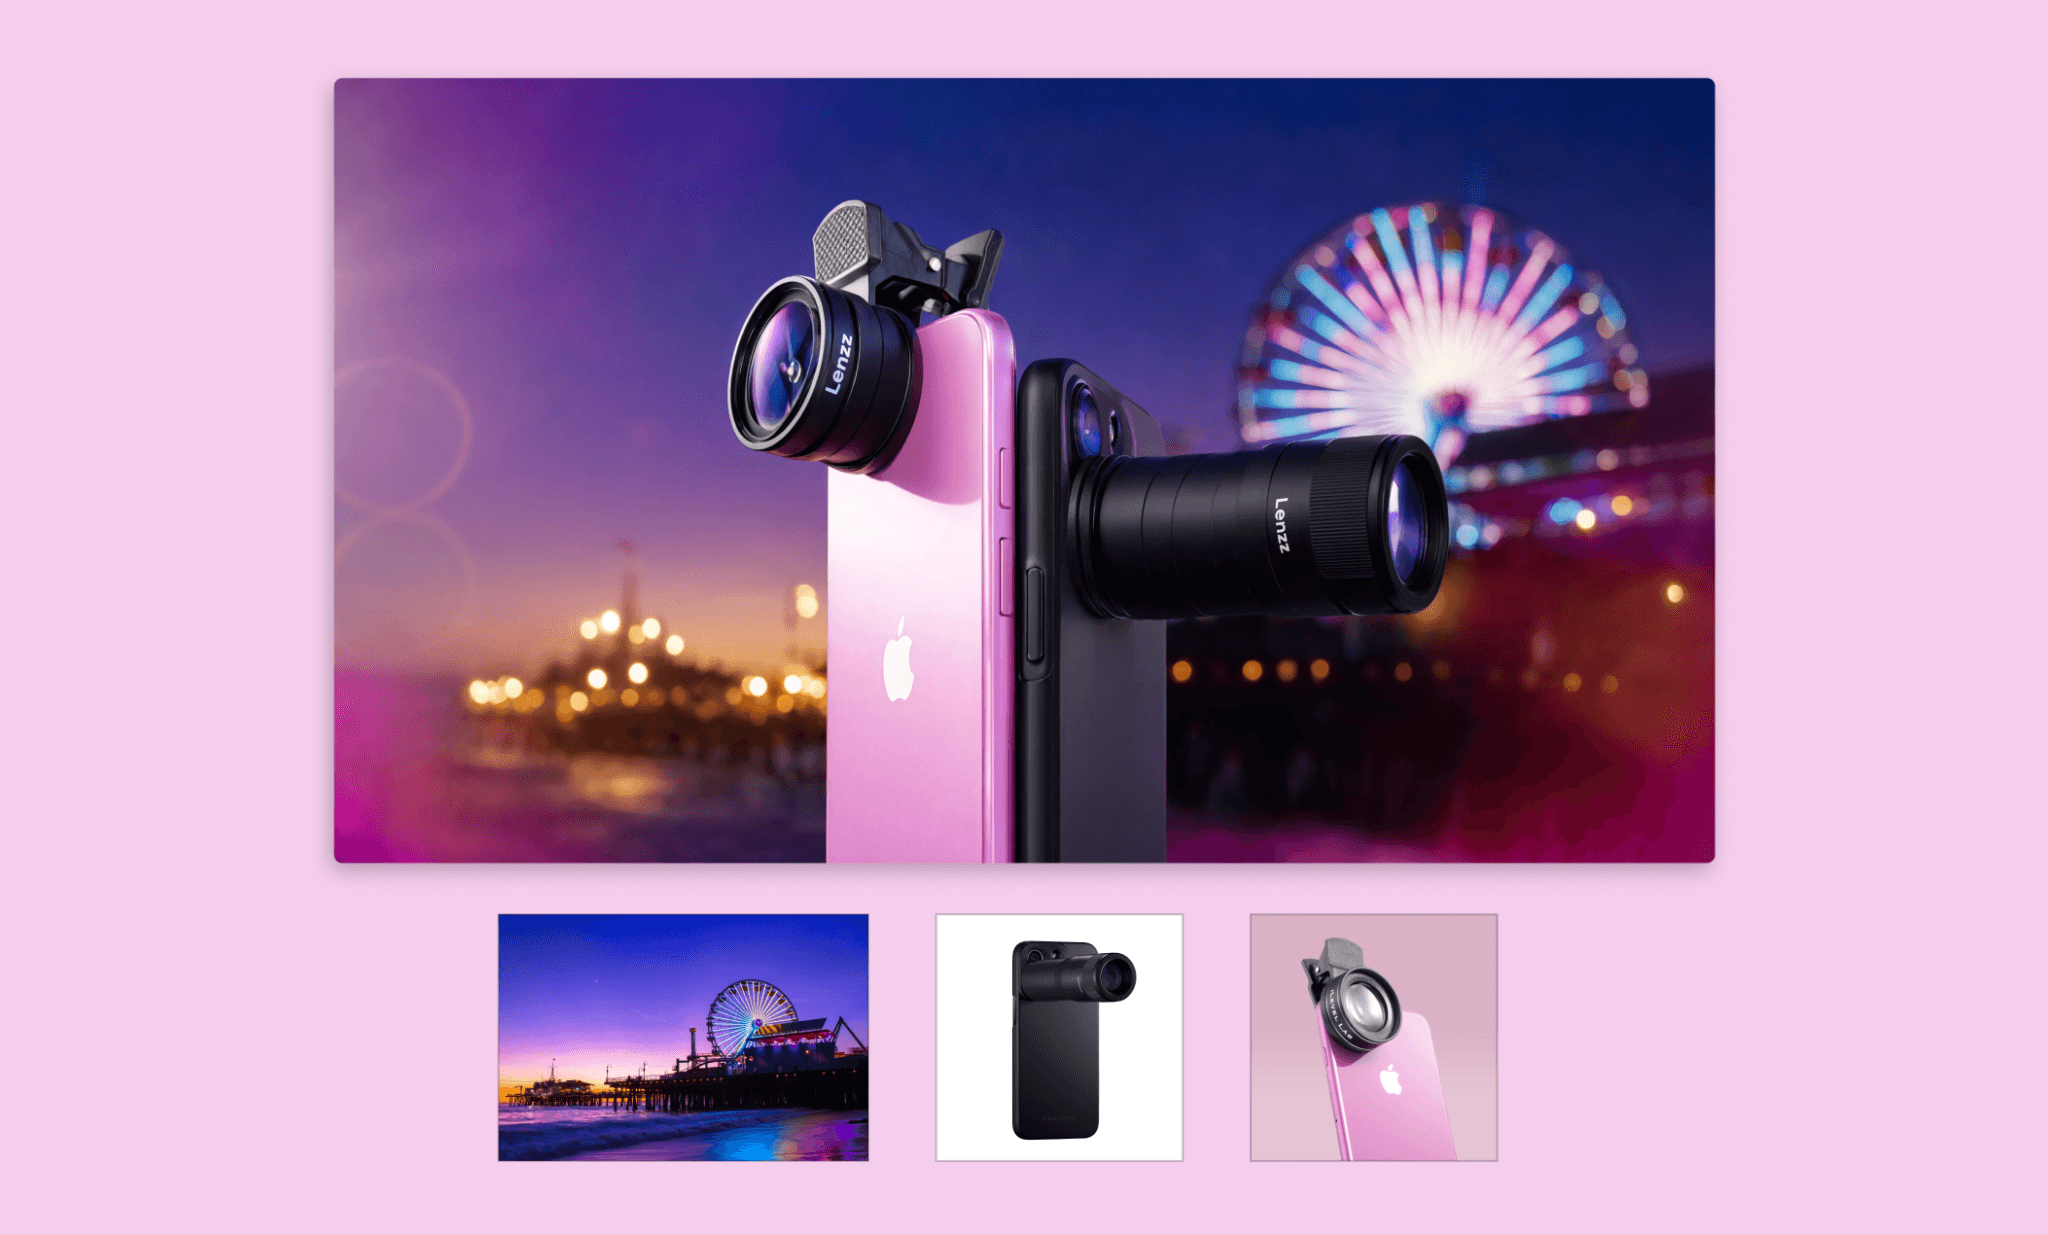
It took ~1.5 minutes for Reve AI to assemble 3 reference images into a composite hero shot. Firstly, the three reference images are genuinely used and manipulated into the image as requested. I was also pleasantly surprised to see the Lenzz wordmark is so legible. (I had tried something similar in my Freepik AI image review but it didn’t work.) The light and shadow are also coherent. Good enough overall to polish with the Reve image editor.
Editing the hero image by touching it
Reve AI offers a handful of standard image editing toolkit: Reframe, add effect, add object from another image and so on. But the most interesting is their touchable image by Reve 2.1. In addition to prompting AI to edit the whole image, you can point to a singular component - which has its own layer and sub-prompt - and make manual or AI edit there.

Tweaking the full image with a prompt
"- Scale down both phones and lenses so they take up less of the frame, leaving more of the carnival background visible on all sides.
- Increase the perceived build quality of both lens barrels and phone finishes — sharper material detail, more refined metal and glass texture, premium product-shot finish.
- Position the two phones directly face-to-face, screens fully aligned front-to-front with no offset at the edges — not meeting corner-to-corner. Keep the pink phone as is; change the black phone to a deep space gray or graphite tone.
- Change the background lighting from dusk to bright daytime — clear blue sky, warm daylight instead of purple/blue night tones, keeping the Ferris wheel and carnival elements but sunlit.
- Reduce the lens glare and bokeh haze on the left and right edges to a subtle, barely-there level — much softer than current. "
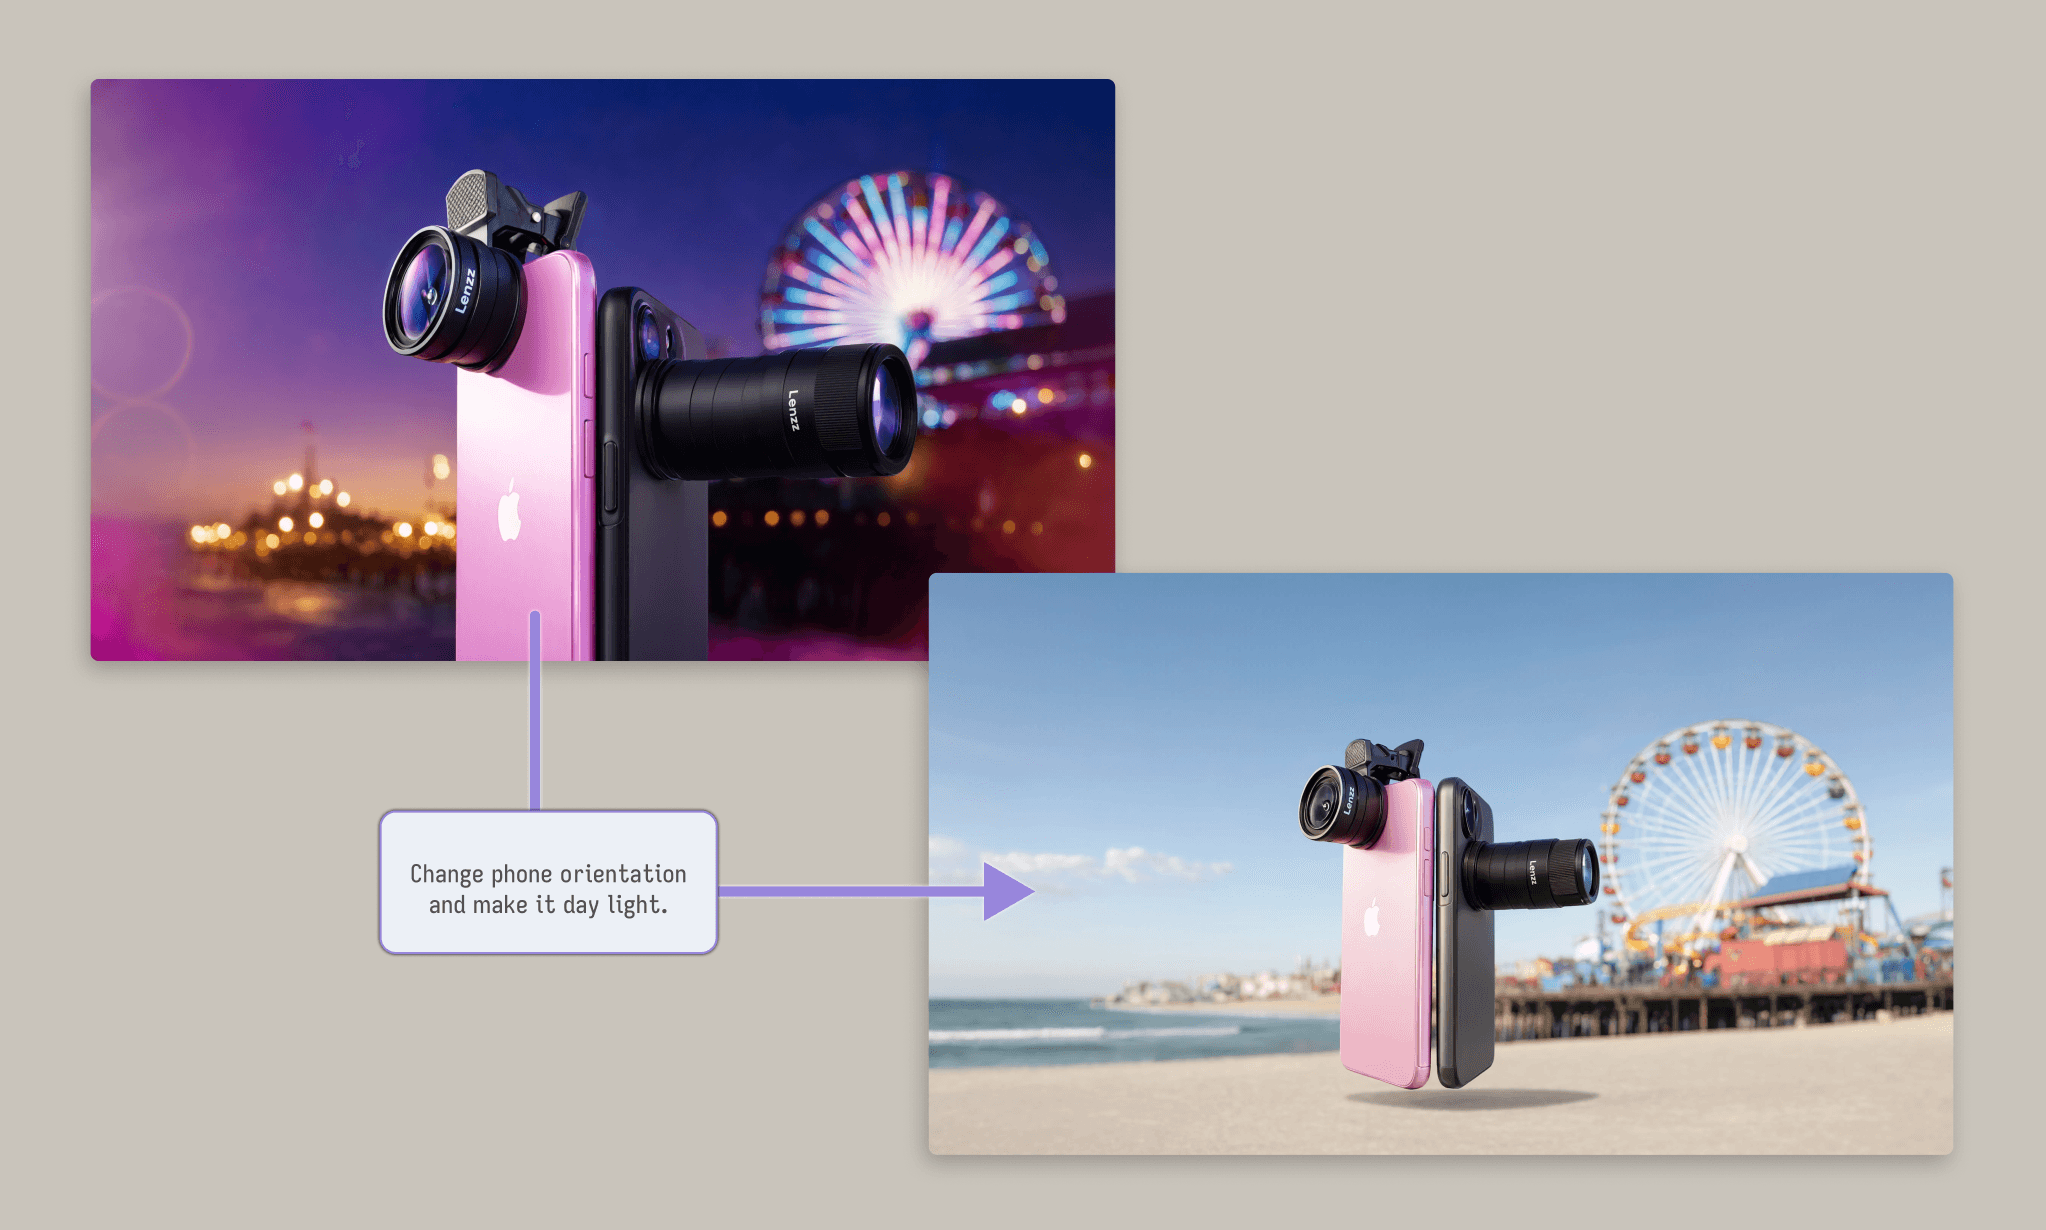
Now, that’s more like it. It followed the most requests but an important one of making phones appear side-by-side instead of angle did not. That aside, the night to day shift is surprisingly good.
Changing individual component with AI
Now, testing the Reve 2.1 feature of touch-to-edit individual components, I decided to make the lens of the grey phone properly placed, add Apple logo, and reposition.
“Make the external lens appear right on top of the lens of the iPhone. Add an apple logo on the phone, And, bring the phone a little downwards - adjust the shadow accordingly.”
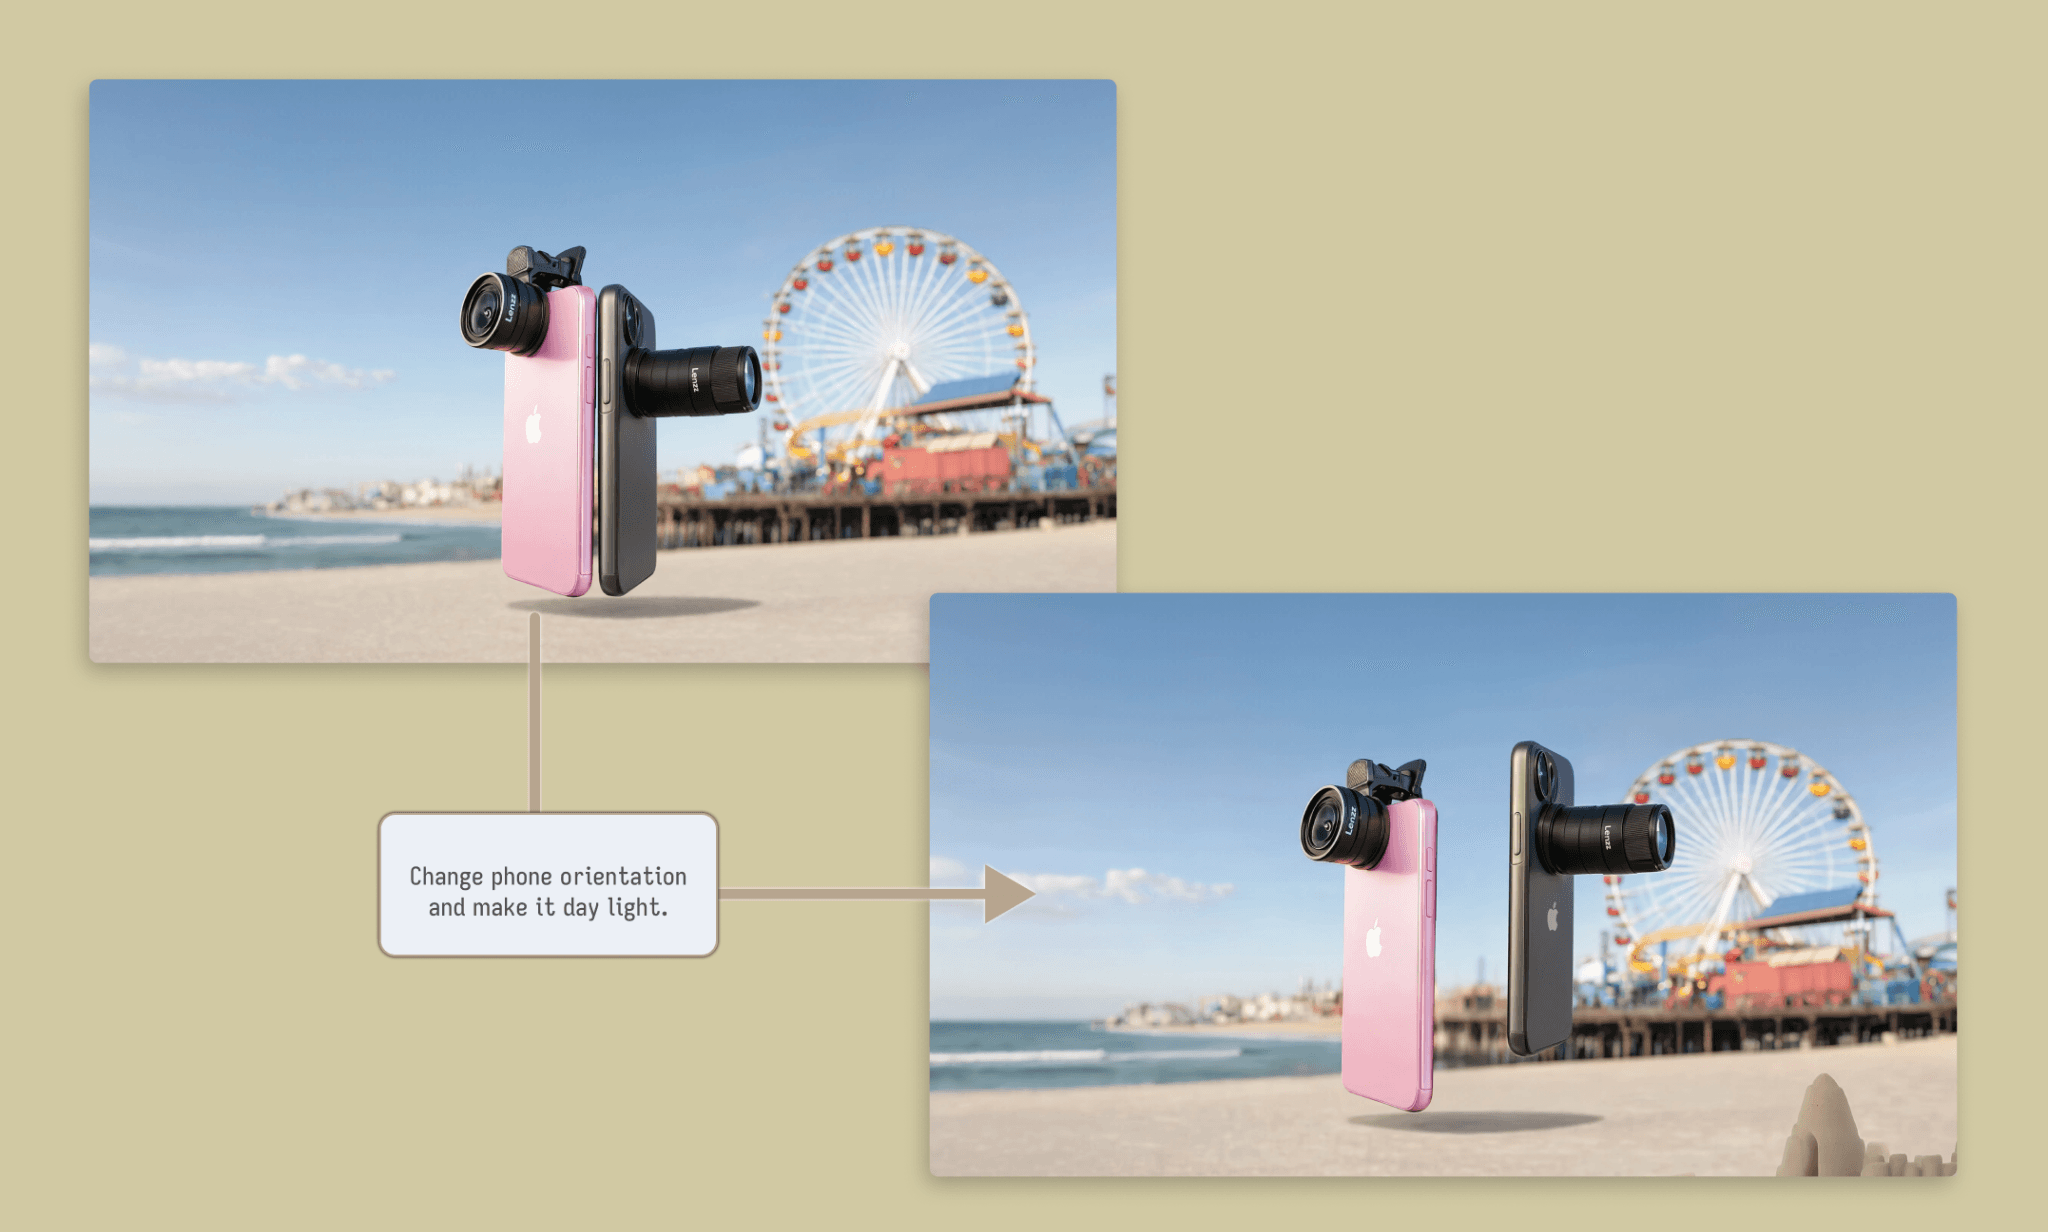
I really like this feature of specificity, however, frankly, its prompt fidelity in editing is subpar. With that am going to move to another image for the landing page.
Use case list shown as types of images
UI/UX professionals typically show a list of items in an alternating layout/zig-zag layout; which is what I chose to show the various use cases of Lenzz. In turn, this is to test Reve’s range of image generation.
Wedding shoot (focus control)
"Hyperrealistic candid wedding photograph. The foreground has rows of seated guests softly out of focus. Center frame: bride and groom embracing and laughing, tack-sharp focus on their faces and eyes. A priest stands just beside them, slightly soft-focused. The background is a lake with mountains, gently blurred. Flower petals thrown by friends and family frozen mid-air around the couple, some sharp near the couple, others soft as they recede. Natural golden-hour light, documentary photojournalistic style."
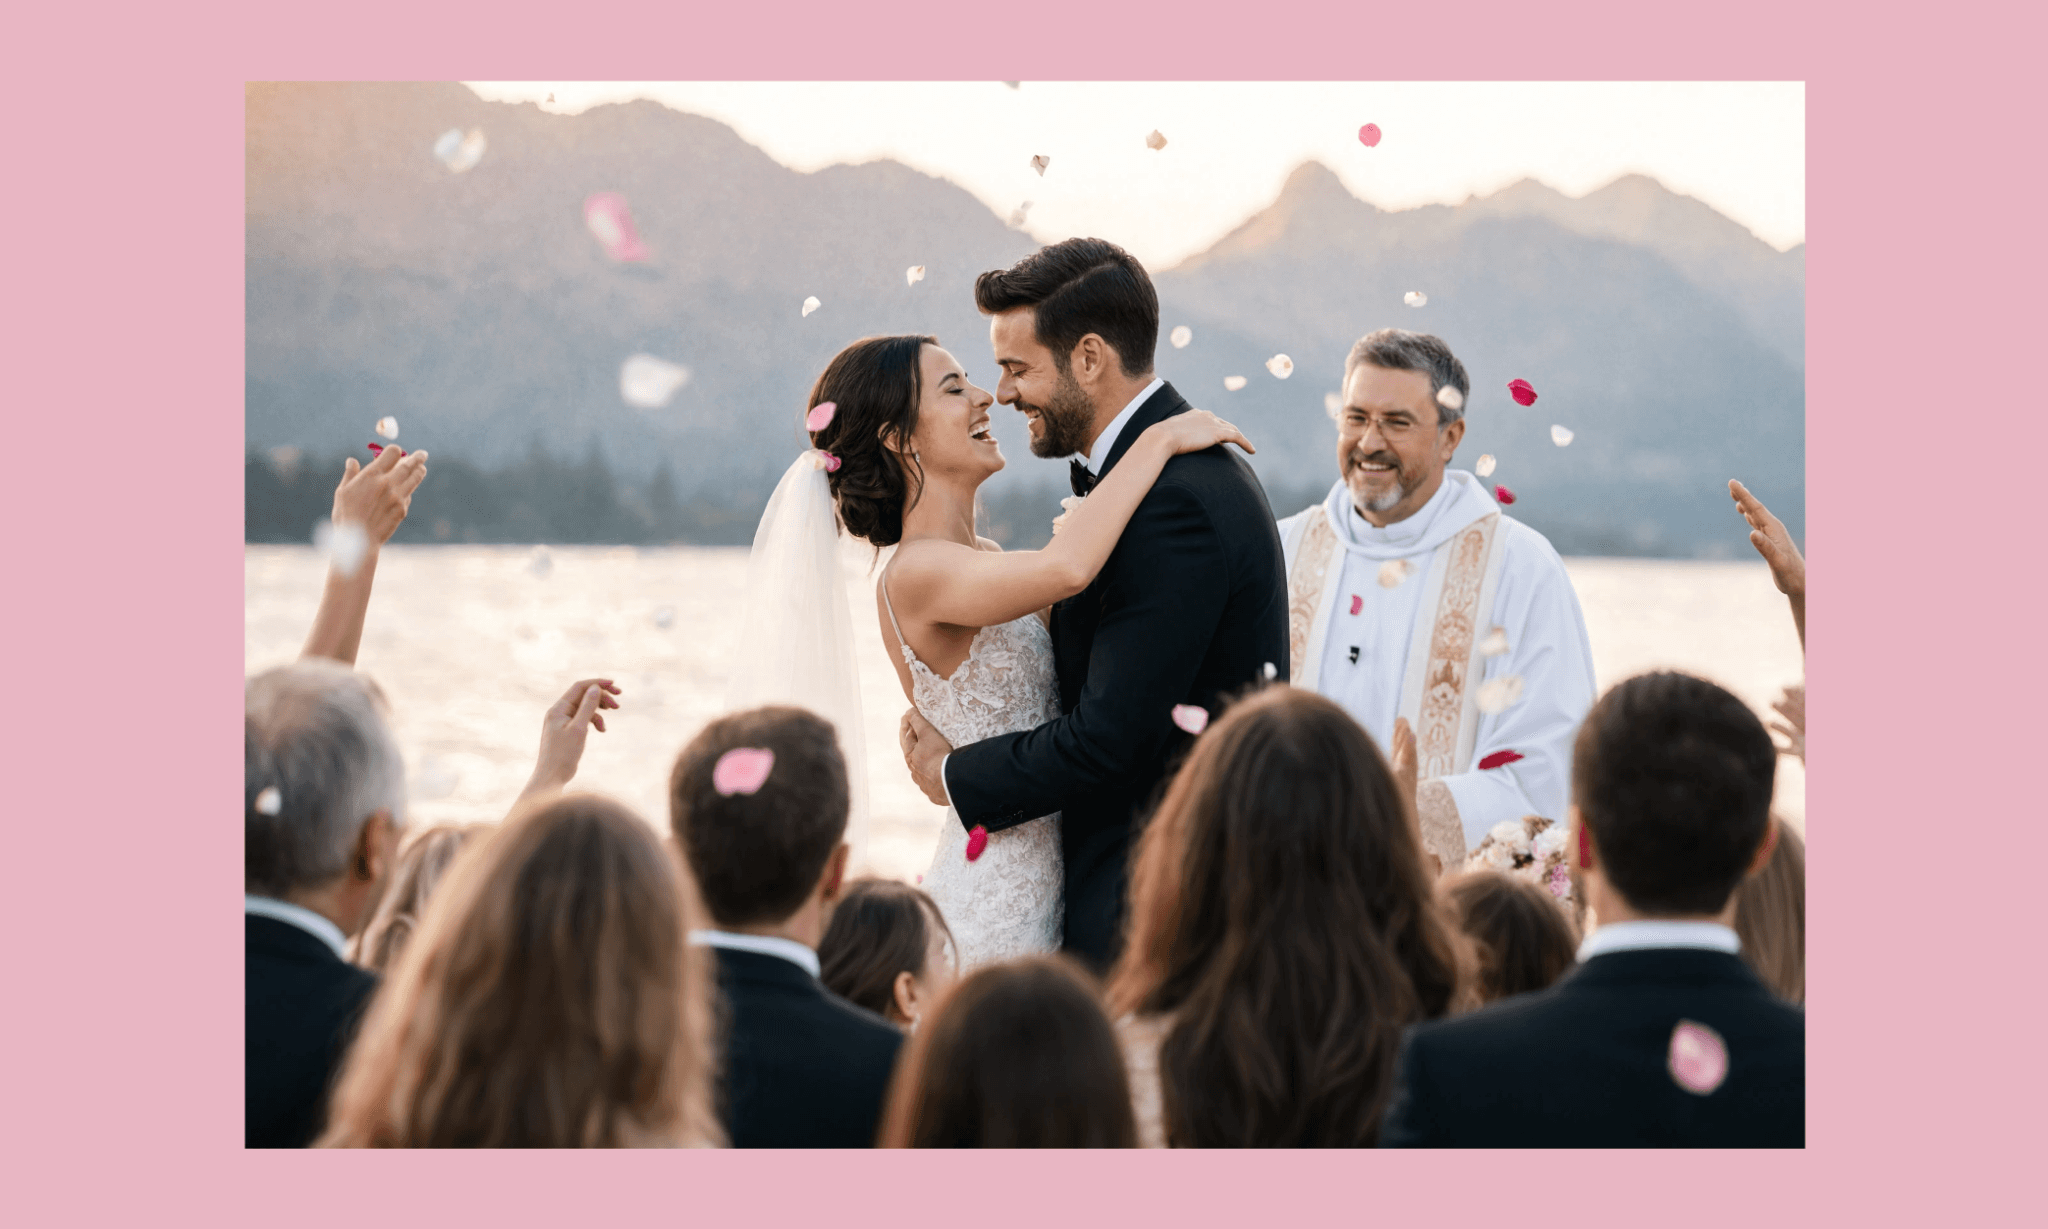
The focus indeed is controlled at the subject (the couple) and flowers’ are in-and-out of focus as asked. Great. However, the request for a row of chairs is completely ignored and the size of people seem incoherent even if I imagine an invisible stage.
Night disco shoot (low-light capture)
"Retro-futuristic disco photograph: Wide-angle bird's-eye view looking down over a packed dance floor. Dozens of dancers in 70s-inspired sequined outfits and afros moving in colorful formations, swirling multicolor strobe and neon lighting, disco ball scattering light fragments below. Warm film grain, vintage color cast, vibrant magenta, cyan, and gold hues, dramatic lens flare."
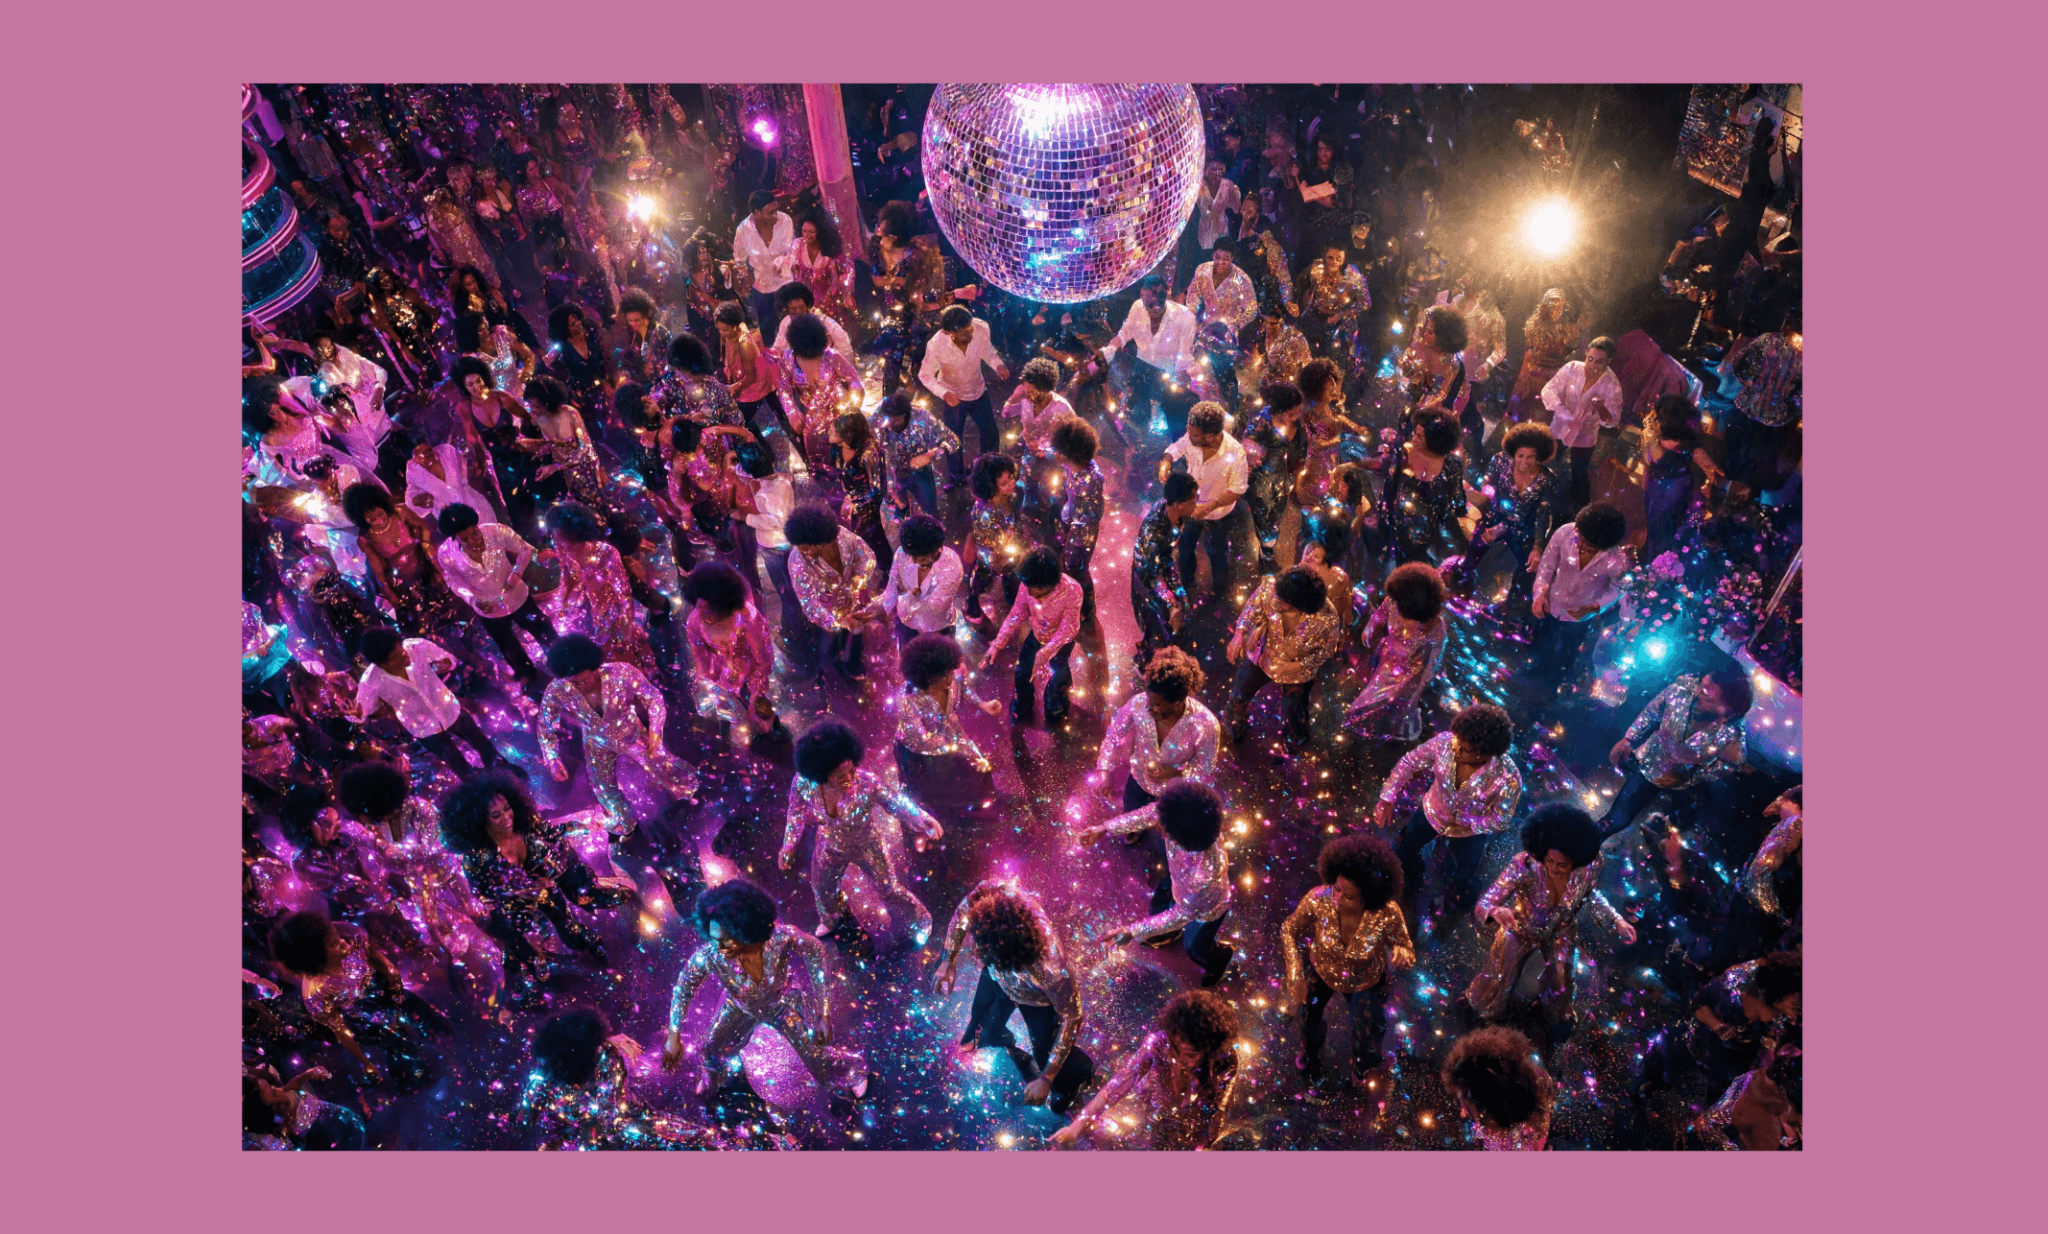
Now, that’s groovy. Lots of colors. Disco ball lights. A believable crowd depiction. And last one is important because I looked closely at the image and could not find a single human generated that’s disfigured. Impressive. However, I feel the light distribution at some parts is too much. Still I’ll point it high.
Product shoot (image with vector graphics)
"Surreal advertising product photograph of a perfume bottle levitating above rippling turquoise water. Dramatic studio lighting with pink and blue colored gel highlights, dreamlike floating water droplets, and some herbs frozen mid-air around the bottle. High-gloss reflective glass surface, deep saturated gradient background. Bold oversized typography spelling 'RABBIT RIBBON' woven into the background, layered semi-transparent and slightly out of focus. Abstract vector graphic elements — flowing ribbon shapes, geometric splashes, soft blob forms — scattered around the product in complementary colors."
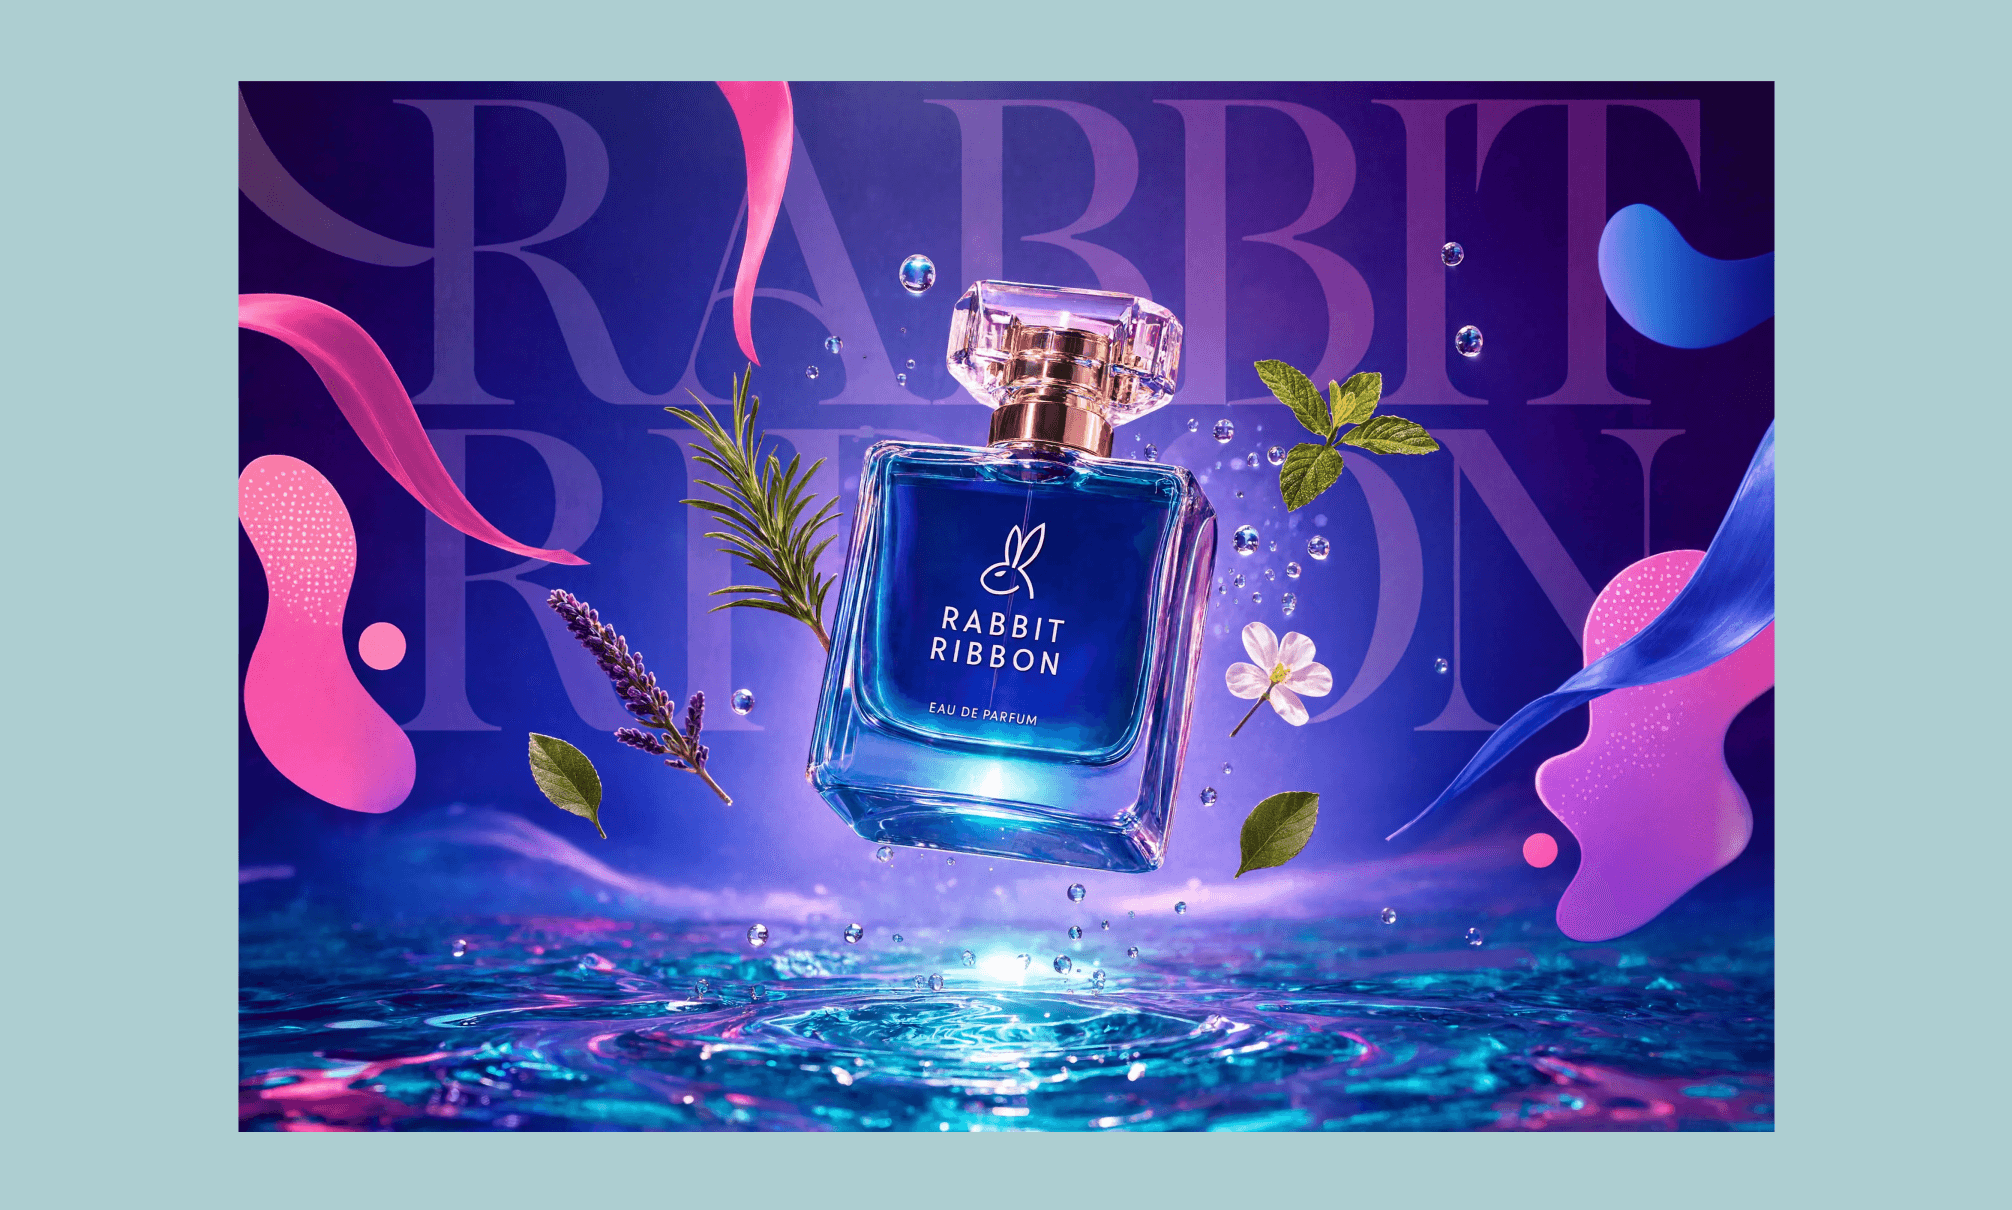
This one is awesome. Honestly, I seldom see GenAIs handling text and vector graphics with elegance. It’s here that I felt Reve AI image generator is a hidden gem.
4. Wildlife shoot (close-up detailing)
"Extreme macro close-up photograph of a chameleon's head and eye in razor-sharp focus — intricate scaled texture, vivid teal, orange, and turquoise coloration, fine detail on the eye's textured lids. Focus falls off rapidly moving back along the body. Background is a smooth, fully out-of-focus green foliage bokeh. Perched on a leafy branch, natural daylight."
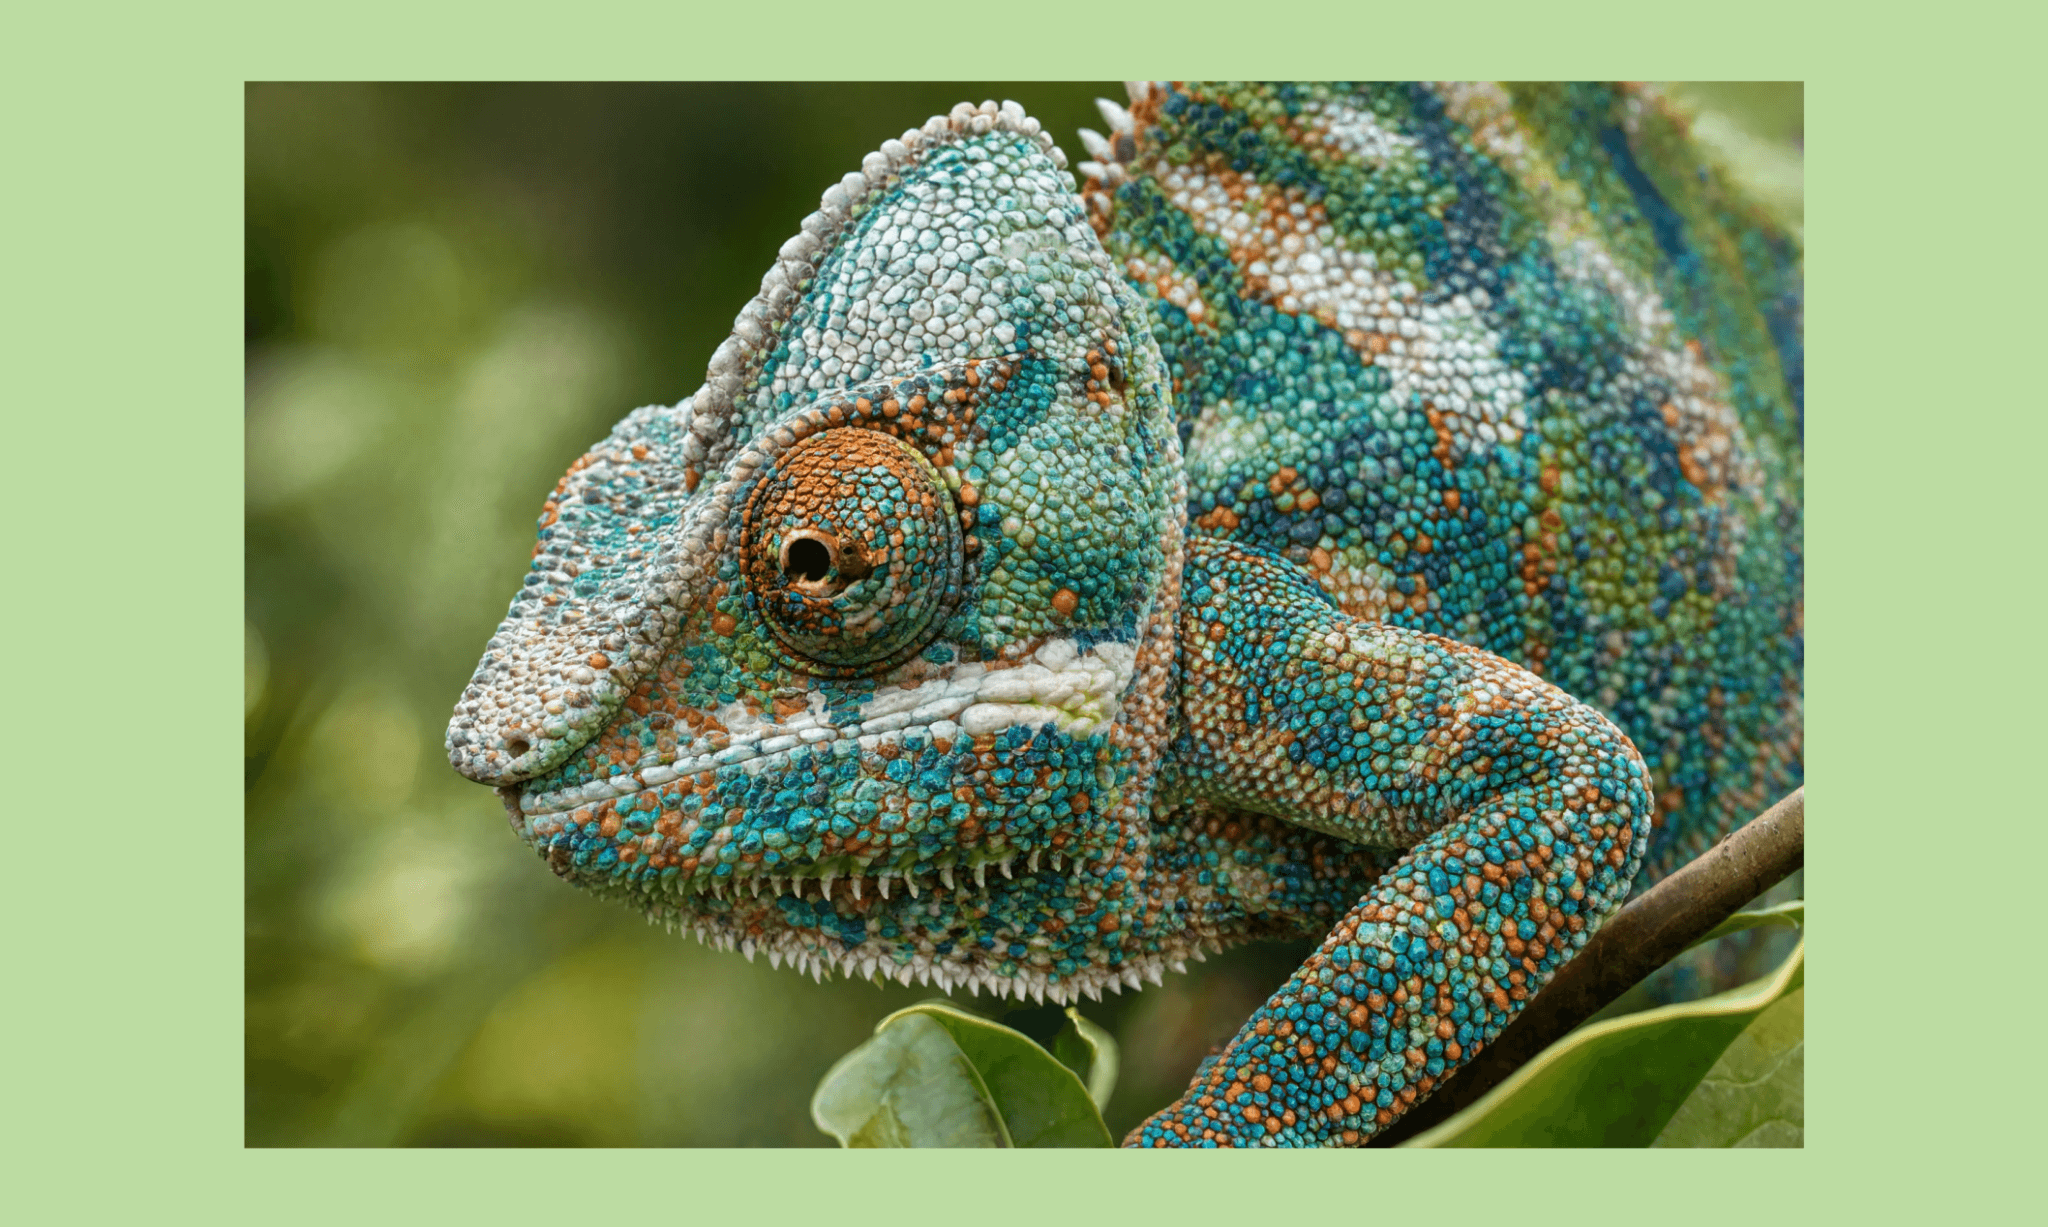
This one came out so life-like. The detailed color dots, subtle light & shadow are amazing. So is the adherence with the prompt – which makes me think that there are some things Reve does well but others not. In my experience so far, it seems to struggle with scale, but colors and detailing are off the chart.
A CTA banner with abstract design
Lastly, we reach for the footer banner which would be a mix of abstract design and actual product. (While leaving space for some copy and button for the designer). For it I uploaded a reference image for the clip-on lens:
"Use the reference image for product design, create a CTA banner background for a phone lens brand called Lenzz. Light, airy gradient background transitioning from soft sky blue to pale sand tone. Ample empty negative space on the left third of the frame for text overlay. On the right side, the Lenzz clip-on lens product floats at a slight angle, softly lit, high-gloss black and blue-tinted glass detail, subtle soft shadow beneath it. Clean, modern, minimal composition."
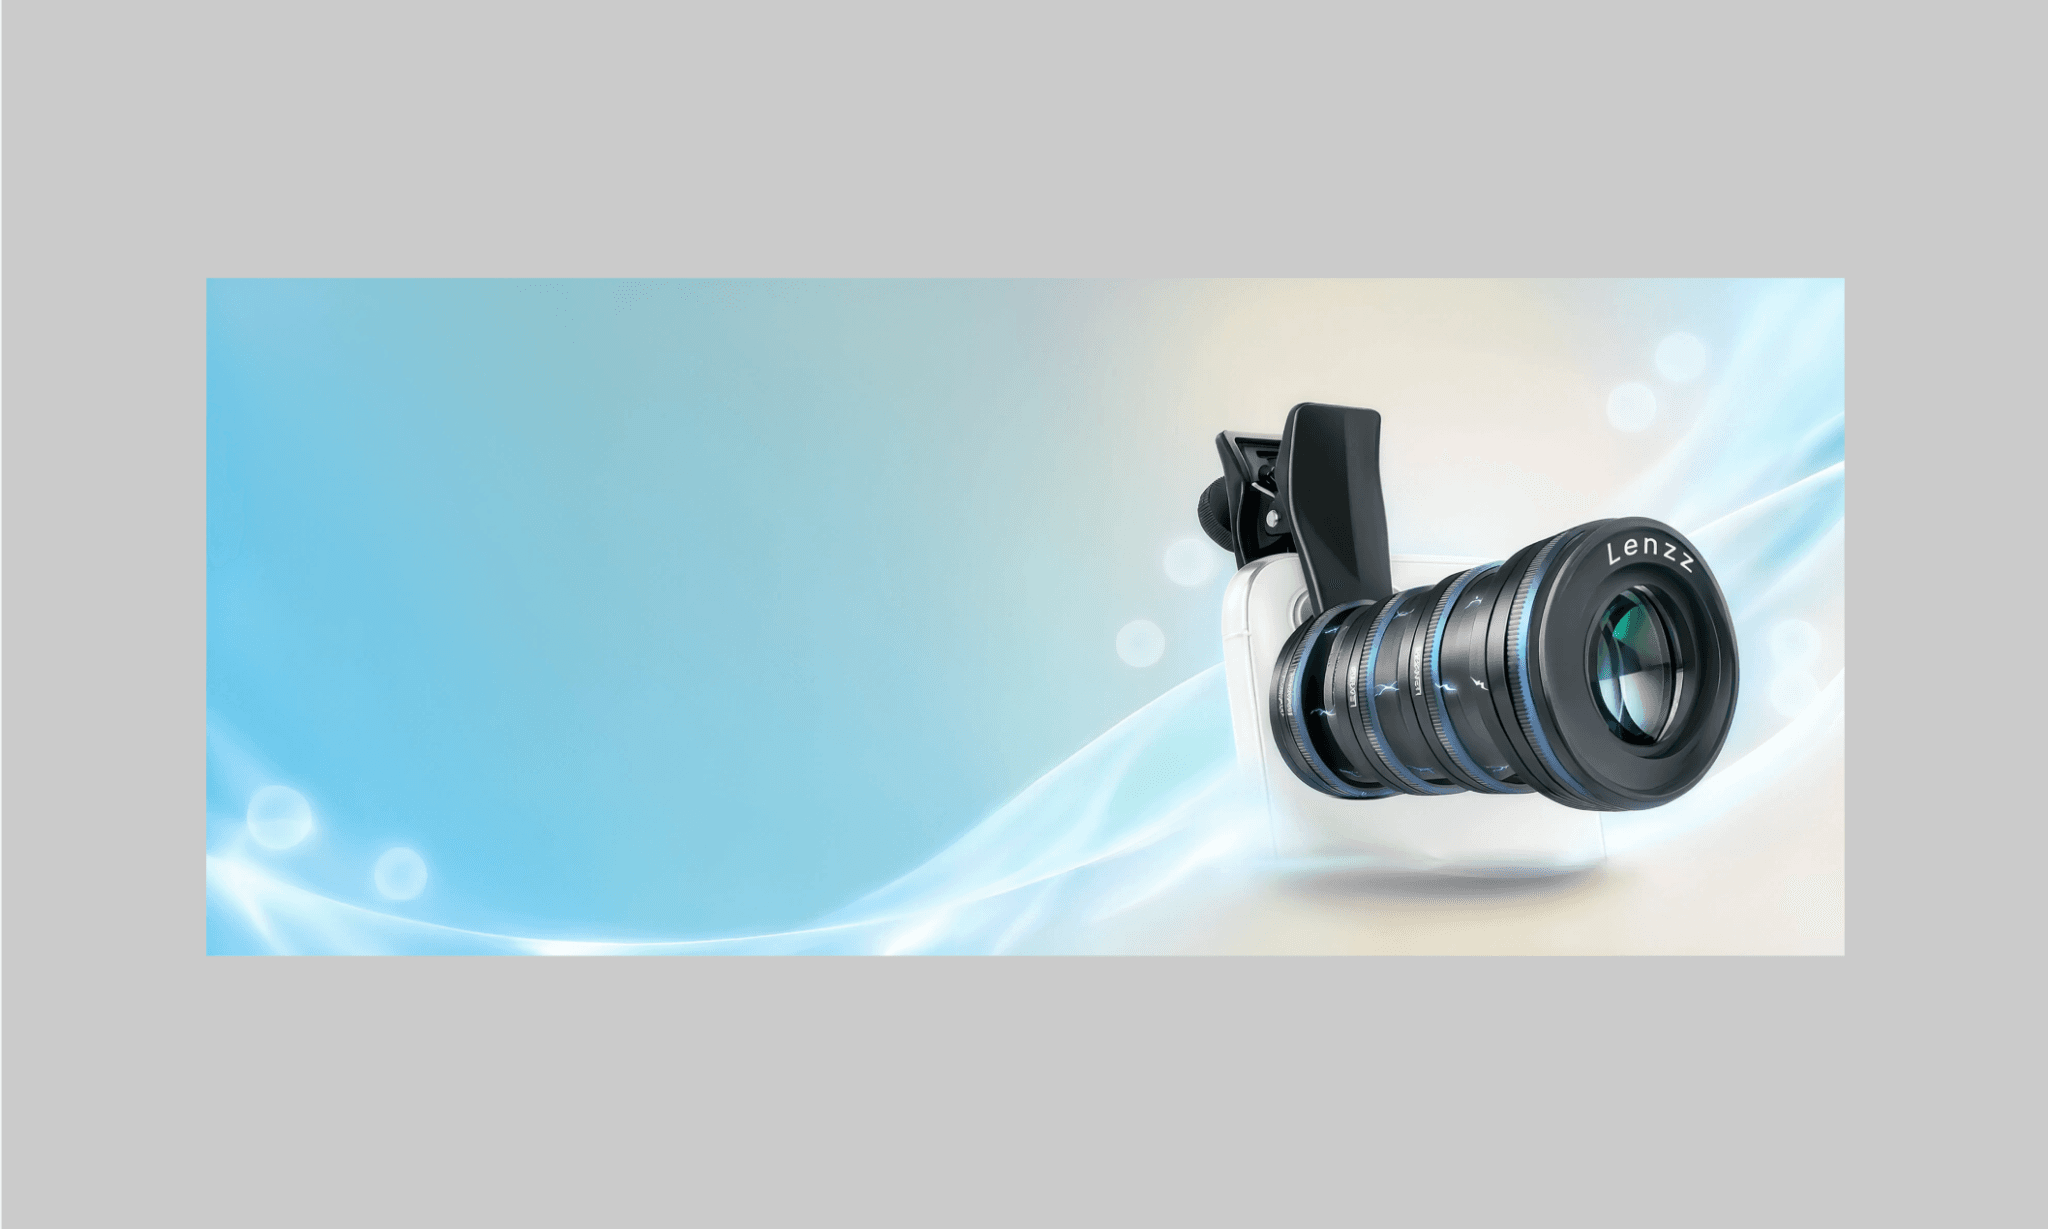
The output is neat as per prompt but at places where I felt it’d take creative liberty, it feels generic. More problematic is the illegible name on the side of the lens (the Lenzz embossed on the front is fine).
How to Use Midjourney for UI assets >
Assemble images by Reve into a UI layout with Banani
With that, we have every image a product team would need to assemble the UI layout of the Lenzz homepage. To do so, you can use Banani AI, one of the best AI UI Generators of 2026: simply upload these images, describe the idea for the layout, and in minutes you’ll have an editable UI ready.
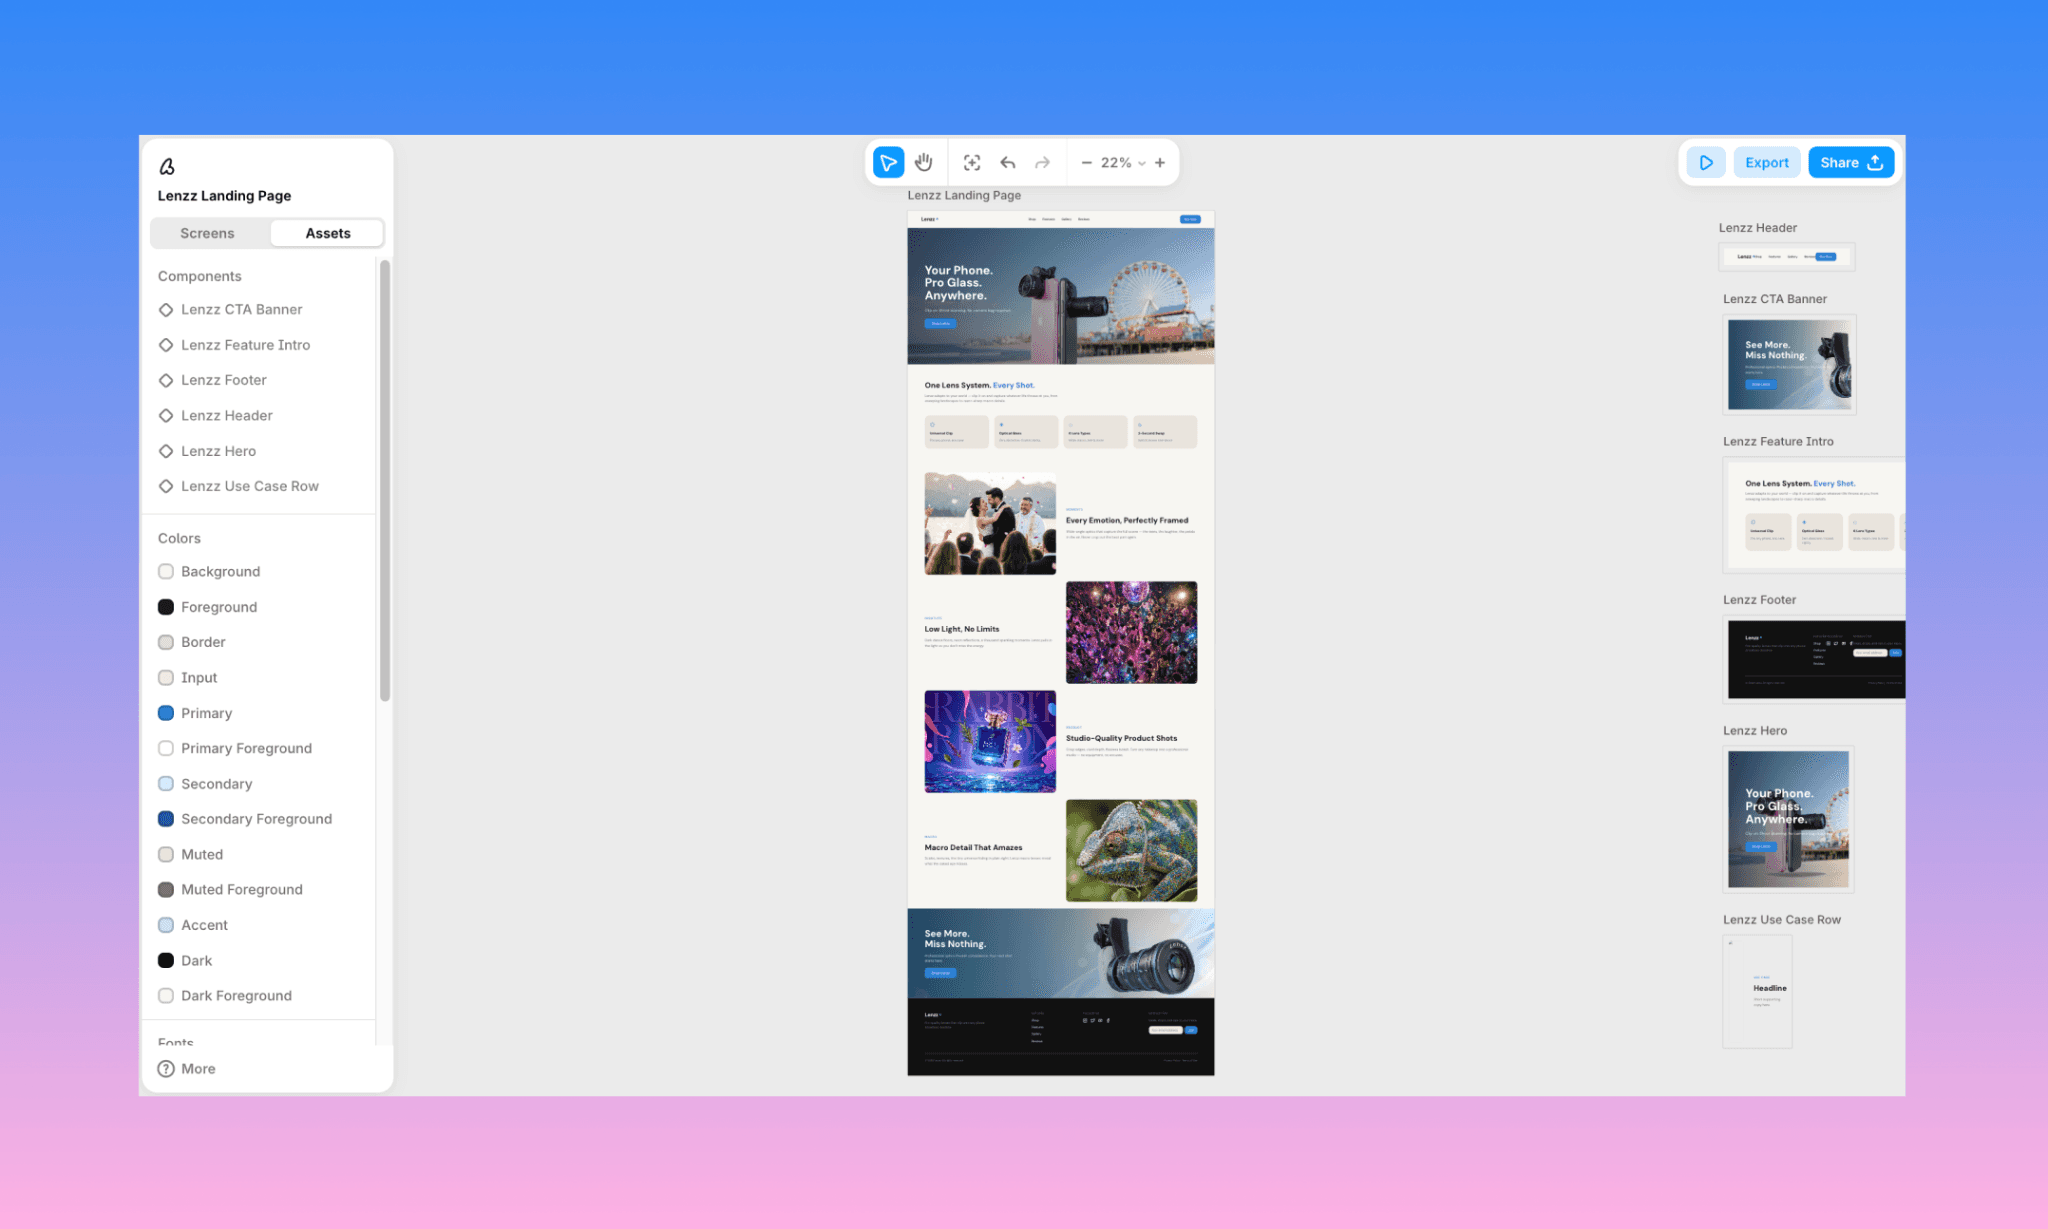
"Create a landing page for Lenzz, a clip-on phone lens brand, using the uploaded images: hero, image1, image2, image3, image4, and cta.
Structure:
Header: Lenzz logo on the left, nav links (Shop, Features, Gallery, Reviews) on the right, a 'Buy Now' button.
Hero section: use the hero image as a full-width background/banner. Add a bold headline with a short punchy subheading about capturing pro-quality photos anywhere, and a 'Shop Lenzz' CTA button.
Below the hero, add an H2 introducing the Lenzz's feature, and adaptability.
Use case section: alternative/zig-zag grid of 4 images: one side image - and another side copy (h3 + small paragraph): image1 (wedding — 'Every Emotion, Perfectly Framed'), image2 (disco/crowd — 'Low Light, No Limits'), image3 (perfume/product — 'Studio-Quality Product Shots'), and image4 (chameleon macro — 'Macro Detail That Amazes').
CTA banner: use the cta image as the background, left-aligned bold with a short supporting line, and a 'Shop Lenzz' button.
Footer: Lenzz logo, nav links, social icons, newsletter signup.
Keep the copy punchy, minimal, and confident — no long paragraphs. Color palette should draw from the hero and cta images (sky blue, warm neutrals, soft gradients)."
Browse and Edit this UI for Free >
How Banani has assembled the AI images by Reve with a rather open brief is incredible. Its choice of cropping, round borders, and cards are in line with modern UI/UX practices. Plus, the copy it wrote does not only convey the bigger idea of pushing selling a clip-on lens, but also the minutiae of what its features are. This UI by Banani is editable with AI chat, can be exported to Figma, and even handoff-ready with MCP support.
Generate UI with Banani AI Free >
Pros & Cons of Reve AI Images
Pros | Cons |
Free to start with the latest Reve 2.1 model | No visible credit counter to track free usage |
Exceptional color, texture, and detail rendering | Struggles with scale and proportion consistency |
Handles text and vector graphics with real elegance | Prompt fidelity weakens during targeted edits |
Composite reference images blend coherently with correct lighting | Ignores some specific compositional requests silently |
Fast generation, roughly a minute for multi-reference composites | Component-level edits can misplace or duplicate objects |
Touch-to-edit lets you revise individual image components |
How Good is Figma Weave for UI Assets >
Pricing of Reve AI in 2026

Reve Free Plan
Reve's AI image generator follows a freemium pricing model in 2026[3]. Its free plan gives a generous daily "energy" allowance for image generation without a credit card. Enough to comfortably test the model across multiple prompts and edits.
Daily-refreshing free energy allocation
AI image generation and natural-language chat-based editing
Brainstorm and refine ideas directly in chat
Basic storage included
Note: There’s no visible AI credit counter or usage dashboard in Reve AI. It makes budgeting for your free plan tricky.
Reve Paid Plans
Plan | Lite | Pro |
Price | $7.99/mo | $19.99/mo |
Energy (vs. Free) | 5x | 100x |
Storage (vs. Free) | 5x | 100x |
Video Generation | Not available | 250 video energy/mo + up to 100/day from standard energy |
Best For | Regular creators, small projects | Working creators, high-volume production |
Reve Image API Plans
Reve AI also offers an API for developers and product teams to plug image generation directly into their own apps, workflows, or design tools. It’s pay-as-you-go, no subscription required.
Minimum purchase is $10 for 7,500 credits, with a $1,000/day purchase cap. Core v2 endpoints: Create (prompt → image + layout) runs 150 credits (~$0.20); Extract Layout, Create Layout, and Render Layout each run 80 credits (~$0.11).
Quite useful if you're building on top of Reve rather than using the consumer app.
How to Use Midjourney for Free >
Alternatives to Reve Image AI
In 2026, Reve AI image generator has a plenty of competitors of varying capabilities, and fitment for a UI/UX designer. To see how the popular ones stack up, I ran the same Lenzz hero brief through each alternative below to compare their one-shot output, features, and best use cases.
Tool | Image Sample | Key Feature | Best For |
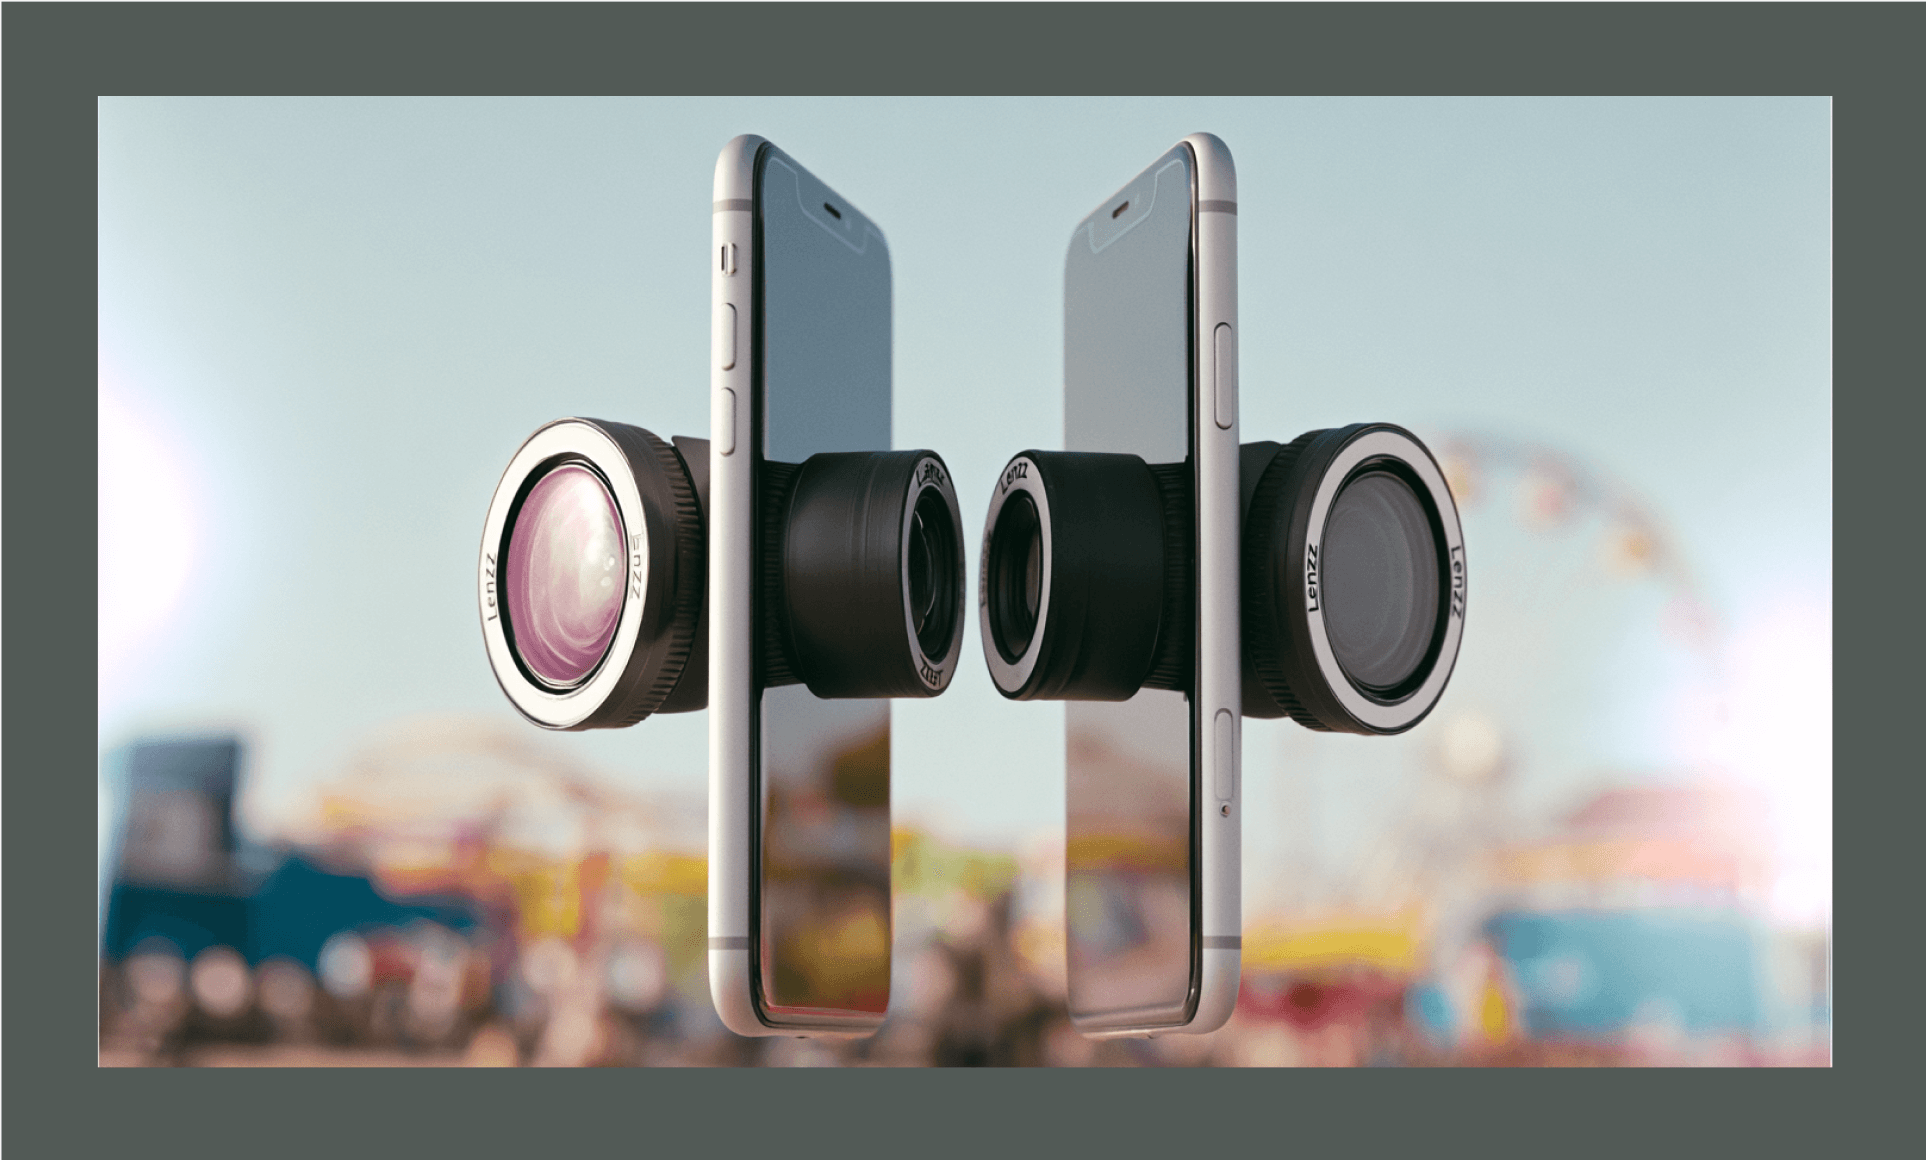 | Unmatched aesthetic range, Style/Omni Reference for consistency | Mood boards and visual ideation | |
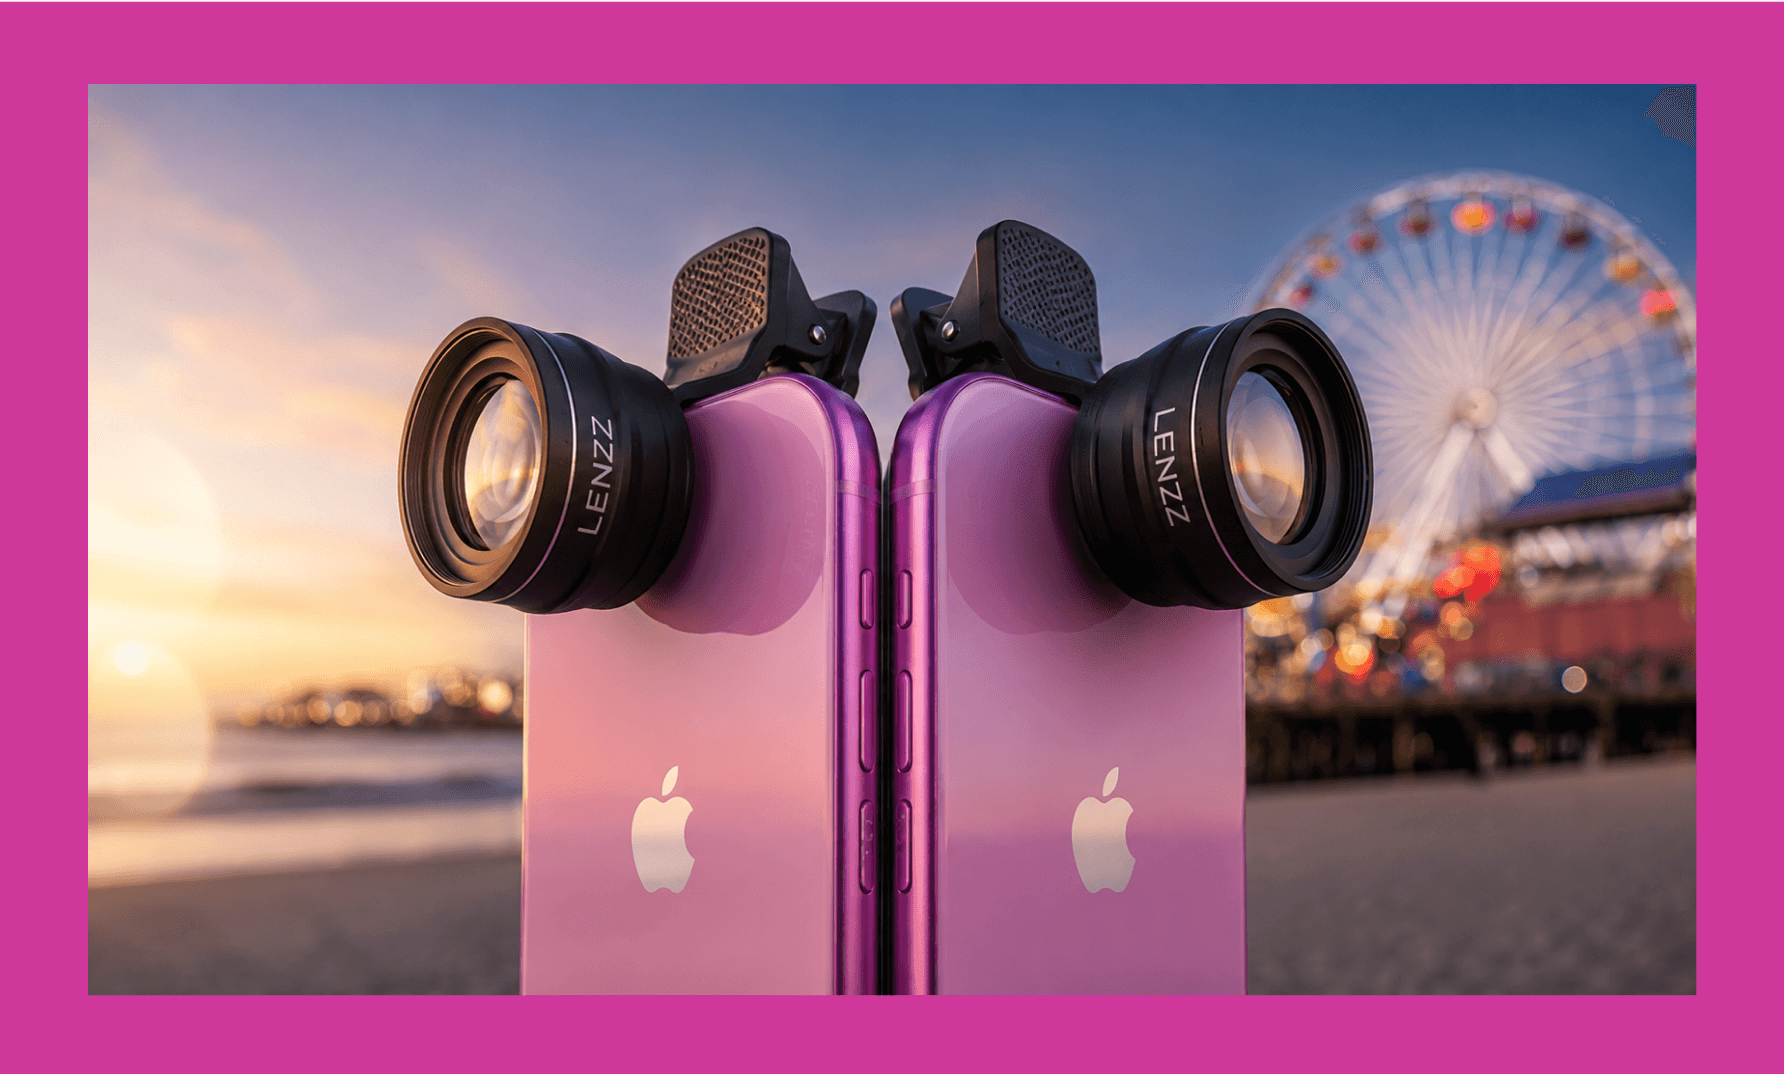 | 64+ models, real-time rendering, upscaling to 22K | Fast, accessible creative iteration | |
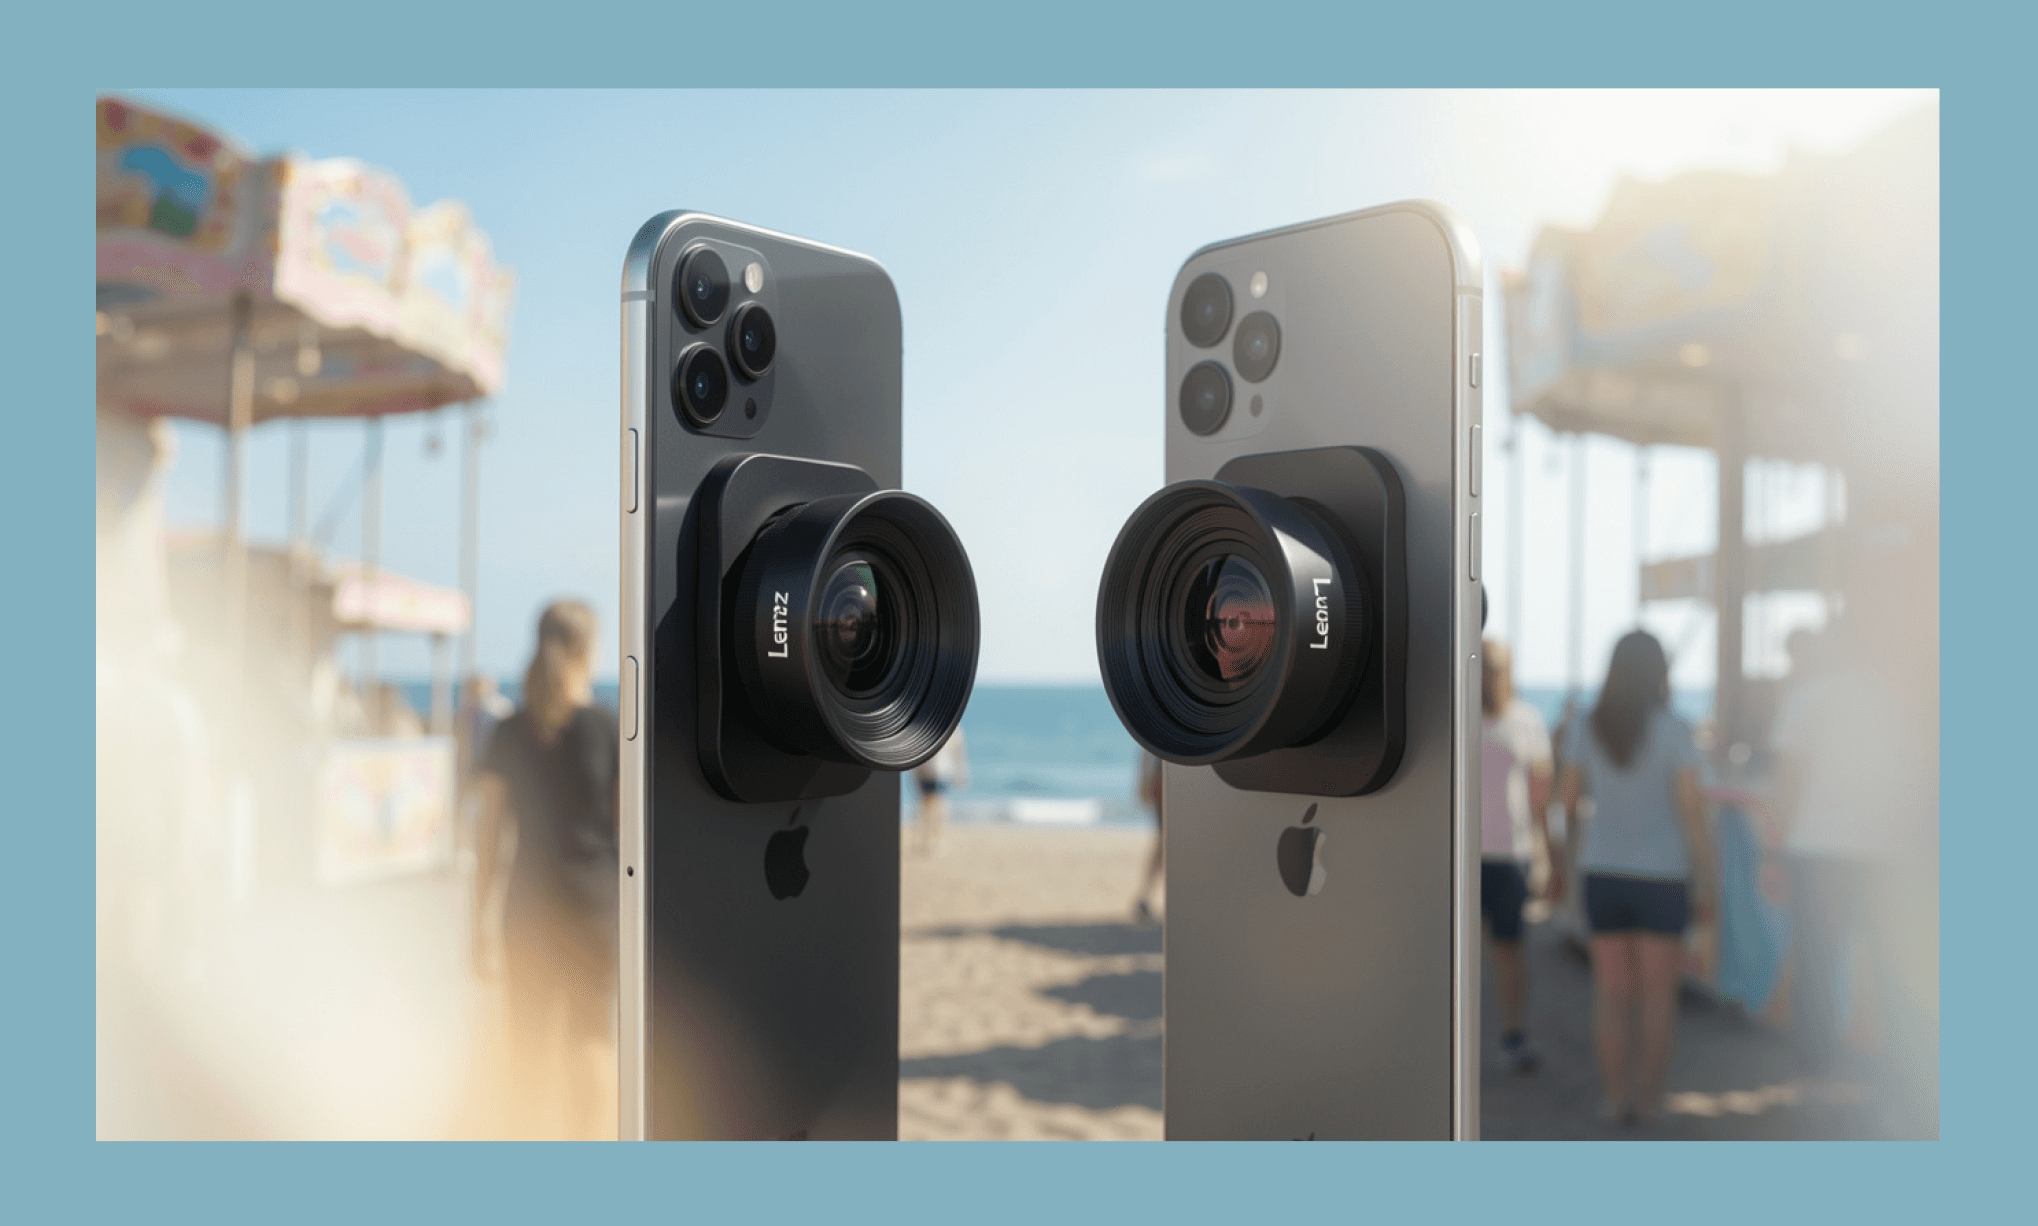 | Dozens of models plus upscaling and enhancement in one marketplace | Affordable one-off generations without a subscription | |
Nano Banana | 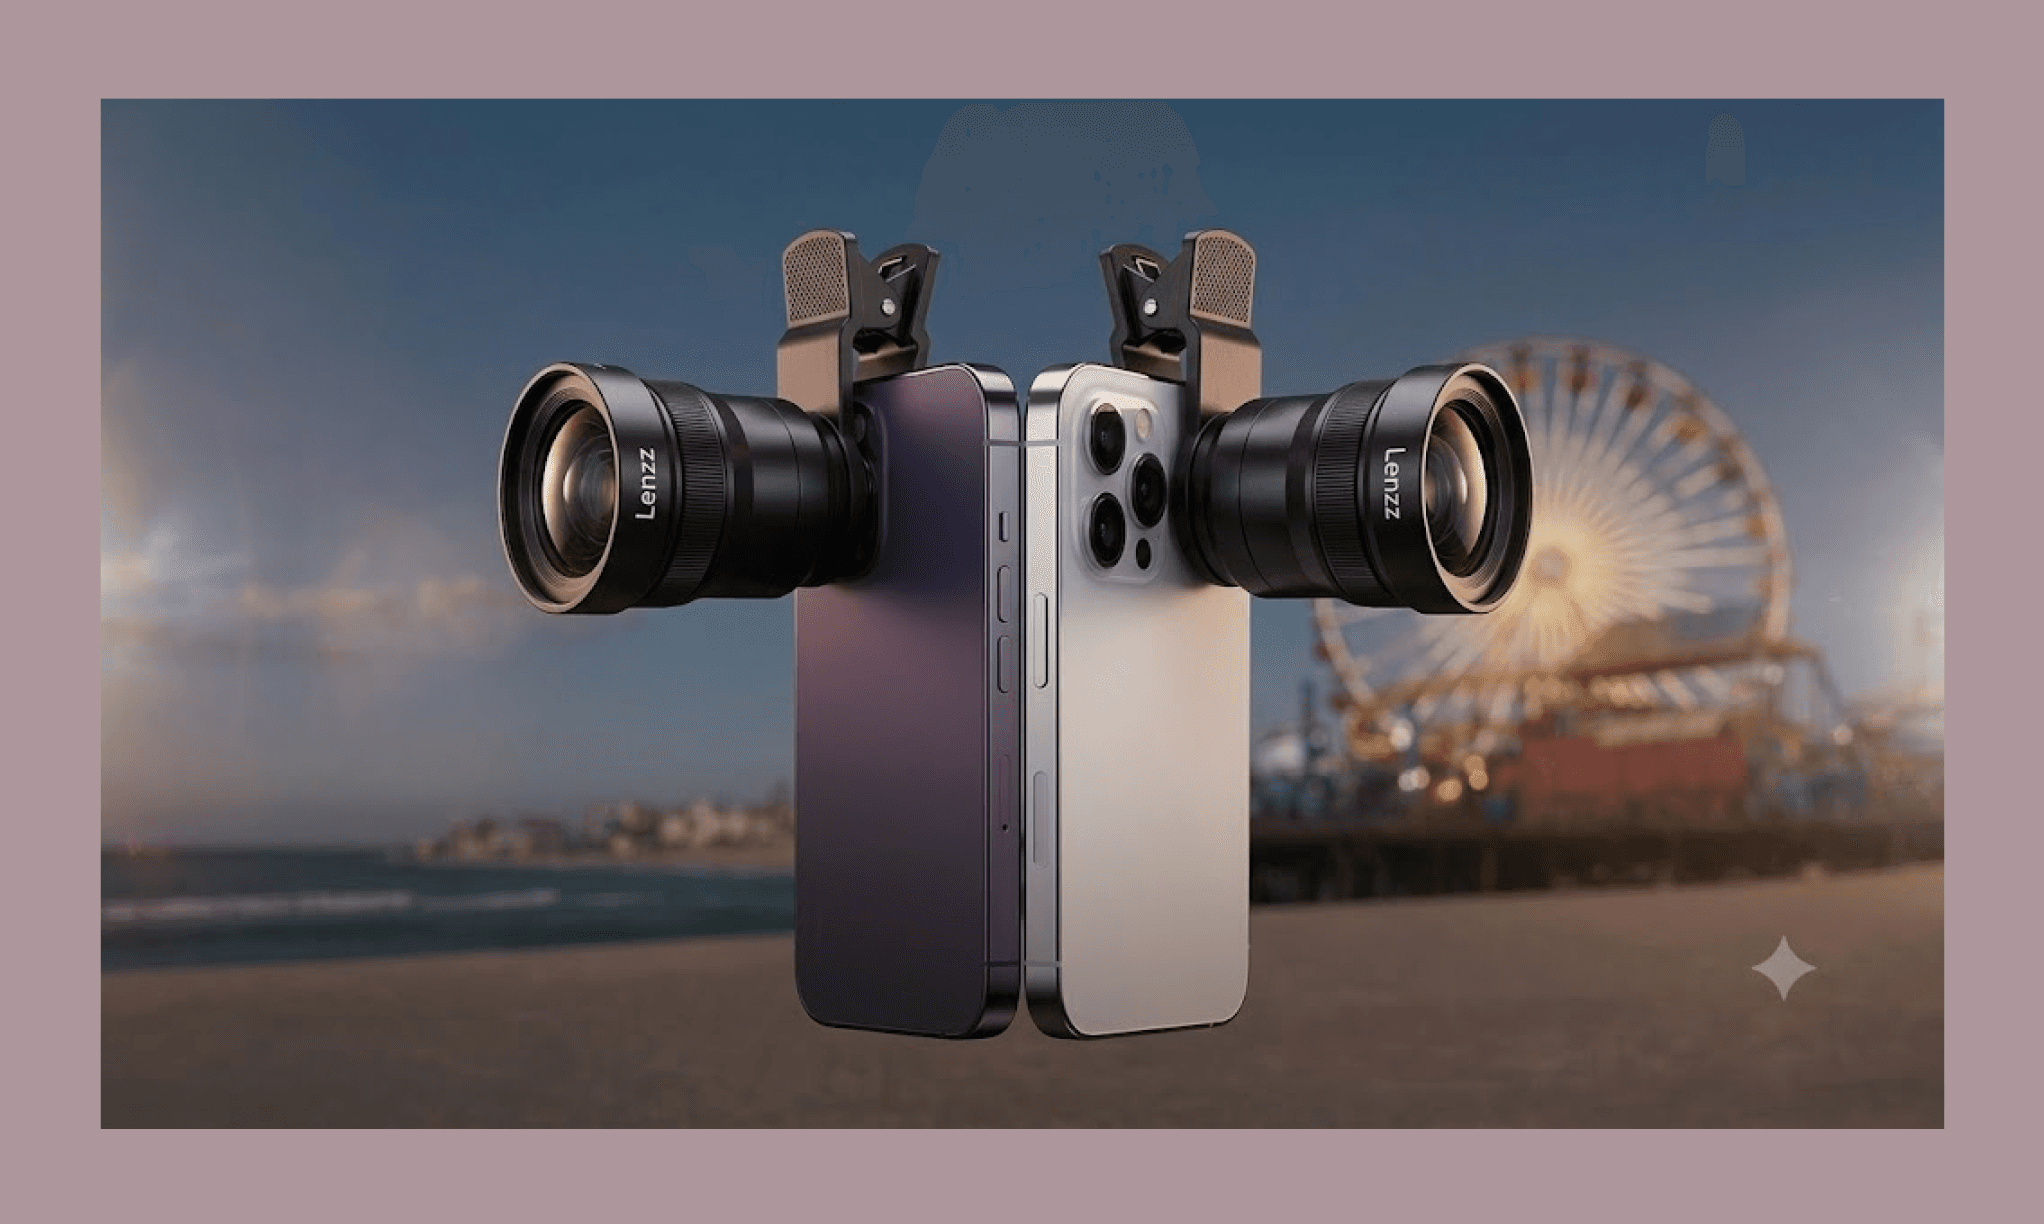 | Multi-reference editing, native 4K, SynthID watermarking | Text-heavy, print-ready visuals |
GPT Image 2 | 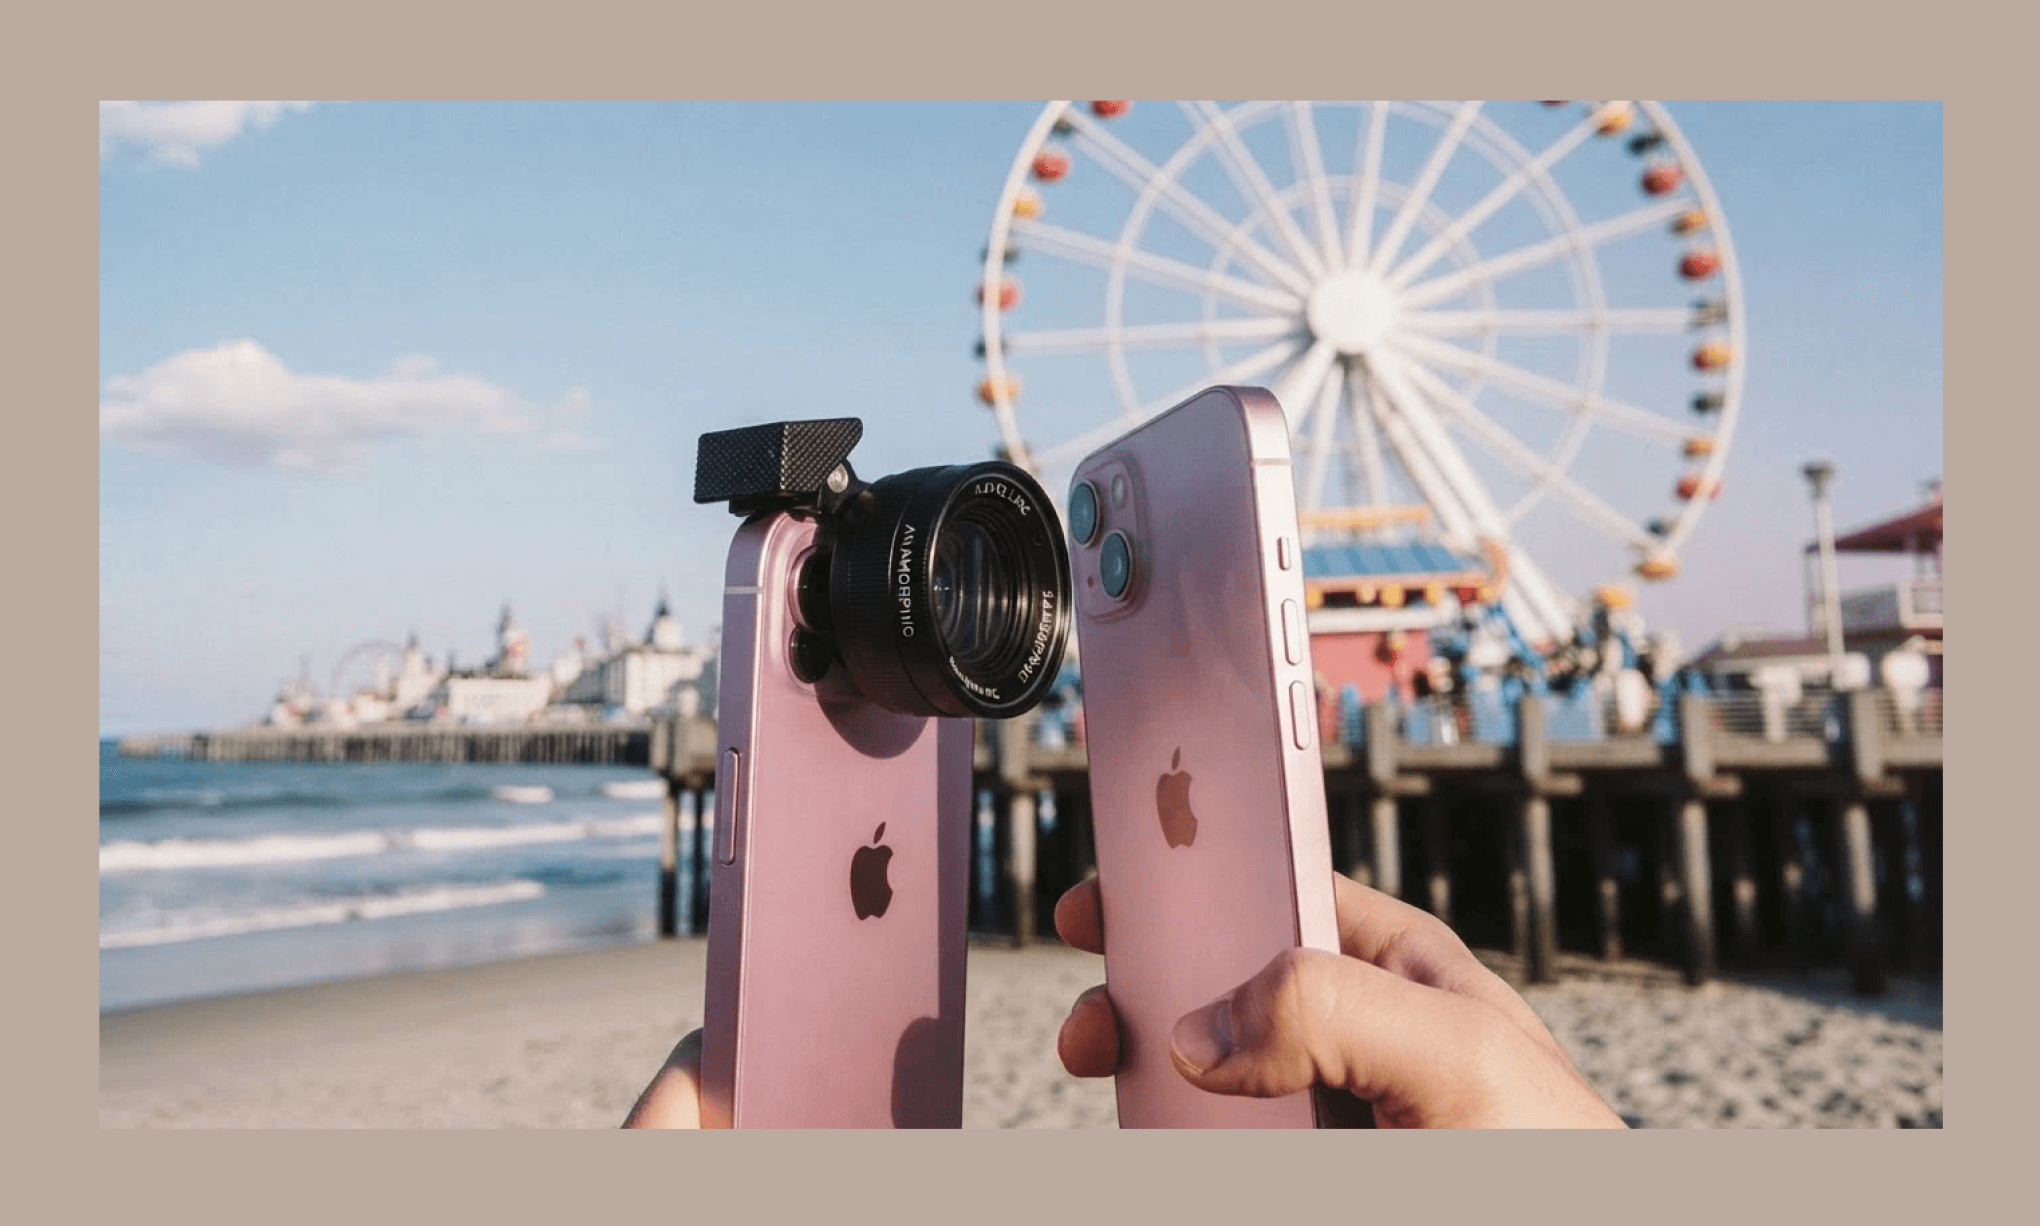 | Reasoning-based generation, near-perfect text rendering | Conversational, precise multi-turn editing |
Free Alternatives to Midjourney for UI Asset Design >
Verdict: Is Reve Image AI Any Good?
Definitely. In fact, I’d day Reve AI is a hidden gem for UI/UX collateral. Across my range tests of Reve 2.1 (from reference image composition to macro detailed photography) it delivered rich color, precise typography, and genuine creativity few competitors match. Scale and proportion occasionally slip, and component-level edits need patience, but the core image quality is exceptional for the price.
For product teams, Reve is a strong source of raw visual assets. Once you have them, an AI UI generator like Banani assembles them into a polished, editable layout in minutes. It can even generate its own images – for free – if you'd rather skip a step.
FAQs on Reve Image AI
Is the Reve image generator free?
Yes, the Reve AI image generator is free to use, but with some limitations. You can sign up without a credit card, and start generating images from a pool of free, a daily-refreshing "energy" allowance.
Are Reve images private?
If you are using the Reve AI free plan, then no. These images/videos could be used to showcase in their public gallery. But for paid plans of Reve (both Lite & Pro), the content generated is private.
Who is the founder of Reve AI?
The founder of Reve AI is Christian Cantrell, who also serves as the company's Chief Product Officer (CPO)[4].
Does Figma have an UI asset generator like Reve AI?
Not exactly as a standalone AI image generator that Reve is. However, Figma has Weave AI, a node-based GenAI tool for image editing and generation within its design ecosystem.
How to assemble the images generated by Reve AI into a UI layout?
Upload your Reve-generated images to an AI UI generator like Banani, describe the layout you want, and it'll assemble a full, editable UI in minutes.
References
[1] https://app.reve.com/
[2] https://arena.ai/leaderboard/text-to-image
[3] https://app.reve.com/pricing
[4] https://www.linkedin.com/company/reveimage


