

Key Features | Node-based infinite canvas, pre-built workflow library, Weave Tools in Figma |
Pros | Impressive image quality, upfront credit costs, parallel generation |
Cons | Steep learning curve, model selection guesswork, weak branding generation |
Pricing | Free (150 credits/mo). Paid from $19–$48/user/month |
Alternatives |
What is Figma Weave AI?
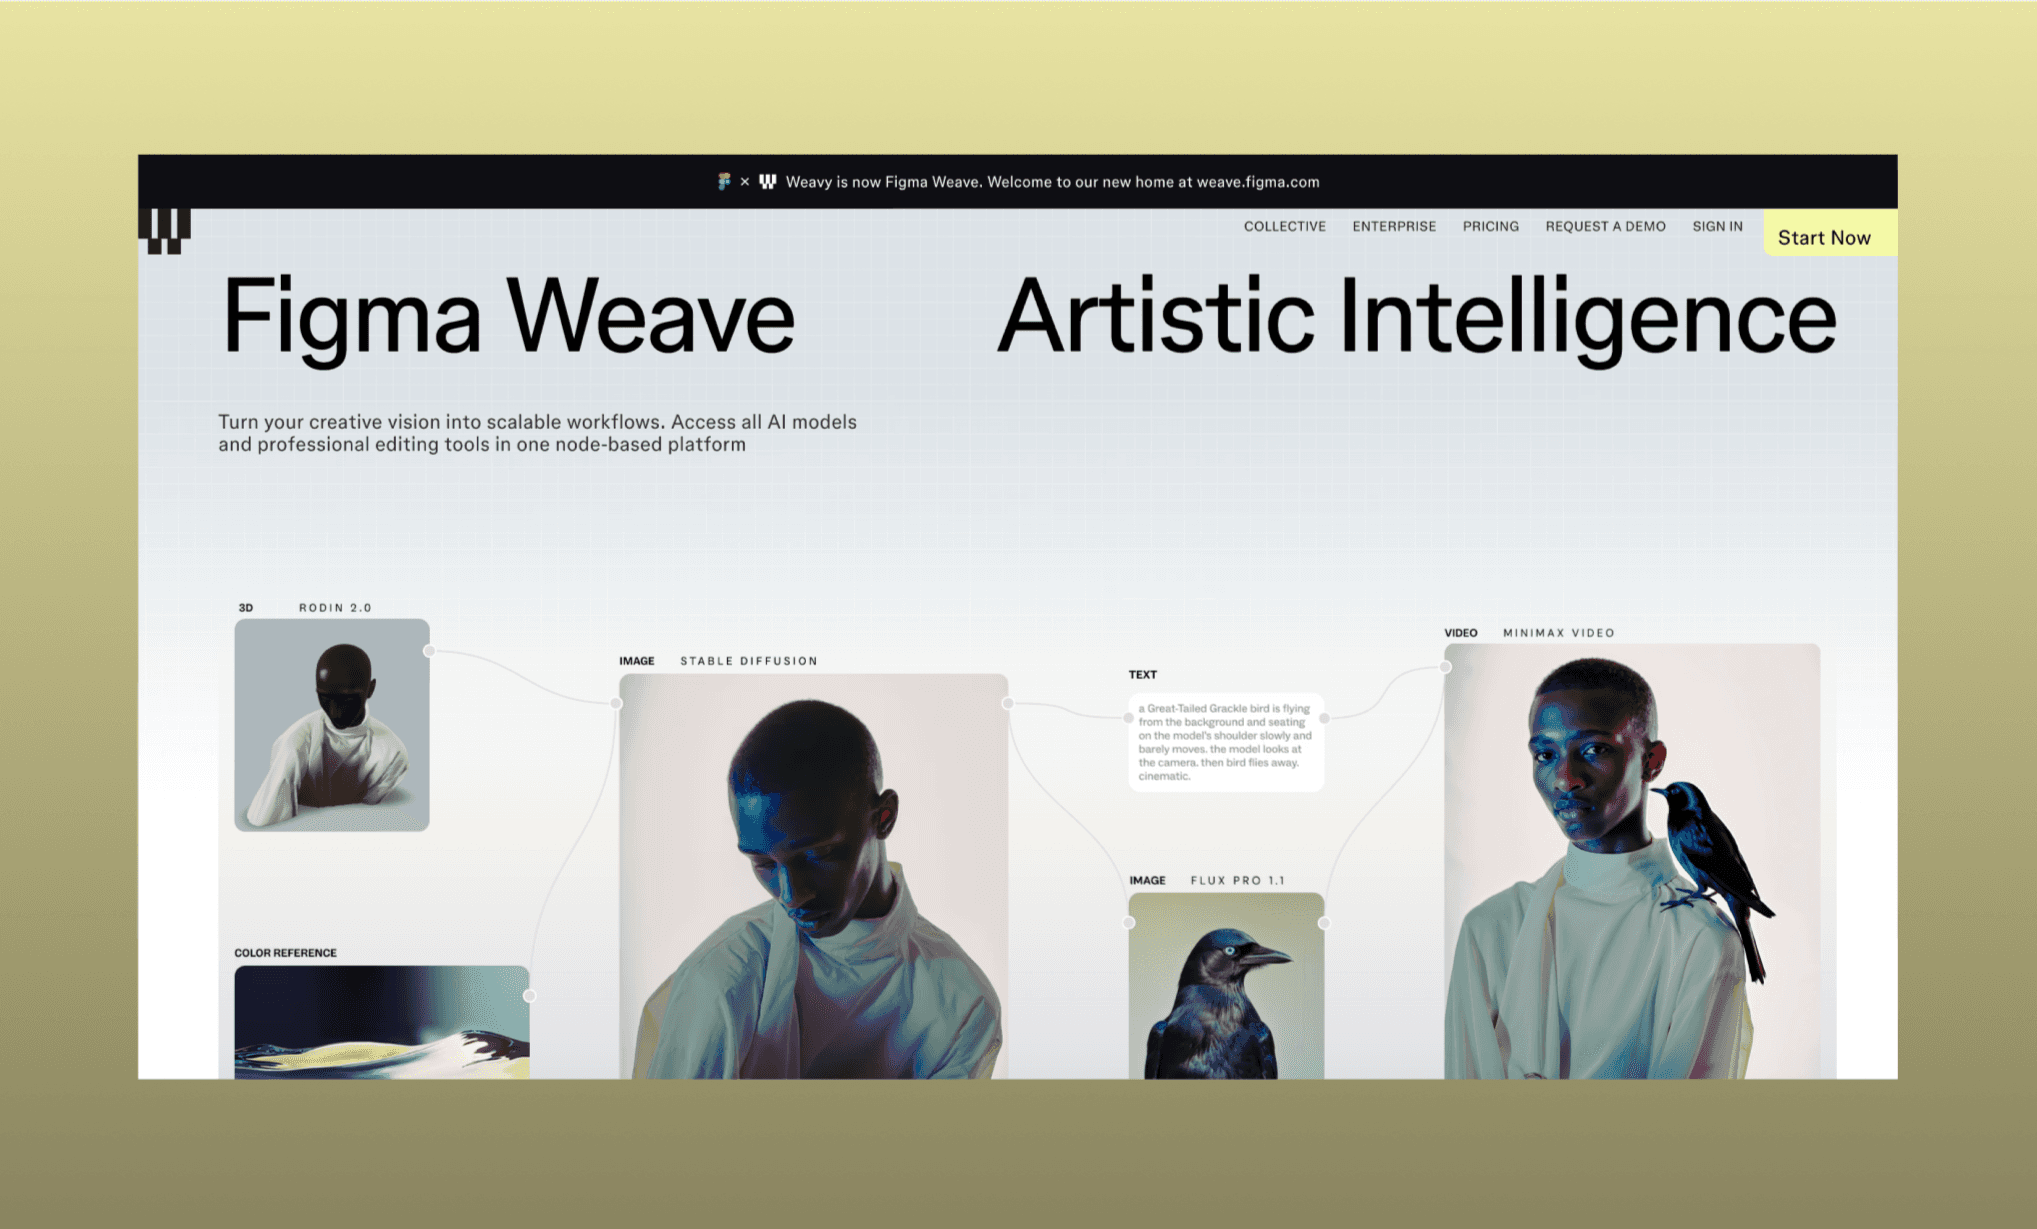
Figma Weave is a node-based AI creative platform for generating and editing images, video, and visual assets through multi-model workflows[1]. Figma's answer to AI-native creative production, it was originally built as Weavy AI and acquired by Figma in late 2025[2].
Using Figma Weave for App UI Assets
To review Figma Weave’s core GenAI features, I decided to build assets for an interior design mobile app, called Interry; it lets users photograph their room and virtually furnish and paint it. In the end, I shall assemble it all as a multi-screen UI flow using Figma Agent and compare it with the assembly by an AI-native UI Designer, Banani AI. You can imagine this review piece will also double up as a tutorial for Figma Weave.
Signing up on Weave is straightforward, free, and you start off with 150 credits. There’s also an option to login to Weave AI with your Figma account.
I Used Krea AI to Generate Assets for Virtual Try-on App >
Understand the Node-based Canvas of Weave AI

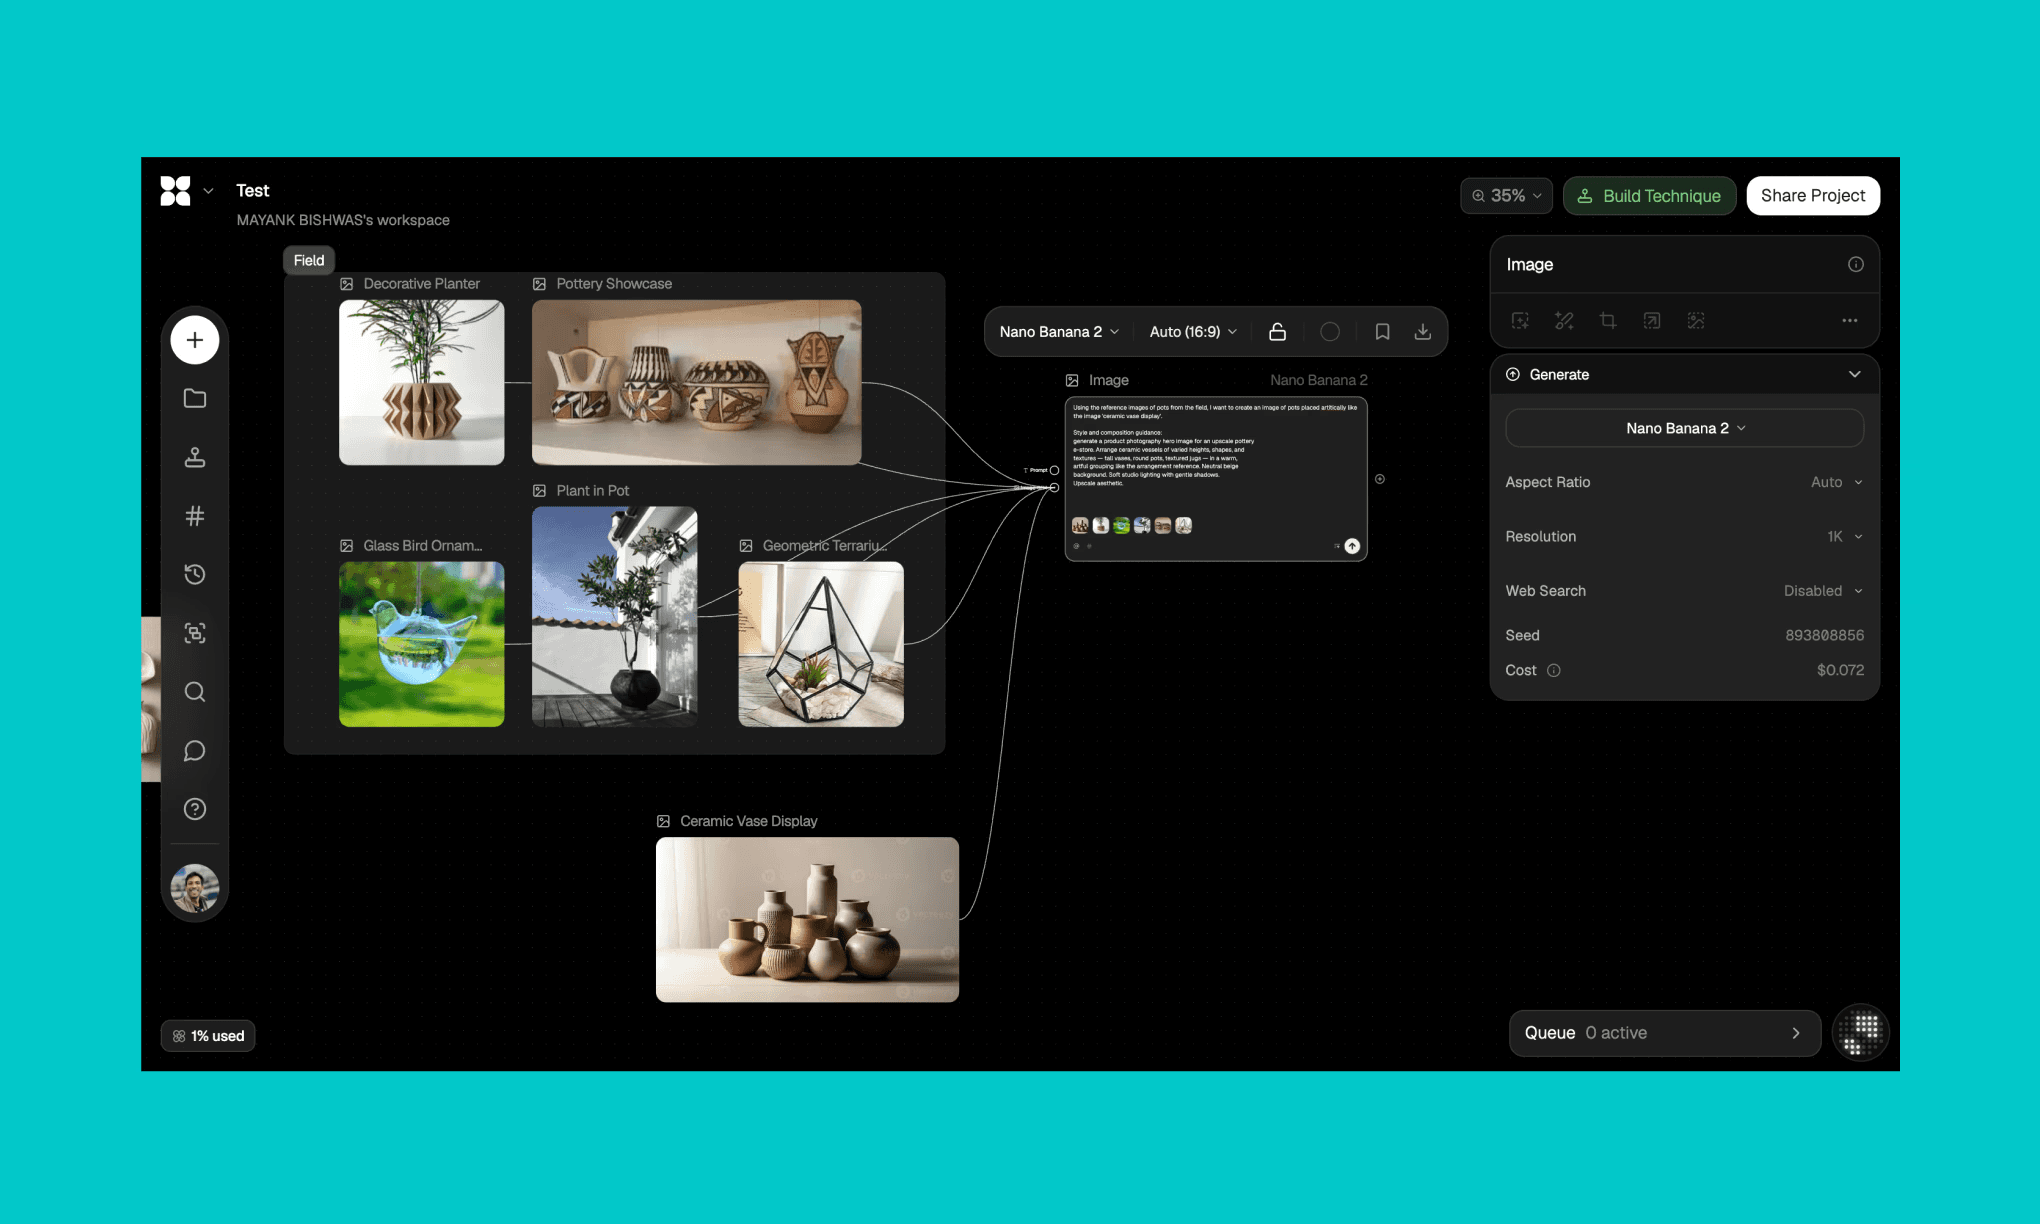
First thing first: Weave is not your typical GenAI tool where you are welcomed with a prompt box; it’s a node-based design generator. Each text prompt, visual reference, output, and edit is a node. Right-click anywhere on the canvas to create them, drag wires to connect, and click ‘Run’ to process.
In the screenshot above, you can see a prompt node, connected to an image node (the model chosen was Flux Fast), and I ran it to get the image output in the canvas.
It took ~30 seconds and cost 0.4 credits. You can see the approximate credit cost before processing, for which I give Weave an instant plus point.
How Flora AI Node-based Canvas Works >
Creating a logo & wordmark in a go

A key proposition of Figma Weave is to process multiple references (image + prompt) to generate an amalgamation of them. And do so parallelly for multiple tasks.
I wanted Interry’s branding to be inspired by Airbnb logo, Tinder colors, and Pinterest typography. So created two flows simultaneously (as in the screenshot above):
i) For Logo
Created a node with Airbnb logo and Tinder colors, connected it with a prompt node asking:
"Create a logo for a mobile app called Interry. Minimal, rounded icon shaped like the letter 'I' — inspired by Airbnb's clean symbol style. Apply a warm coral-to-pink gradient inspired by the Tinder color palette. White background."
And, then linked both the nodes to an image node (powered by Qwen Image Edit Plus by Alibaba)
The logo took more than 10 minutes to be generated. Cost 3 credits. And is just average in design.
ii) For Wordmark
Created another similar workflow with Pinterest and Tinder brand assets as references. But for this, the AI image model I went with was, Flux Canny Pro.
It generated the wrong output; instead of writing Interry, it edited my Pinterest wordmark in Tinder’s gradient. Cost a hefty 6 credits, but was fast though, ~30 seconds.

Observation: Firstly, putting all 3 references together to get 2 outputs is not possible in Weave AI. It works with a sequential node approach for iterative refinement, not one-shot blending. And secondly, choosing the right model for the right task is a learning task in itself. Having too many options is not conducive for beginners.
Given the credits already spent and the learning curve tax on every iteration, I decided to take the logo Weave generated — imperfect as it is — and move forward.
Midjourney Alternatives for Logo Design >
Generating the hero image options
Next up, I needed the hero image for Interry's app store listing and onboarding screen. So, I went with a prompt that visually represents the app’s core proposition:
"A young couple sitting on a sofa. The woman holds a phone, both leaning in, swiping excitedly. As they swipe, all kinds of home items burst out of the phone screen and fly energetically around them — sofas, lamps, kitchen cabinets, beds, bathtubs, potted plants, outdoor chairs, floor tiles, rugs, shelves etc. Warm energetic color palette: deep red, burnt orange, and black. Editorial photography style. Cinematic lighting. High contrast."
This time I decided to run two models to check out their output: Google Imagen 4 (6 credits) and GPT Images 2.0 (9 credits). I really like their multitask/parallel task setup.

Google Imagen 4 took ~30 seconds, while GPT Images 2.0 took ~1 minute. While both the images are in line with my prompt, but I like Google/Gemini’s output better.
Examples of Web Design with Gemini 3.1 Pro >
Examples of Web Design with GPT 5.4 >
A collage for categories (with various Image models)
I want the homepage to also show 4 categories of product images like a collage ie. living room, bedroom, bathroom, patio. This time I decided to use 4 different image GenAI models so can compare their output side-by-side in Figma Weave. (As from my Krea AI image review, I knew that different GenAI models perform differently inside their providers and cost differently too).

Image Model | Used for | Prompt | Image | Credit | Time |
Mystic | Living room | 5/5 | 5/5 | 12 | 45s |
Recraft V3 | Bedroom | 5/5 | 4/5 | 5 | 30s |
Stable Diffusion 3.5 | Kitchen | 4/5 | 4/5 | 8 | 30s |
Higgsfield | Patio | 4/5 | 5/5 | 21 | 1min |
I’ve been overly critical in rating the image models in Figma Weave, but, frankly, I am impressed by them all; their quality and speed are impressive. And them sticking to the credit cost shown before the processing, is commendable (it’s unlike Freepik AI that only gives approximate cost)
Image Model Comparison in Flora AI >
Virtually decorating a room with multiple images
This is the most interesting part of my test of Figma Weave, where I take a room image (sourced from Google) and try to decorate it with various furnishing items (also sourced from Google) step by step; and also test a change in angle and lighting.

Step 1: The original room
I sourced a living room image that I wanted to decorate virtually. The two items I want to try on: a botanical gold wallpaper and a minimal dome ceiling lamp.
Step 2: Applying the wallpaper (Flux Kontext Multi Image | 10 credits | 30s)
I fed the room image and the wallpaper pattern into a Flux Kontext Multi Image node along with the prompt:
“In the living room shown in image 1, recolor the walls with the wallpaper pattern shown in image 2. Keep everything else intact.”
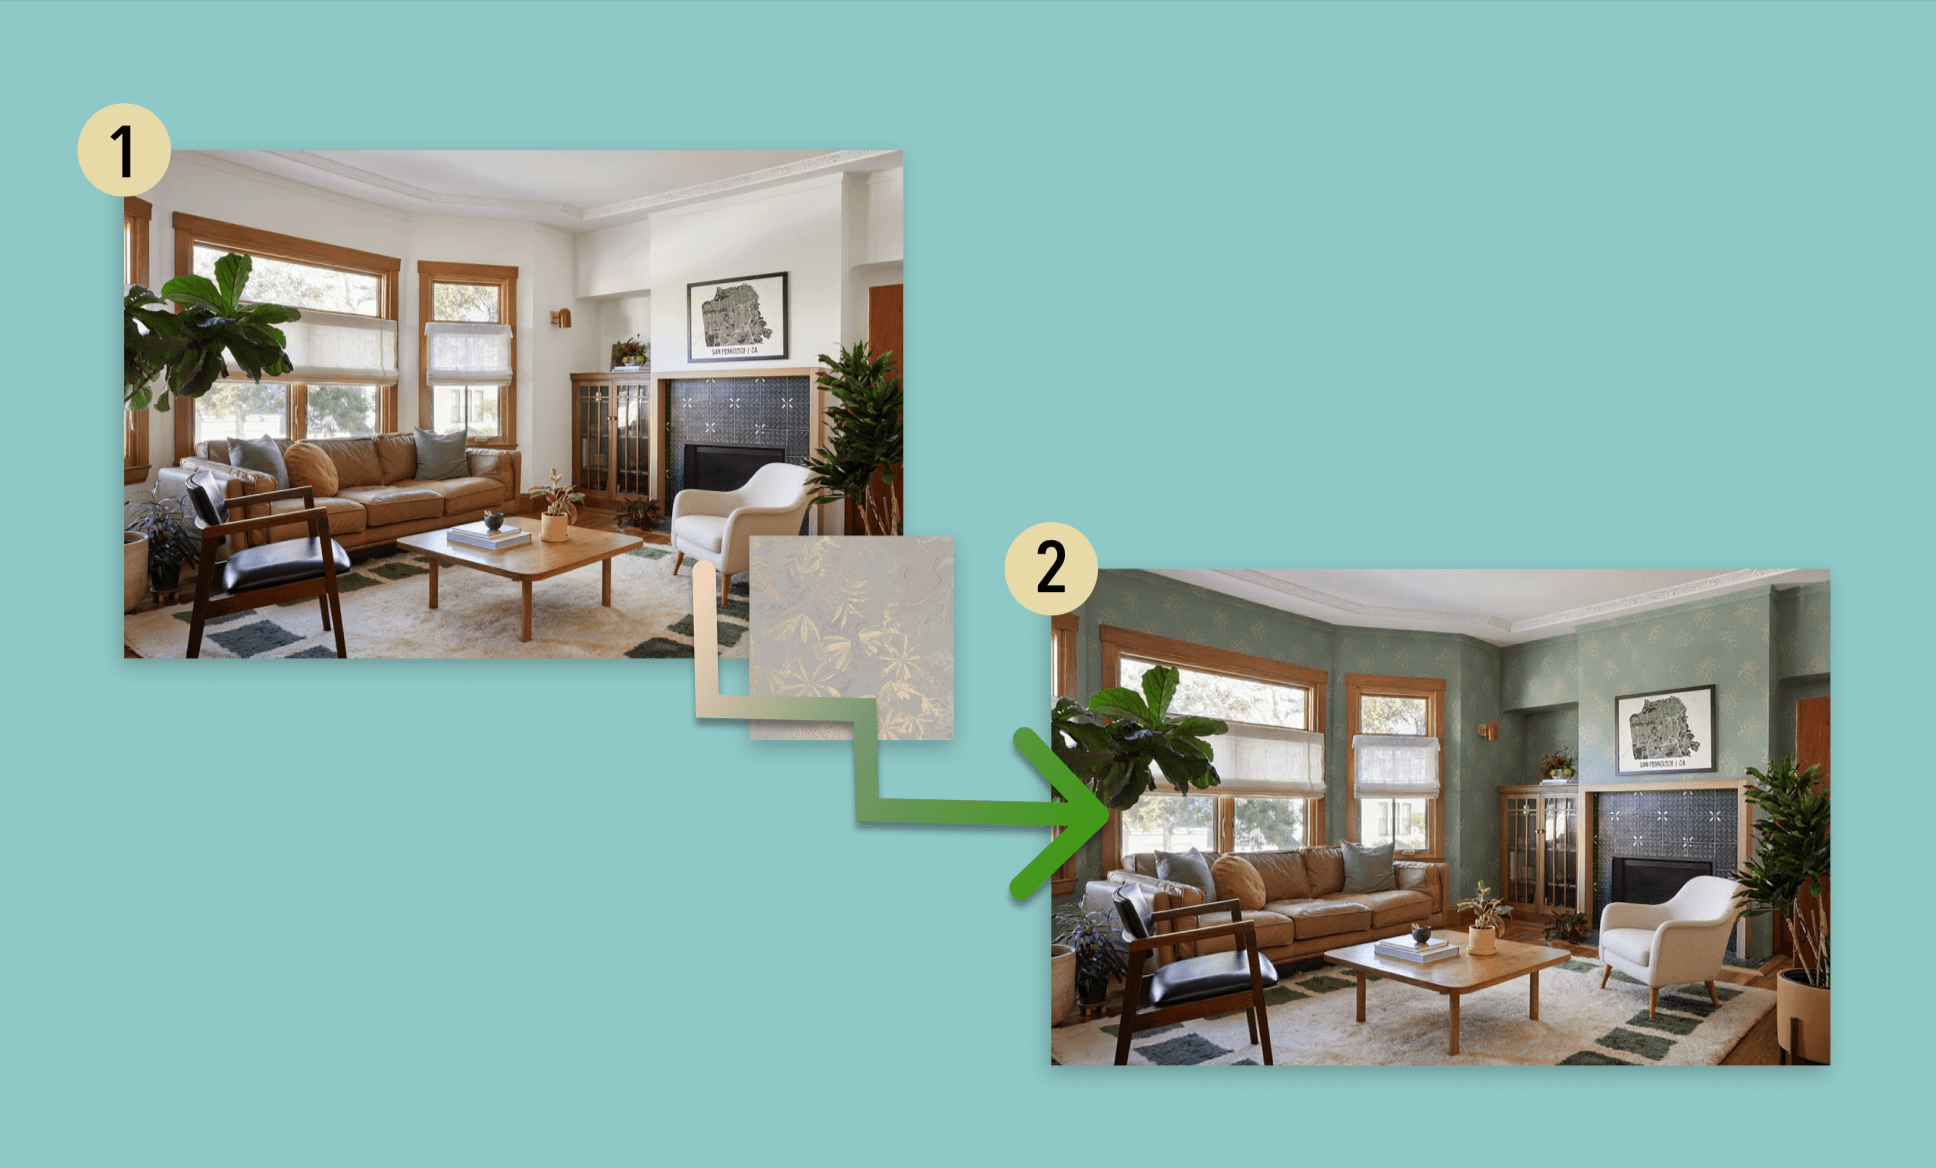
The output is pretty decent as it not only pasted the wallpaper but also intelligently decided to skip the ceiling borderline and choose the right lighting. Everything else remains intact however, on close inspection I could notice the output image was less sharp than the original.
*Note: The reference image of change required must be clean viz. just the subject itself, no background, or other content.
Step 3: Pushing to 90° + worm's eye view (Qwen Edit Multiangle | 4 credits | 10s) Skipping the prompting for an angle change, I used Qwen's built-in rotation settings: wide angle, 90° horizontal rotation, and a low-angle view. The shift is subtle but consistent; the room geometry holds, the furniture stays proportional.

*Note: Prompting for a POV change without using the model's multiangle settings does nothing.
Step 4: Night mode with ceiling lamp (Flux Kontext Multi Image | 10 credits | 30s)
Fed the wallpapered room + the dome ceiling lamp image into Flux Kontext, and asked it to place the lamp and switch to night lighting:
“In the living room shown in image 1, place a ceiling lamp shown in image 2. And make it night time with little to no image coming in from the window. And the ceiling light is illuminating the indoors.”
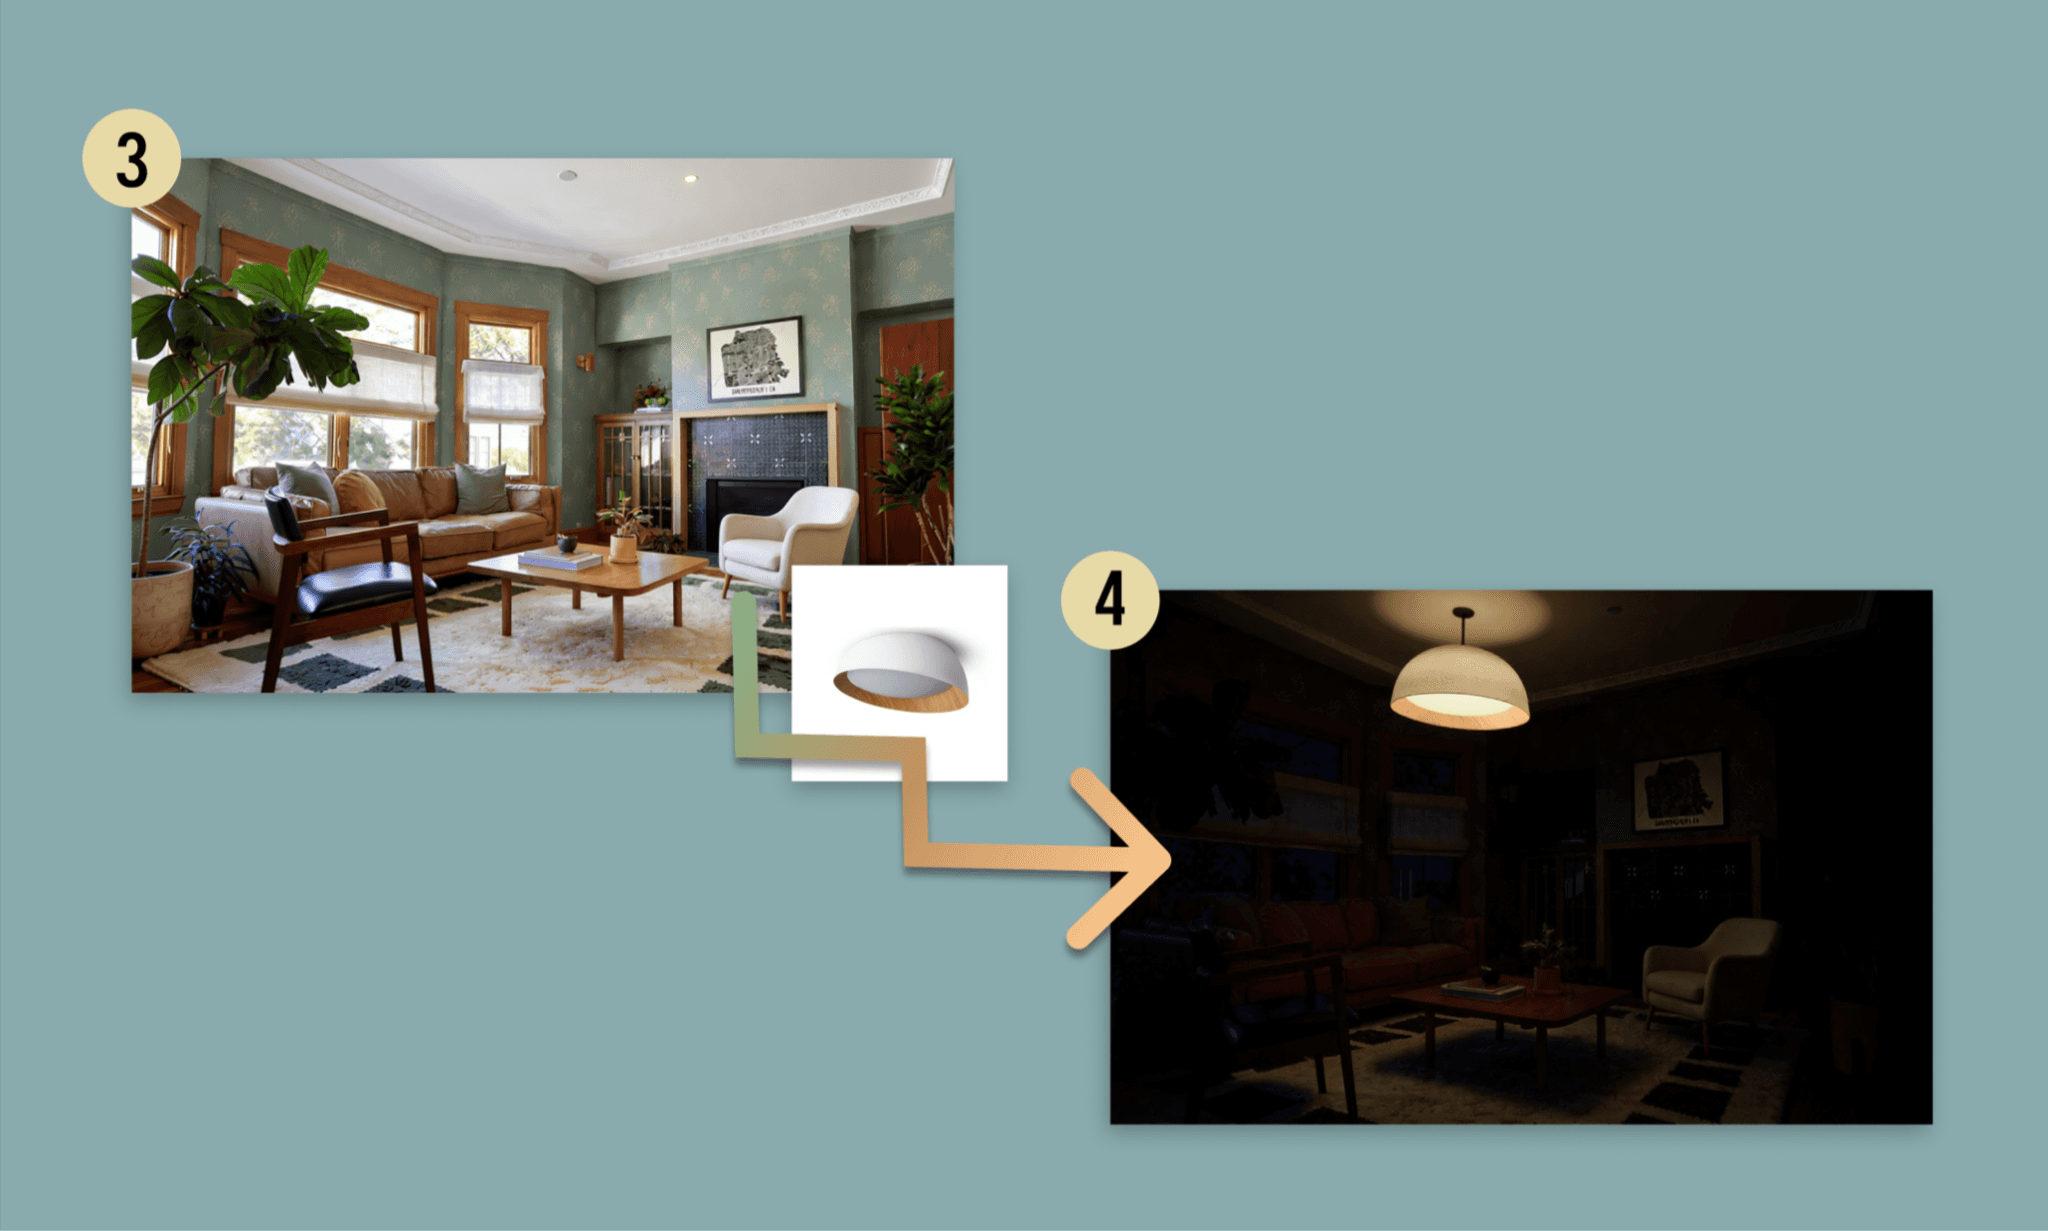
Except for the oversized lamp, everything else is awesome. The lighting, the shadow, the atmosphere. It's the most dramatic transformation of the session, and honestly the most impressive.
Summary: GenAI Model Comparison of Figma Weave
Across my Interry UI test, I used over a dozen different AI models inside Figma Weave. Not all of them are part of this review, but below you can see a snap of my experiences with them:
GenAI Model | My Experience | Credits | Time |
Flux Fast | Fast, cheap, reliable — good for first drafts. | 0.4 | ~30s |
Qwen Image Edit Plus | Slow, average output, poor at blending references. | 3 | ~10 min |
Flux Canny Pro | Misread the task; edited reference instead of generating new. | 6 | ~30s |
Google Imagen 4 | Prompt-accurate and cinematic — my hero image winner. | 6 | ~30s |
GPT Images 2.0 | Good quality but slower and pricier than Imagen 4. | 9 | ~1 min |
Mystic | Best image quality in the test; worth the cost. | 12 | ~45s |
Recraft V3 | Accurate, affordable — best value of the four models. | 5 | ~30s |
Stable Diffusion 3.5 | Reliable and prompt-adherent; slightly less polished finish. | 8 | ~30s |
Higgsfield | Stunning mood and lighting; too expensive for simple shots. | 21 | ~1 min |
Flux Kontext Multi Image | Best for room edits; needs clean reference images though. | 10 | ~30s |
Qwen Edit Multiangle | Cheapest and fastest; settings-driven only, not prompt-driven. | 4 | ~10s |
Runway Gen-4 Image | Unreliable — cropped image, ignored chair reference entirely. | 6 | ~45s |
Krea AI Image Models & Tools Comparison >
Turning UI assets into UI mockups
Putting the Figma Weave’s output to a real utility test, I next assembled the UI assets into UI mockups of my Interry app. Here, I put two AI UI design tools head-on for it: Figma Agent v/s Banani AI. I uploaded the same set of assets and gave them both the same prompt:
"Design a mobile app UI for Interry, an interior design app that lets users photograph their room and virtually furnish it. I want 4 screens:
- Screen 1: Home Screen: Header with logo + wordmark. Full-width hero with CTA button ‘Design Interior’. Below that, some pills to suggest categories of furnishing items in a row, and a collage of furnishing items partially visible.
- Screen 2: Virtual Try-On: Shows original room.png full screen with 3 items starred/bookmarked below it: wallpaper.png, lamp.png, and one sofa placeholder. Also, an icon to show angle change option. A 'Try On' CTA button.
- Screen 3: Virtual Try-On (Wallpaper applied): Shows room with wallpaper.png applied — use room with wallpaper.png. Same bottom tray with wallpaper item highlighted/selected.
- Screen 4: Virtual Try-On (Ceiling lamp applied) Shows dark room.png full screen — the room at night with the dome lamp installed. Bottom tray shows lamp.png as the active item.Overall design direction: warm, modern, minimal. Coral-pink accent color matching the logo gradient."
Figma Agent: Nailed the brief, but not the asset placement
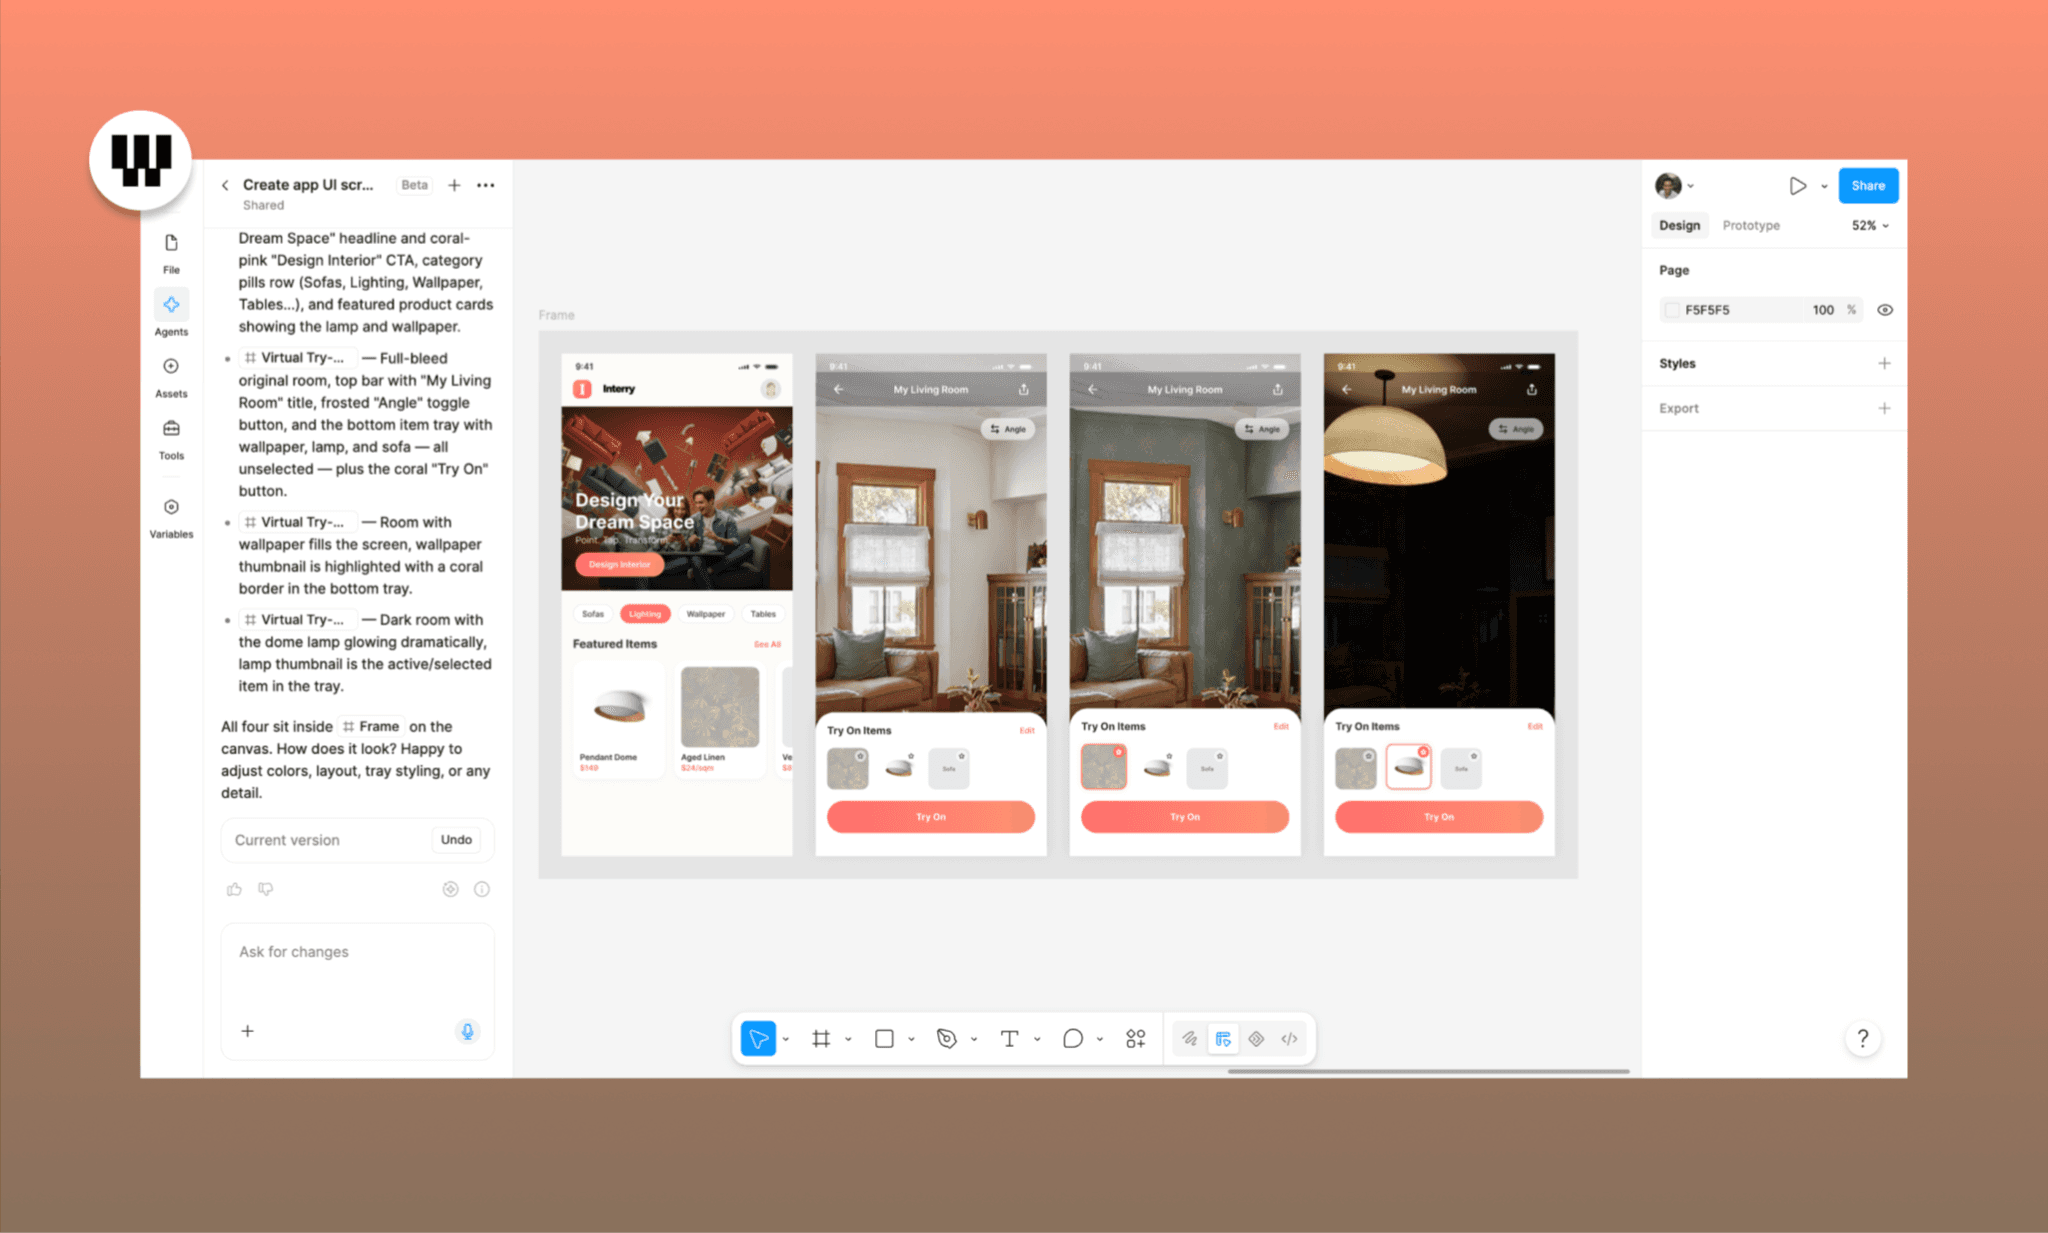
Nailed the brief in ~3:30 mins but took it too literally. All four screens are there, assets placed correctly, but image proportions are off; the room photos feel cramped rather than immersive. No bottom navigation bar, no placeholder elements where content was missing.
Banani AI: Placed the asset right, and filled in missing details

Review & Edit this Design for Free >
Faster (~3 mins), and smarter about the gaps. Used the assets at the right proportions, and independently added elements that made the UI feel complete: a bottom nav bar, a multi-angle toggle icon, even AI-style room description copy. The virtual try-on screens actually look like a real app.
Weave excels at generating and editing creative assets. For assembling those assets, use Banani AI, a purpose-built UI tool for speedy, smarter generation. You can even go from prompt-to-UI without uploading any reference and then export the design to Figma if needed.
Create UI with Banani AI Free >
Can we use Weave AI inside Figma?
Yes, but partially. Figma Weave is accessed separately from the Figma ecosystem. However, in Config 2026[3], it was announced that select Weave workflows will be available as Tools in closed beta inside the design canvas; for free to Figma paid subscribers.
In the screenshot below, I tried a Weave Tool, Change Lighting, inside Figma Design.
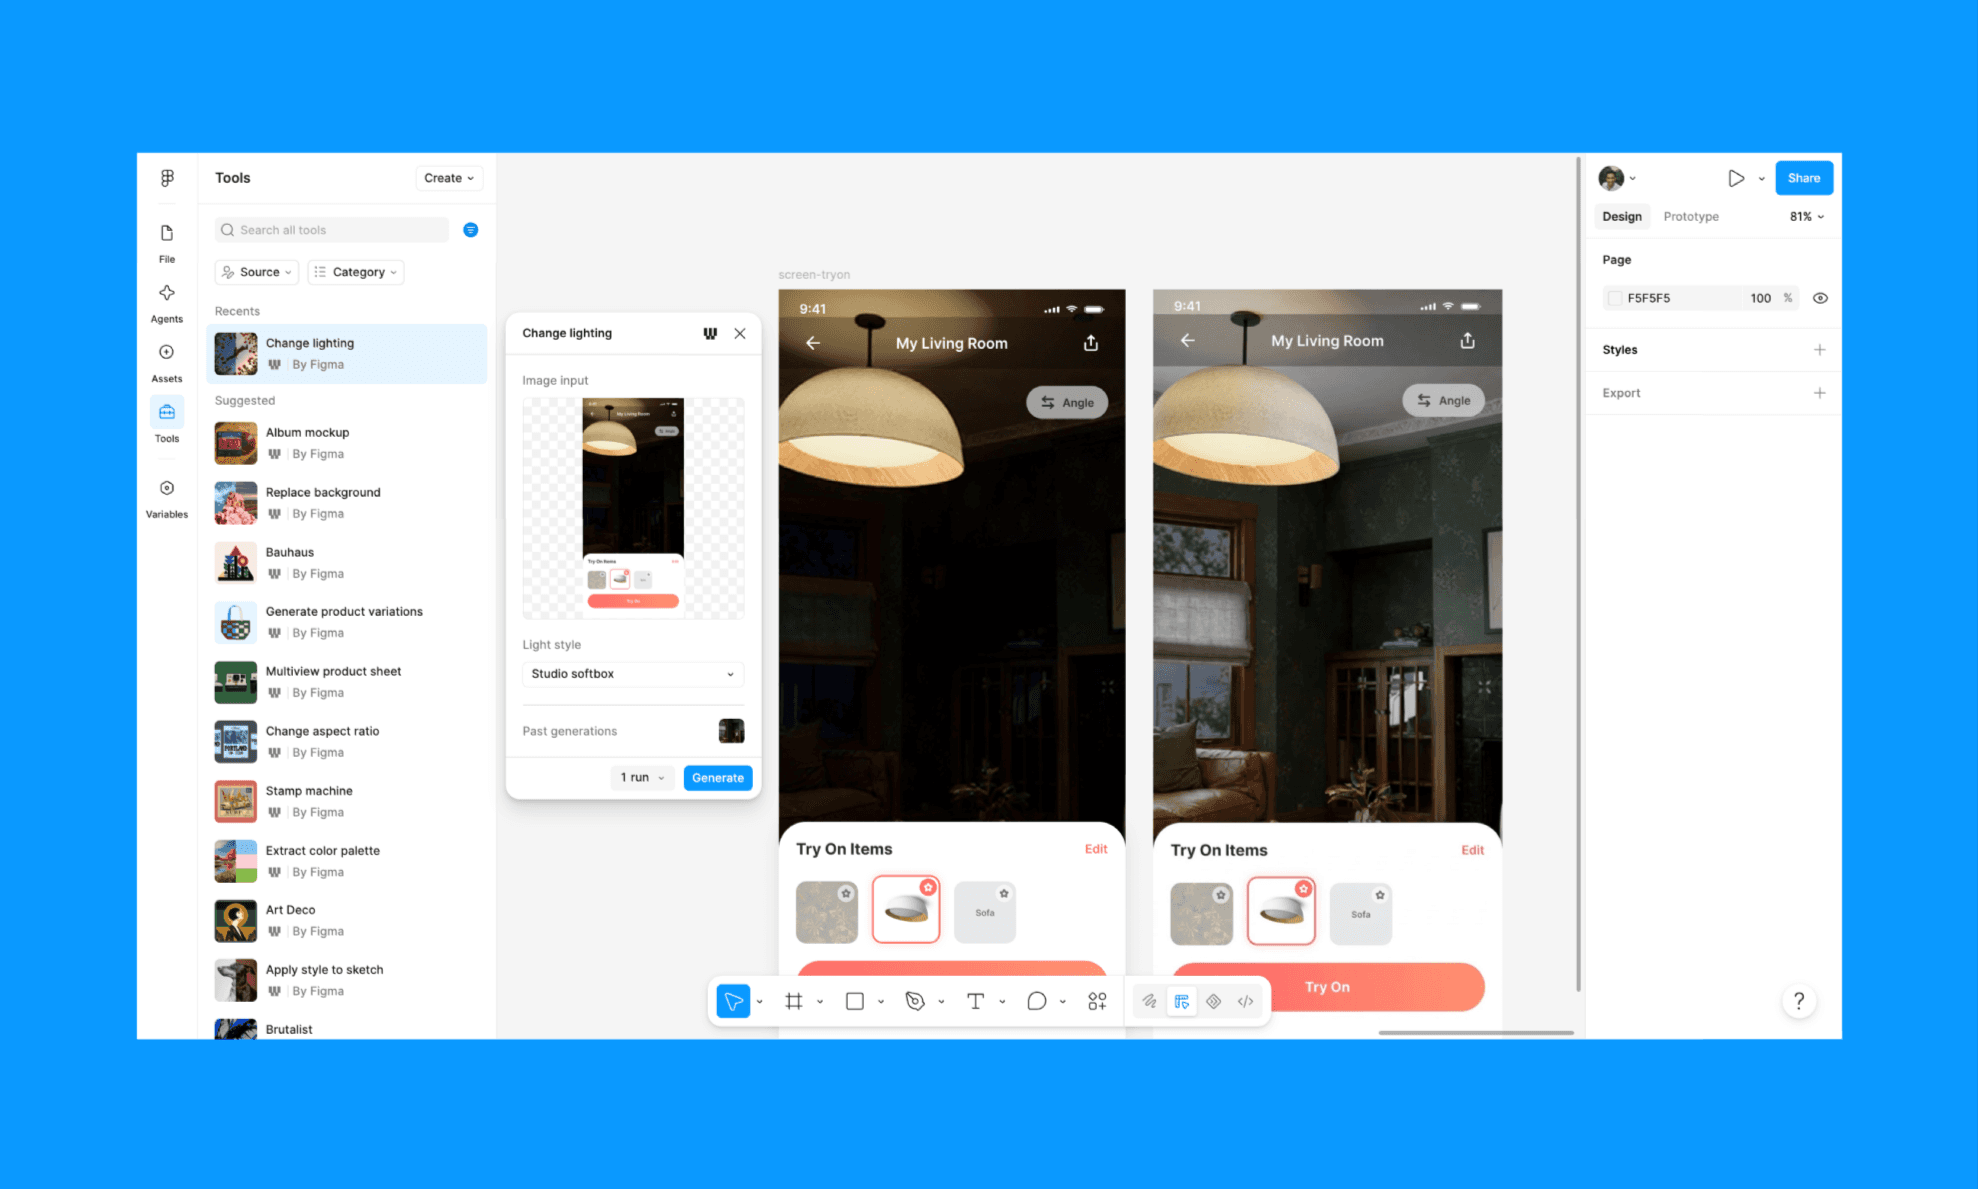
It worked fast and pretty much as it would inside Weave AI without having to set up the nodes, models, and prompt. In fact, with each Weave workflow shown on the left-panel, there is an interlink to the pre-made workflow inside Weave AI; that workflow can be copied and edited.
That’s what’s not available yet: building custom Weave workflows inside Figma, or the Figma node in Weave. So, as of mid-2026, you cannot embed live Figma frames directly into a Weave pipeline.
Pros & Cons of Figma Weave
What Worked Well | What Could Improve |
20+ pre-built workflows reduce cold-start friction | Node-canvas can be confusing for beginners |
Parallel task execution saves significant time | Wrong model choice wastes credits fast |
Credit cost is shown upfront before every run | Multi-reference blending often picks one dominant input |
Room lighting and atmosphere edits are stunning | Logo/branding generation is slow and average |
Wide model library covers most creative needs | No custom workflow building inside Figma yet |
Clean reference images yield surprisingly accurate outputs | Image sharpness degrades after multi-image edits |
Weave Tools inside Figma work without node setup |
Community Reception of Figma Weave
Alongside my first-hand experience of Figma Weave, reactions on Figma Weave Reddit threads are cautiously optimistic. Most UX designers appreciate the multi-model flexibility and Figma AI's backing, but flag the steep learning curve as a barrier. Plus, some praise it as powerful for creative production teams with pipeline needs, but overkill for solo designers looking for a quick image fix and would rather stick with Midjourney, Krea or similar alternatives.
Free Midjourney Alternatives for UI Assets >
Pricing of Figma Weave AI
Figma Weave Free Plan
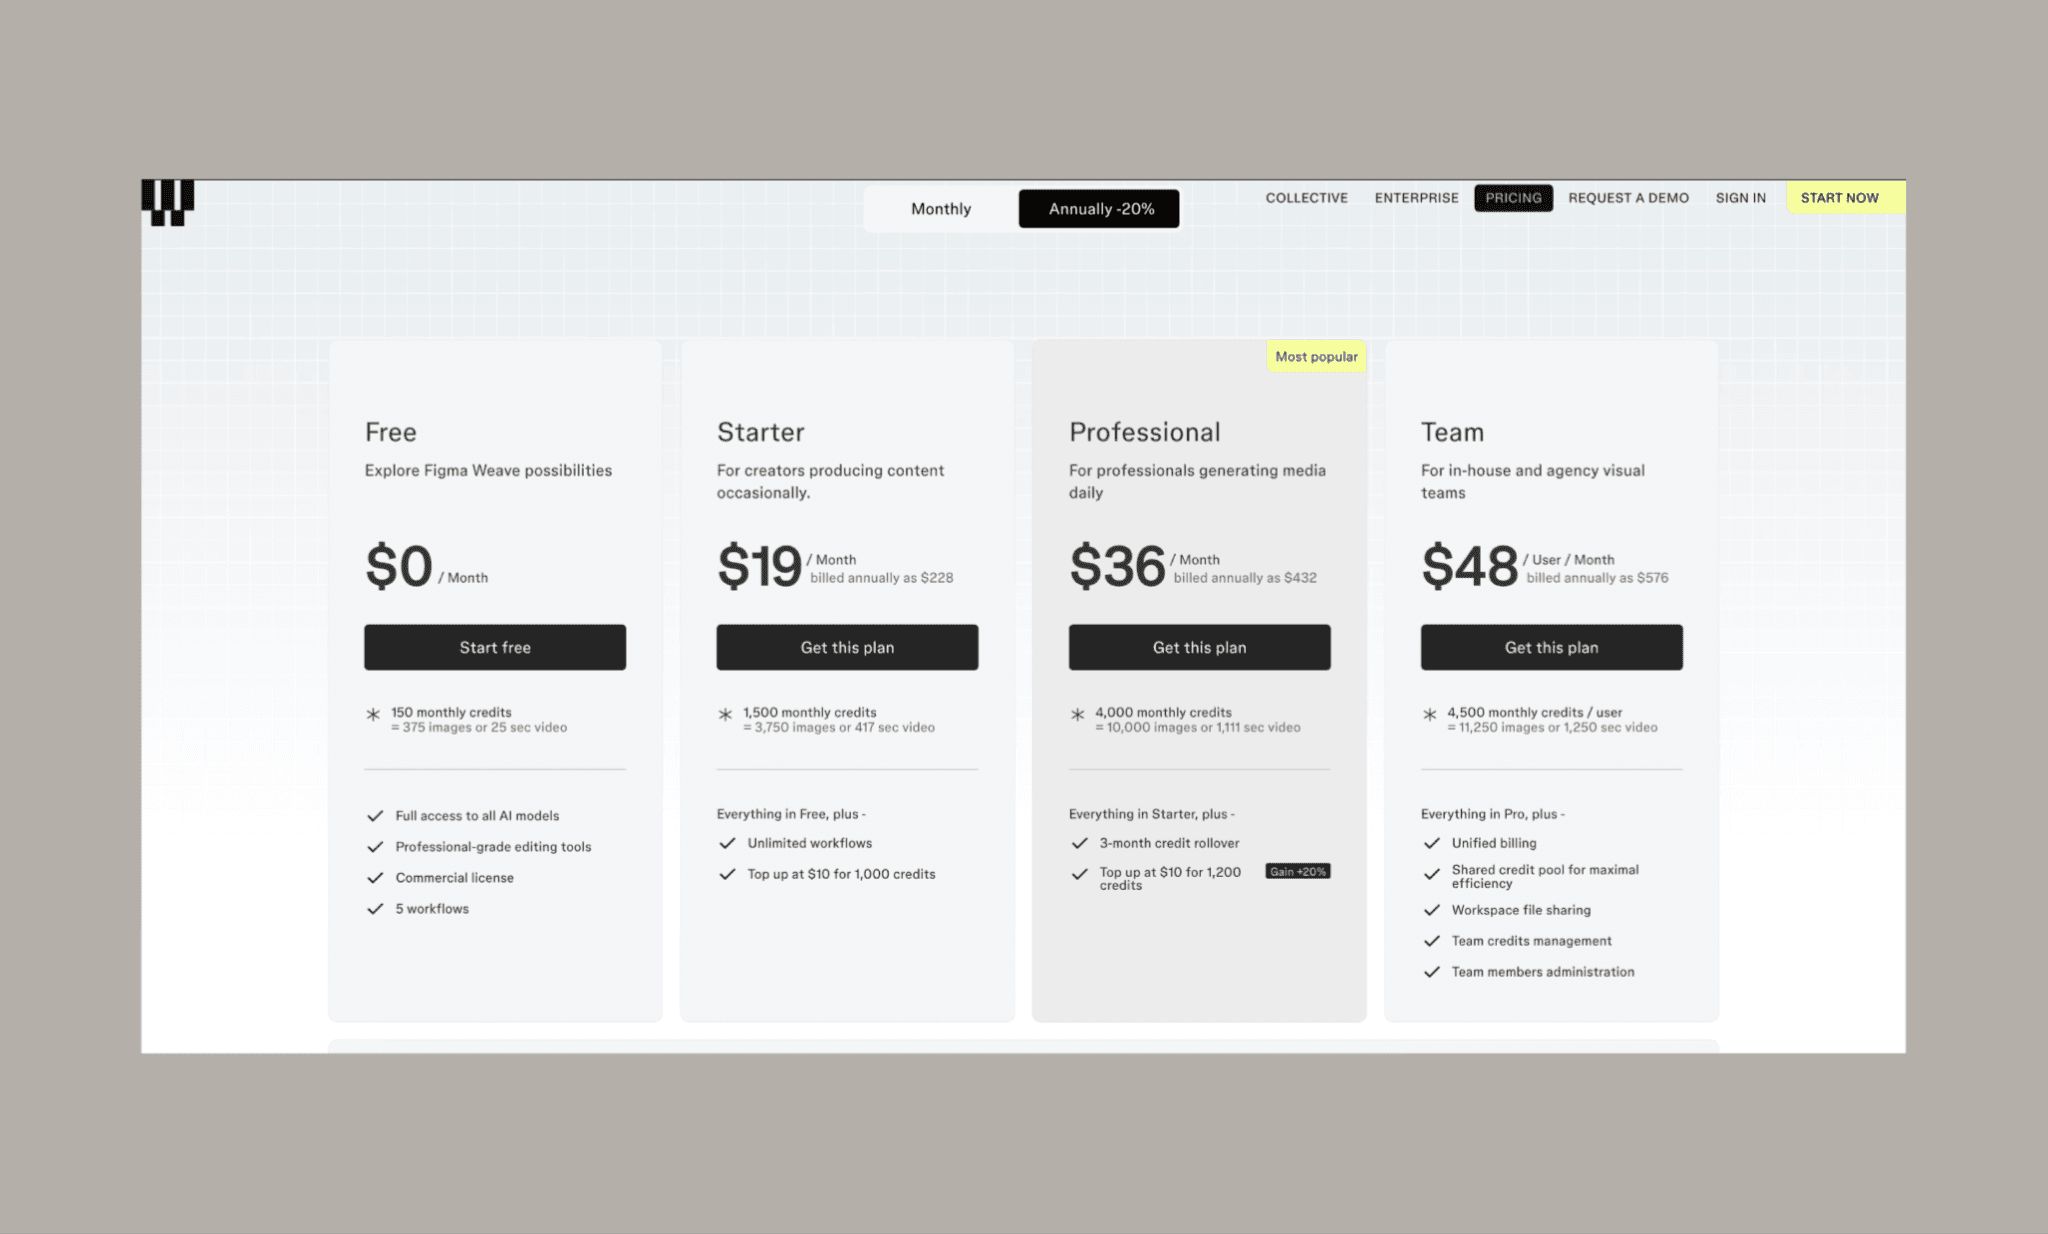
Weave AI by Figma has a freemium pricing model (just like Figma pricing). You can sign up for a generous free tier to explore Weave's full model library and core workflows; no credit card needed.
150 monthly credits (~375 images or 25s video)
Full access to all AI models
Professional-grade editing tools
Commercial license included
Up to 5 workflows
Figma Weave Paid Plans
Plan | Cost (Annual) | Credits/Month | Key Features |
Starter | $19/mo ($228/yr) | 1,500 (~3,750 images) | Unlimited workflows, top up at $10/1,000 credits |
Professional | $36/mo ($432/yr) | 4,000 (~10,000 images) | 3-month credit rollover, top up at $10/1,200 credits |
Team | $48/user/mo ($576/yr) | 4,500/user (~11,250 images) | Shared credit pool, unified billing, team admin |
*Note: The monthly billing is 20% costlier for each paid plan
An Enterprise plan of Figma Weave is also available at custom pricing for agencies and large in-house teams.
Figma Weave vs Figma Subscription
Although it's a product by Figma, taking a Figma subscription does not automatically grant you access to the Weave subscription. You have to purchase the two separately (at least as of mid-2026).
However, as mentioned earlier, select Weave Tools are available inside Figma Design and are free to use during open beta.
Is Google Stitch Really Free in 2026 >
Figma Weave Alternatives
Flora AI vs Figma Weave
Flora AI is a node-based AI creative suite with 50+ models for image, video, and audio generation on an infinite canvas. Its Fauna AI agent lets you direct, chain, and iterate outputs conversationally. It is structurally the closest competitor to Weavy AI/Figma Weave with same node logic, and a similar model range.
Choose Flora AI over Weave if you need deeper audio/video workflows and aren't invested in the Figma ecosystem.
My Experience with Flora’s Infinite Canvas >
Higgsfield vs Figma Weave
Higgsfield Canvas is a node-based image and video pipeline tool built around cinematic output, e.g., VFX, product photography, fashion campaigns, and brand animation. It runs top video models like Kling 3.0, Seedance 2.0, and Veo 3.1 side-by-side with real-time team collaboration baked in.
Choose Higgsfield over Weave if video generation and cinematic campaign production are your primary use cases.
Magnific / Freepik Spaces vs Figma Weave
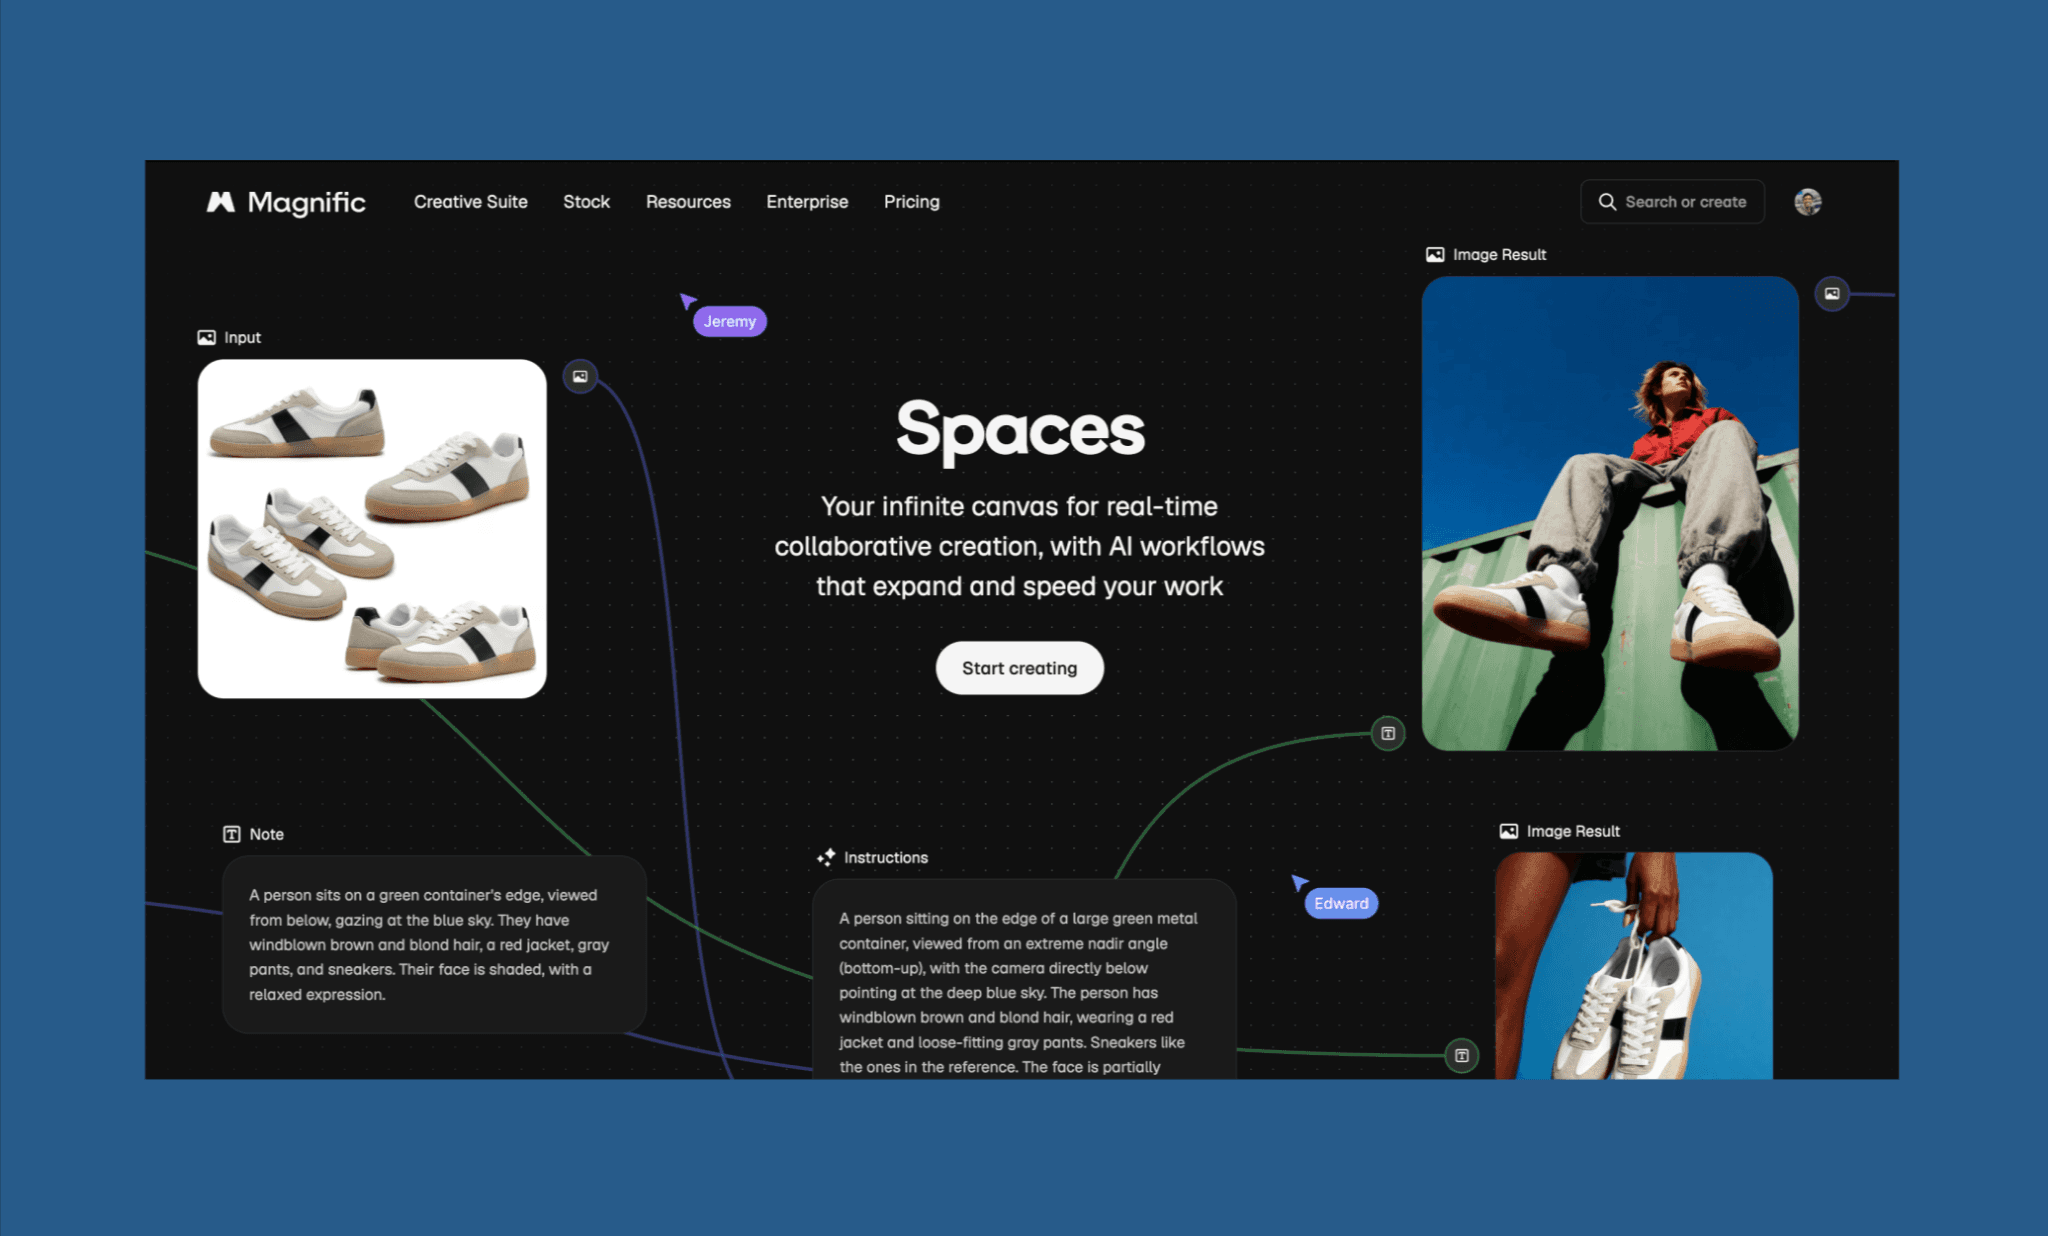
Freepik Spaces (now Magnific Spaces) is a collaborative AI image workspace built on Freepik's vast asset library. It combines generative image creation with stock asset access, upscaling, and enhancement tools; making it more accessible for marketers and content teams than a node-based workflow tool.
Choose Freepik Spaces over Weave if you want generative images with stock library access, minus the node complexity.
Freepik’s Evolution to Maginific AI >
Verdict: Is Figma Weave Worth it?
Per my experience with Figma Weave, I’d say it’s worth a try, but not possibly enough to win a space in your UI design workflow. The main reason being it wields GenAI like a weighty workflow. The models’ range is genuinely impressive, the parallel task setup saves real time, and the virtual room editing surprised me. But the node canvas, model selection, guesswork, and credit drain make it a tool for patient, pipeline-minded creative teams.
Figma is clearly pressing hard on AI and is worth watching. But if you need an AI-native UI designer now, that’s faster, smarter, and more affordable, start using Banani. It’s powered by the latest Gemini and GPT models, deeply integrated with Figma, and exports code via MCP.
FAQs on Figma Weave AI
Is Figma Weave free?
Yes. Figma Weave has a free plan with 150 monthly credits; enough for ~375 images. For more credits, its paid plans start at $19/month.
When will Figma Weave be available?
Figma Weave is already available now at weave.figma.com.
How to use Weave in Figma?
You cannot use the full-fledged node-based feature of Weave AI inside the Figma canvas. The closest you can come is using select Weave AI workflows available as Tools inside Figma Design. You can see them on the left-side panel, along with Figma Agent.
How much does Weave AI cost?
Figma Weave AI has a freemium model; its paid plan starts from $19/month (Starter) up to $48/user/month (Team), billed annually. And individual image generations cost range from 0.4 credits to 20+ credits, depending on the model used.
Is there any AI for Figma design?
Yes, Figma has its own AI agent built into Figma Design for generating and editing UI. Additionally, there have been AI as Figma plugins like those from UXPilot and Visily. If you’re looking to generate full app screens and prototypes from a prompt and export directly to Figma, Banani AI is a great option to start for free.
References
[1] https://weave.figma.com/
[2] https://techcrunch.com/2025/10/30/figma-acquires-ai-powered-media-generation-company-weavy/
[3] https://www.figma.com/blog/connecting-figma-and-weave/


