

Si alguna vez hiciste vibe-coding de una app, te has puesto el sombrero de diseñador para bien o para mal. Y probablemente te dio cosa ver que tu app vibe-codificada se ve igual que la de todos los demás.
Según un informe de Figma de 2025, el 56% de los no diseñadores ya realiza activamente tareas centradas en diseño[1]. Así que, a medida que en 2026 se solapan más las expectativas de diseñadores e ingenieros, el vibe designing merece el mismo pedestal que el vibe coding. De hecho, iría un paso más allá y sugeriría 'no hagas vibe coding antes de vibe designing'. Te ahorrará tiempo, créditos, e incluso puede ayudar a que tu app vibe-codificada destaque.
Vibe Designing: Diseñar con IA
Vibe designing es básicamente vibe coding para diseñadores. Sin habilidades prácticas para usar software de diseño, solo traduce tus "vibes" en visuales usando IA.
La IA para vibe designing son básicamente diseñadores de UI con IA que te permiten usar entradas multimodales (prompts de texto, capturas de pantalla o incluso bocetos toscos) para generar interfaces reales y editables, listas para entregar a desarrollo.
Vibe Coding vs Vibe Designing

En el contexto del desarrollo de productos, vibe coding es ingeniería de software, mientras que vibe designing es diseño de producto. Ambas usan herramientas de IA multimodales (impulsadas por los mismos LLM de OpenAI, Anthropic, Google y similares) para traducir tu intención al resultado en el formato que necesitas (código o UI, respectivamente).
Aspecto | Vibe Coding | Vibe Designing |
Qué genera | Apps y funciones que funcionan | Diseños de UI y interfaces visuales |
Entrada principal | Prompts de texto que describen la lógica | Prompts, capturas y bocetos |
Enfoque | Código, funcionalidad, integraciones | Layout, jerarquía, colores, interacciones |
Herramientas típicas | ||
Resultado | App funcional o base de código | Pantallas o prototipos de UI de alta fidelidad |
Cuándo usarlo | Construir la funcionalidad del producto | Diseñar el producto pulido |
Las apps vibe-codificadas tienen brechas de diseño
Vibe coding una app es rápido y divertido. Pero también frustra ver que todas se parezcan igual.
Construye un dashboard en Lovable. Dale el mismo prompt a Bolt. Y luego a Base44. Lo que obtendrás es la misma barra lateral izquierda, la misma cuadrícula de tarjetas redondeadas, el mismo acento morado bg-indigo-500 que se ha vuelto la bandera no oficial de las interfaces generadas por IA. No es casualidad. Estas herramientas tiran del mismo conjunto de valores por defecto de Tailwind y de componentes shadcn/ui que dominan sus datos de entrenamiento[2].
Todo se ve... bien. Profesional, incluso. Pero quita el logo y no distinguirías una app de otra. Puede estar bien para prototipado. No está bien para nada en lo que un usuario real deba confiar, pagar o volver a usar.
Así que, independientemente de qué app de prototipado con IA uses, el vibe coding va a chocar con un techo de diseño.
Vibe designing puede abrir un hueco en ese techo. Al darle a la interfaz una cara que no parezca armada con la misma caja de piezas que la de todos los demás.
Mi flujo de trabajo de vibe design con IA
Paso 1: Empieza con la intención
Primero, planifico todas las pantallas, funciones y secciones que quiero en mi app. Ayuda anotarlo en papel y lápiz, hacer un boceto rápido o, si trabajo con un equipo, usar Miro AI para brainstorming.
Por ejemplo, digamos que quiero construir una UI de app de meditación. Antes de programar, quiero vibe diseñar sus tres pantallas (Inicio, Acerca de y Precios) para desktop y móvil usando Banani AI. Y, como parto sin referencias de UI, querría ver variaciones de una idea, y quizá también refinarlas antes de exportarlas para desarrollo.
Paso 2: Configura el prompt (para la web app)
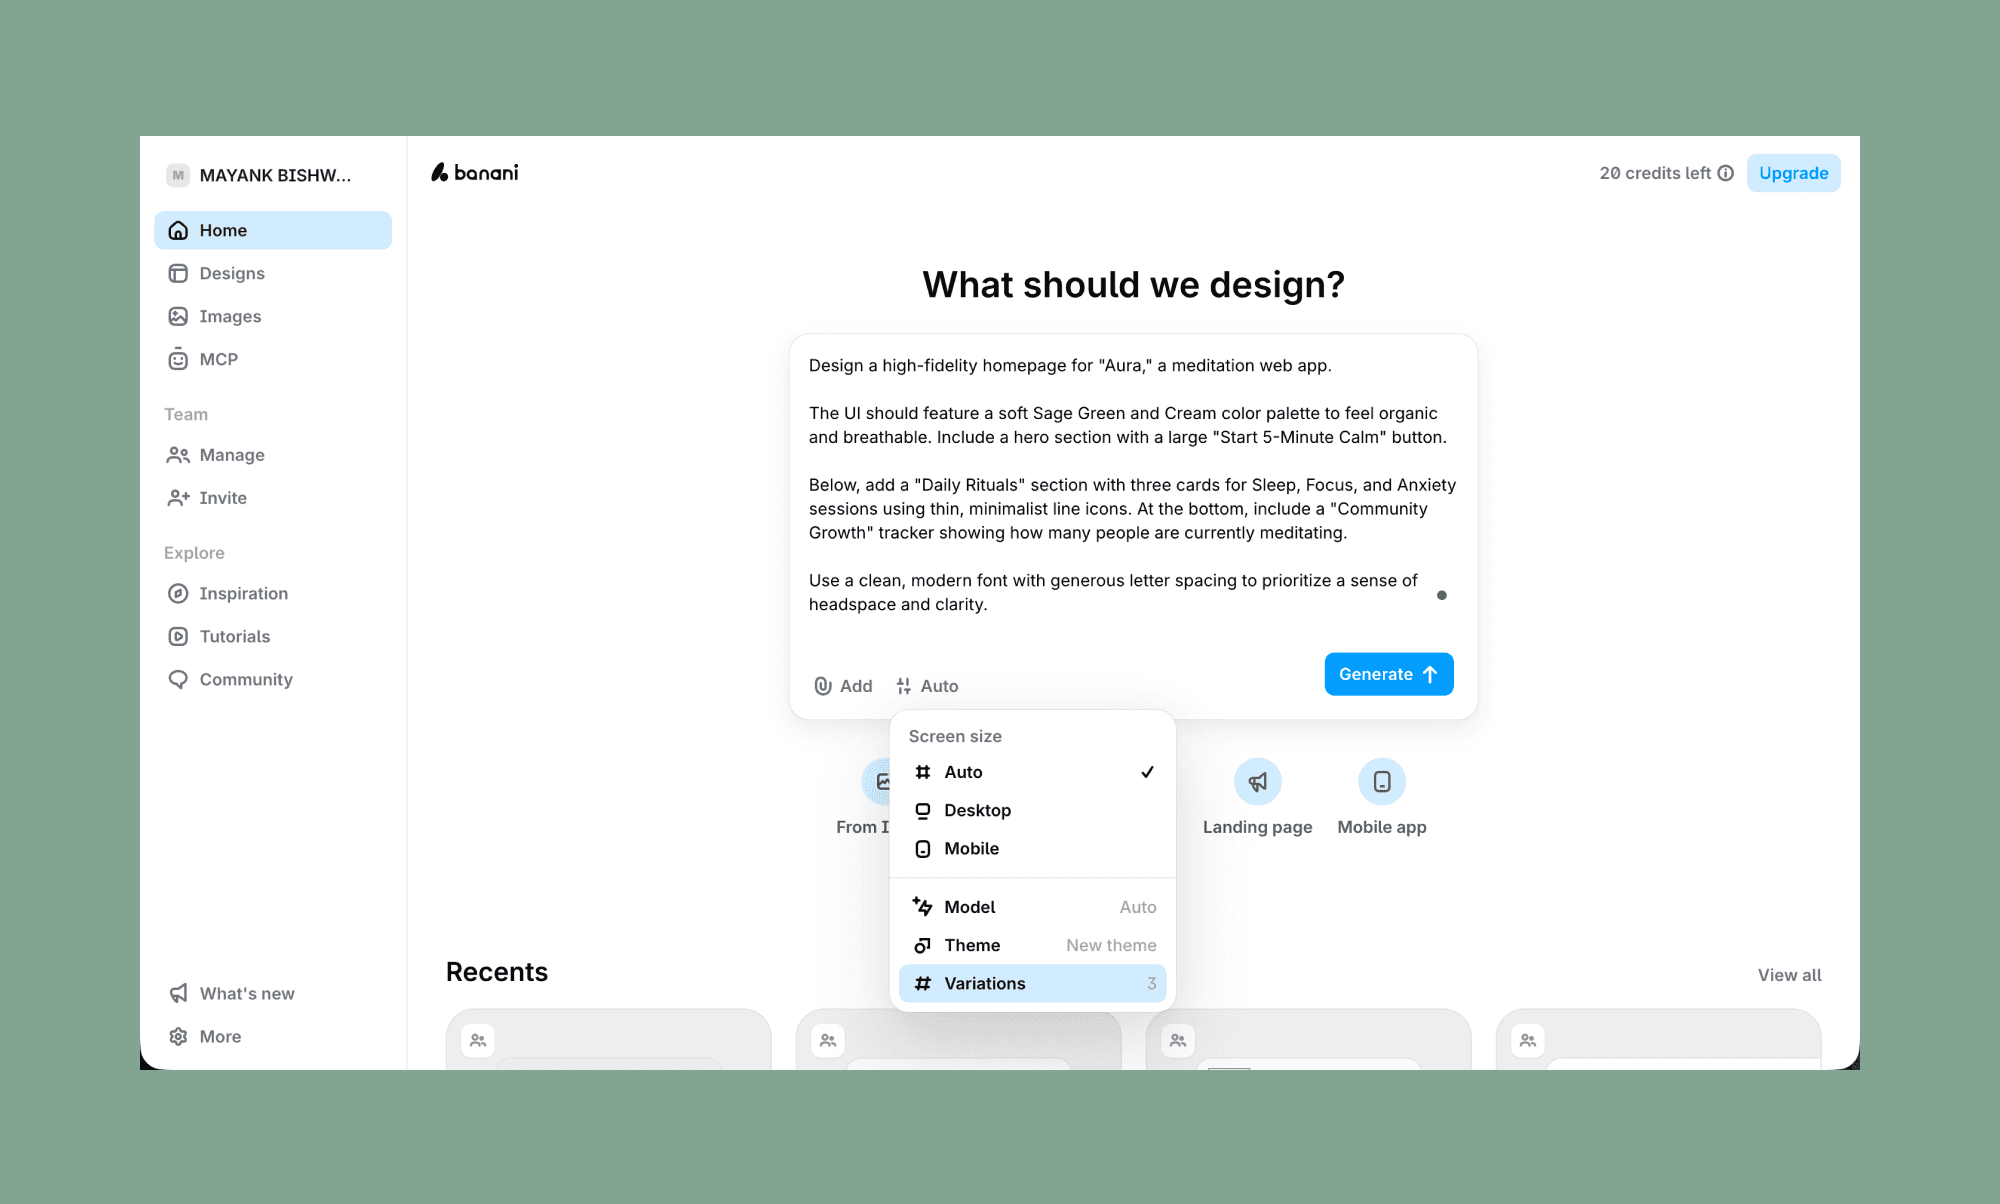
Empiezo volcándolo todo para la pantalla de inicio. Porque una vez que los elementos de diseño se fijan aquí, pueden extenderse a las demás pantallas.
Mi prompt:
"Diseña una página de inicio de alta fidelidad para 'Aura', una app web de meditación.
La UI debería usar una paleta suave de Verde Salvia y Crema para sentirse orgánica y ligera. Incluye una sección hero con un botón grande 'Empieza 5 Minutos de Calma'.
Debajo, añade una sección 'Rituales diarios' con tres tarjetas para Sueño, Enfoque y Ansiedad usando iconos lineales finos y minimalistas. En la parte inferior, incluye un tracker de 'Crecimiento de la comunidad' que muestre cuántas personas están meditando ahora mismo.
Usa una tipografía limpia y moderna con un espaciado generoso entre letras para priorizar sensación de espacio mental y claridad."
Nota: He pedido mostrar 3 variantes (Banani puede crear hasta 5) de mi idea de homepage. Y poner el modelo en 'Auto' para que elija la mejor (entre las versiones más recientes de Gemini y GPT) según mi prompt automáticamente.
Paso 3: Elige un estilo y añade más pantallas
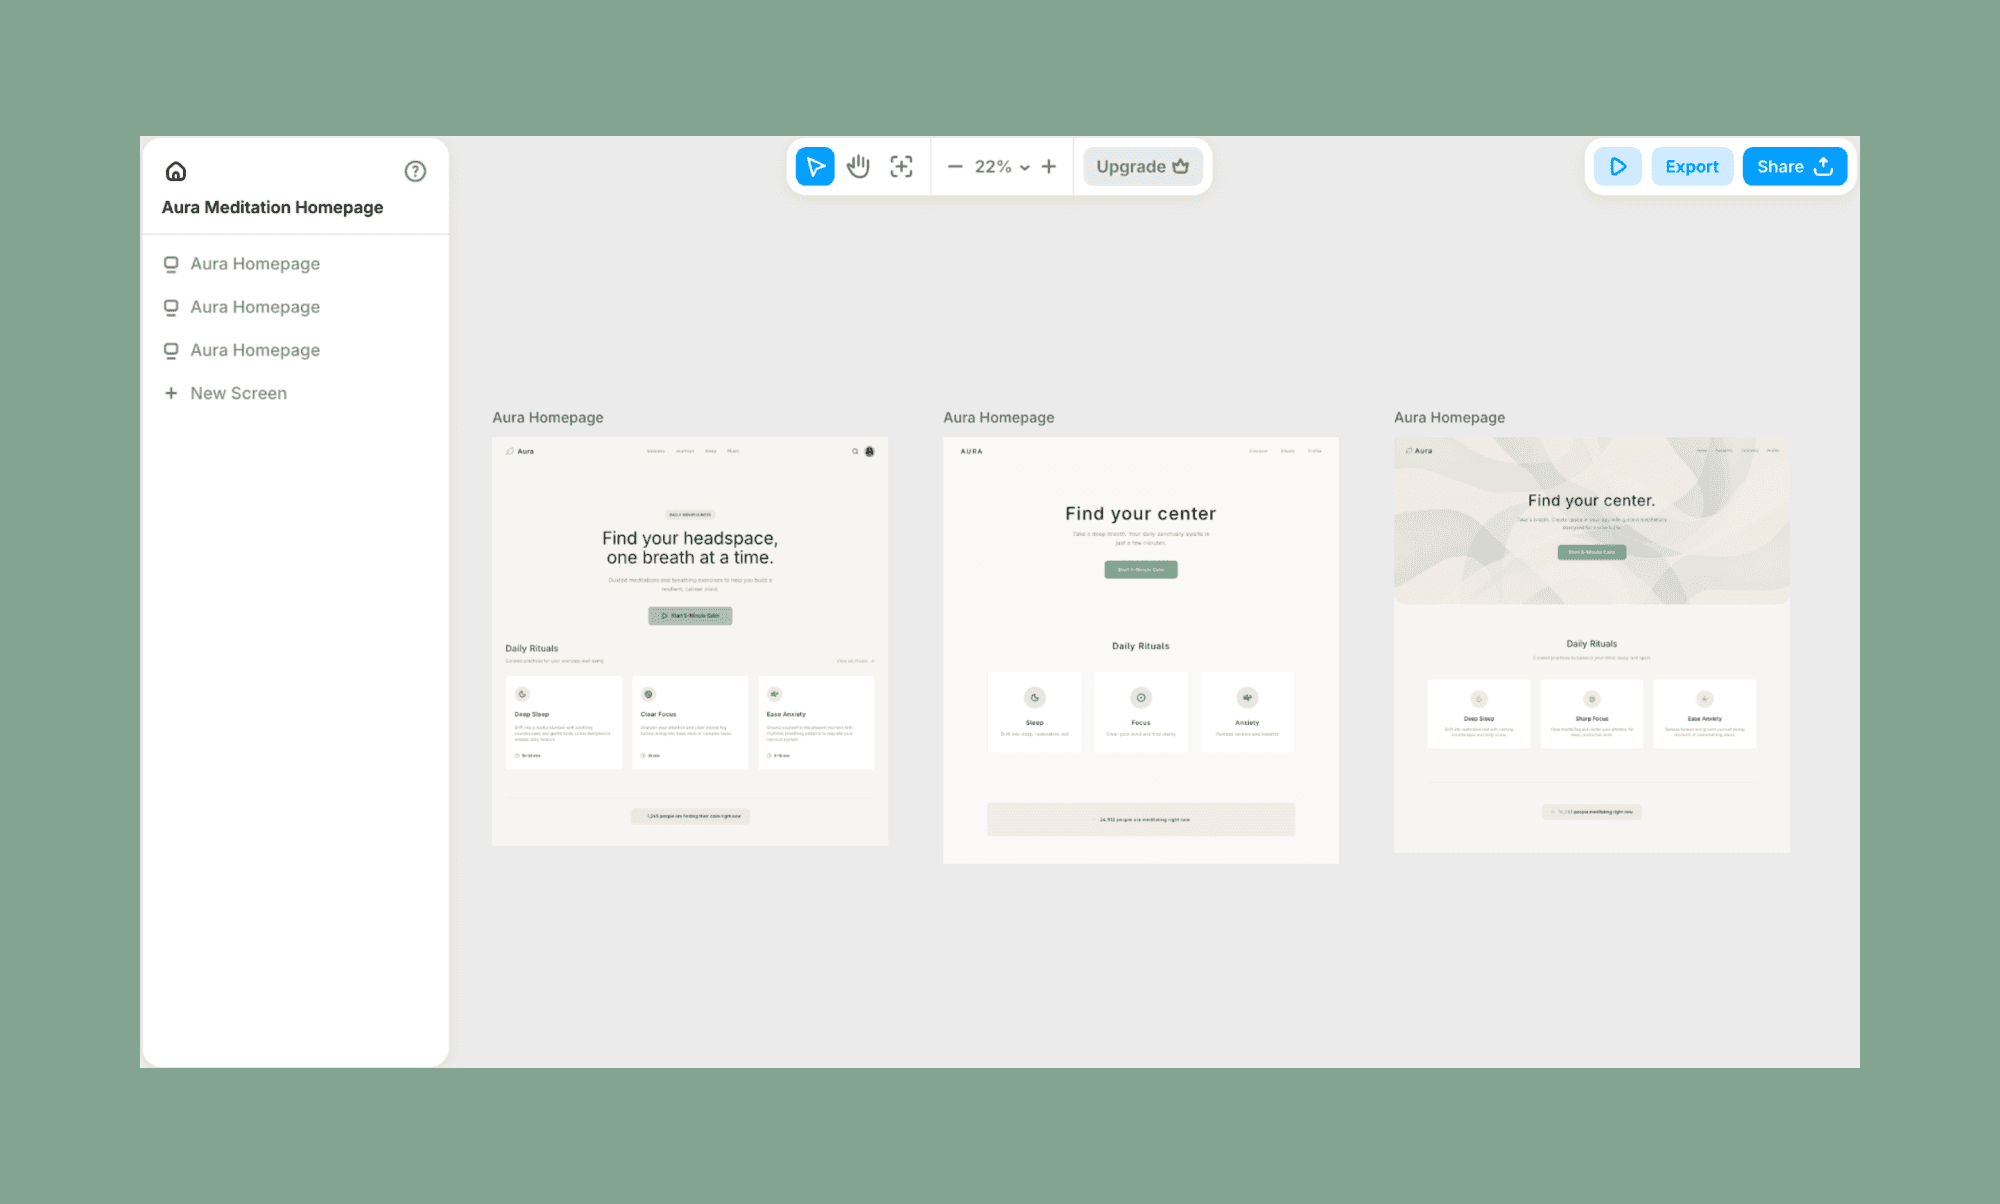
Como pedí, generó 3 variaciones de la misma idea/prompt. Siguió los elementos, el copy y el color que había pedido. (¡Sin el problema morado, ya ves!) Y todo tomó ~30 segundos.
Ahora me gusta más la última. Así que, por comodidad, borro las dos primeras. Y para añadir más pantallas, simplemente paso el cursor sobre el último diseño, hago clic en el signo '+', y crea automáticamente un lienzo en blanco pidiendo un prompt.
Como quería añadir dos pantallas adicionales - Acerca de y Precios - seguí este paso de vibe coding de UI dos veces.
Página Acerca de:
Mi prompt:
"Diseña una página de precios de alta fidelidad para Aura. Mantén la paleta Verde Salvia y Crema. Incluye dos tarjetas limpias: un plan 'Mensual' y un plan 'Anual' con una etiqueta 'Más popular'. Enumera 4–5 beneficios por plan usando los mismos iconos lineales minimalistas de la página de inicio. Asegúrate de que los botones CTA principales sean prominentes y coherentes con el estilo de 'Empieza 5 Minutos de Calma'."
Página de precios:
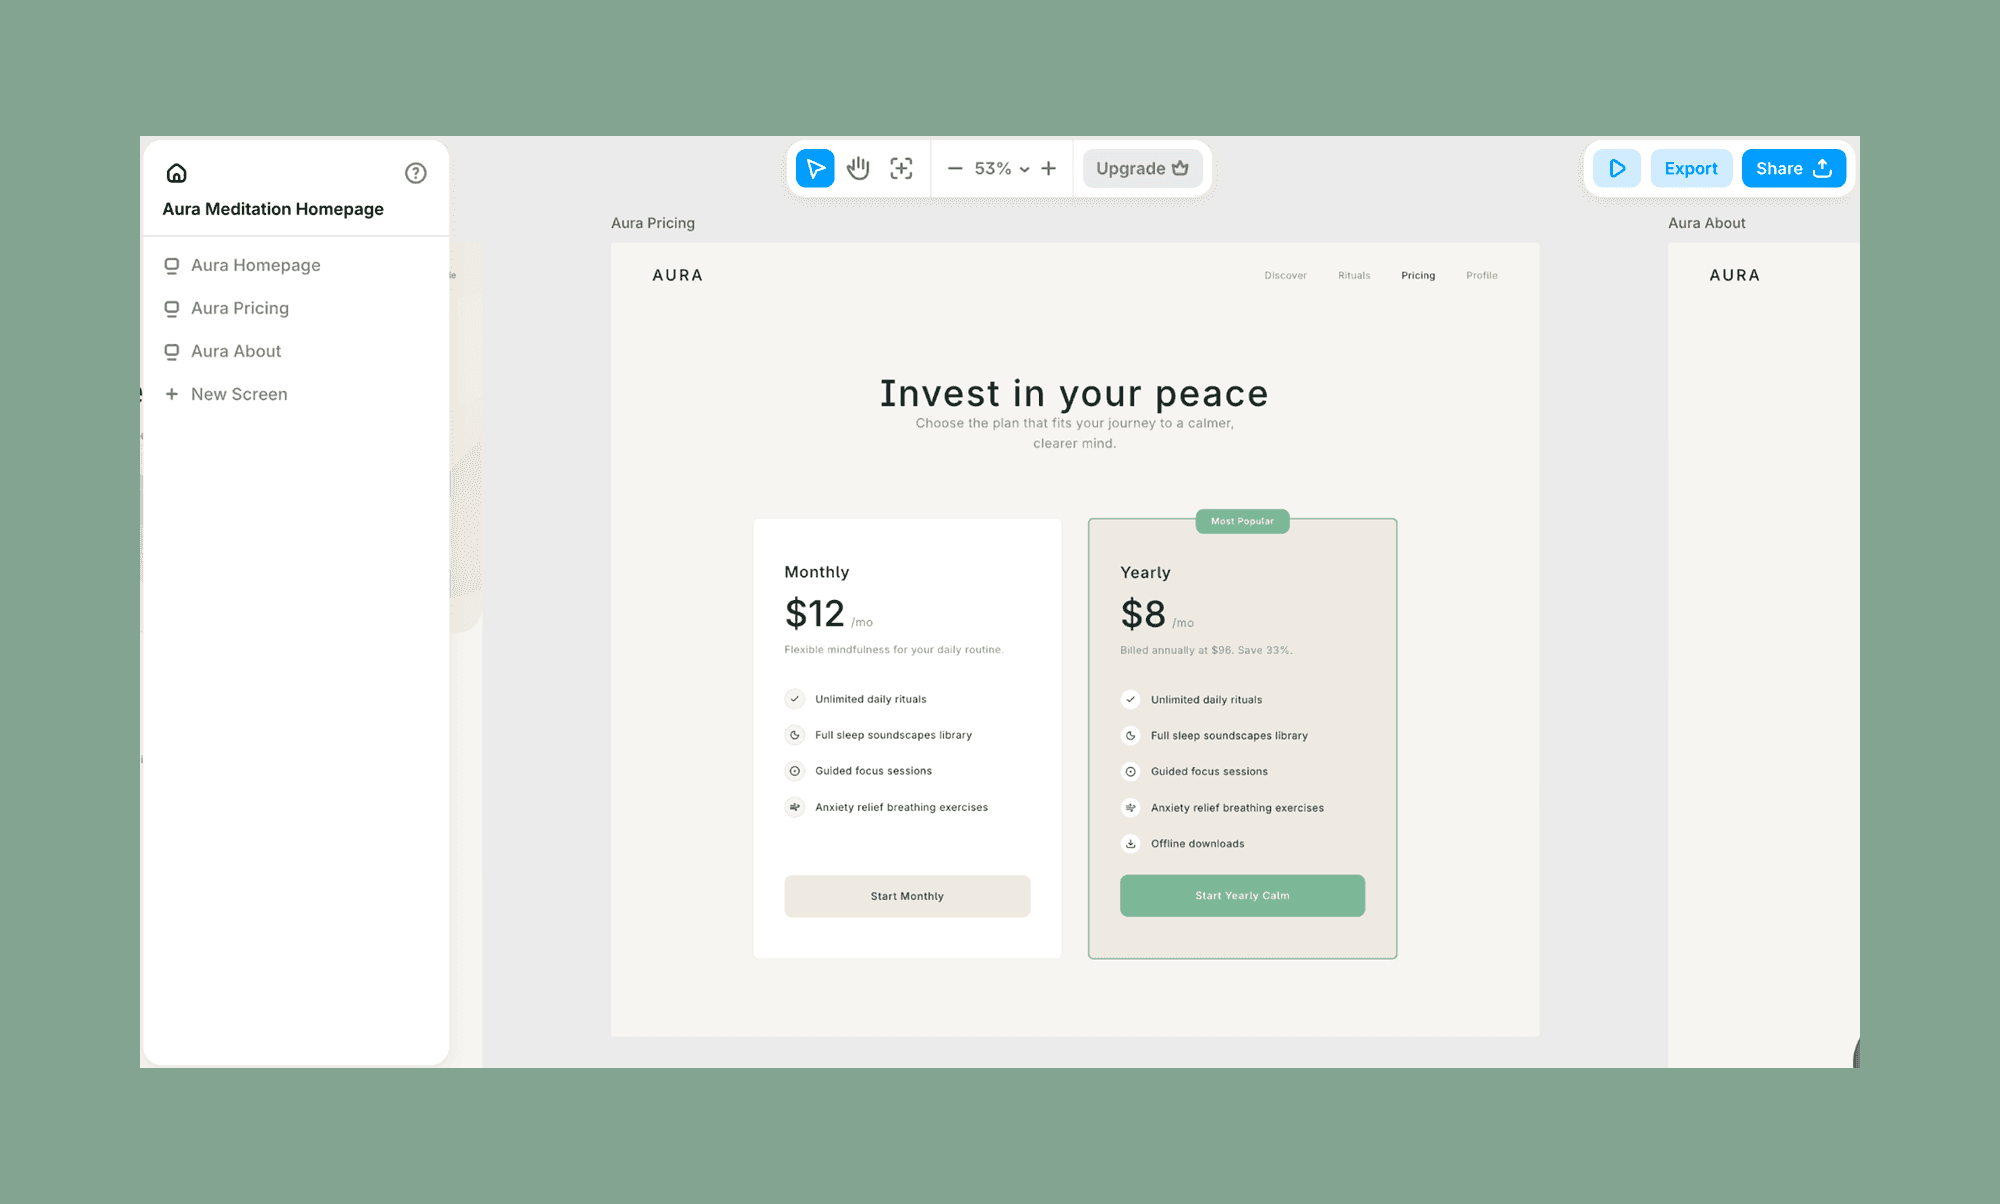
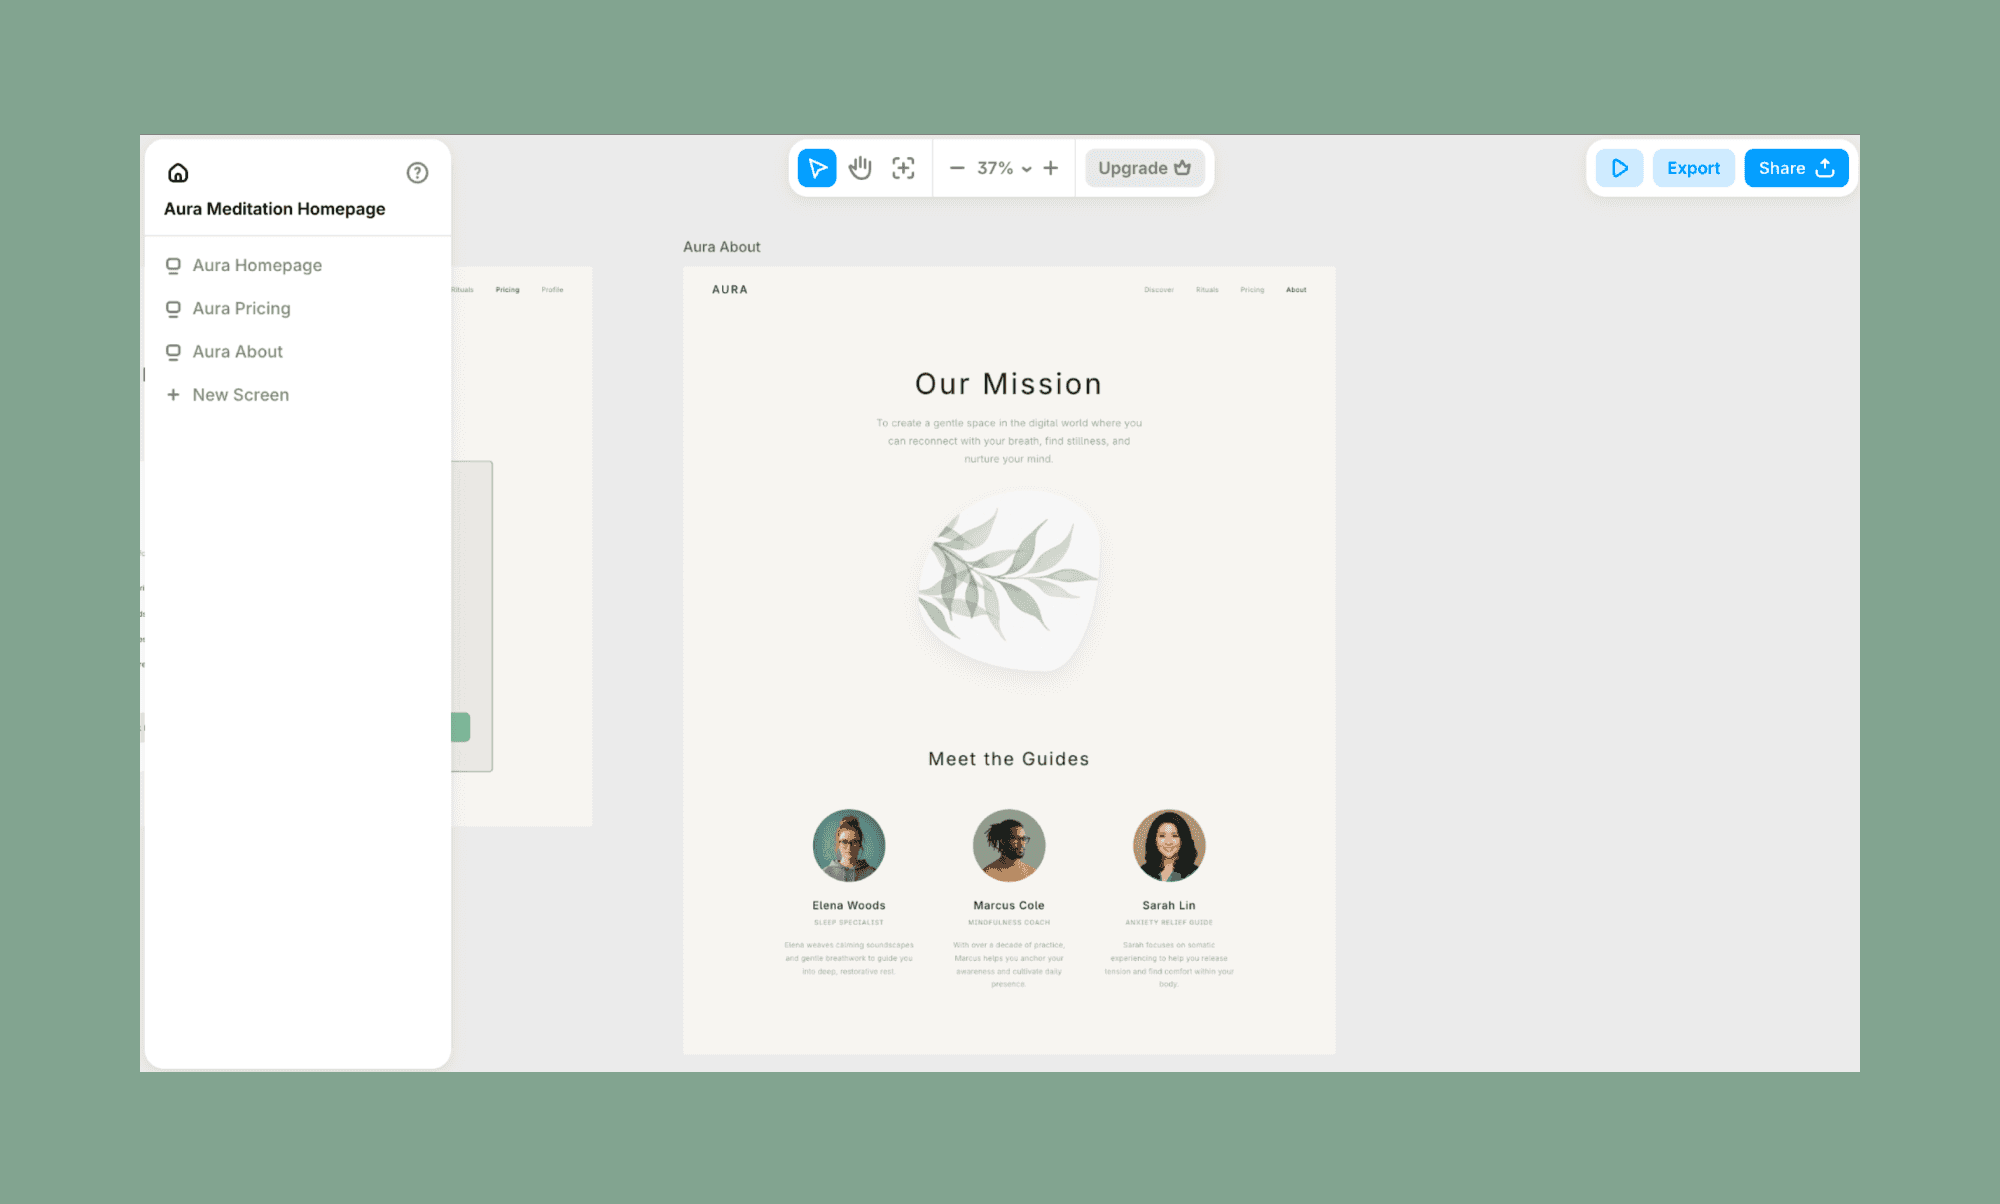
Mi prompt:
"Diseña una página Acerca de de alta fidelidad. Usa una sección hero grande y aireada con un titular 'Nuestra misión' y un espacio reservado para una imagen orgánica con forma natural. Debajo, añade una sección 'Conoce a las guías' con tres marcadores de perfil circulares y bios cortas. Mantén el layout suelto y respirable, con la misma tipografía limpia y un espaciado generoso entre letras."
Paso 4: Edita y refina la UI
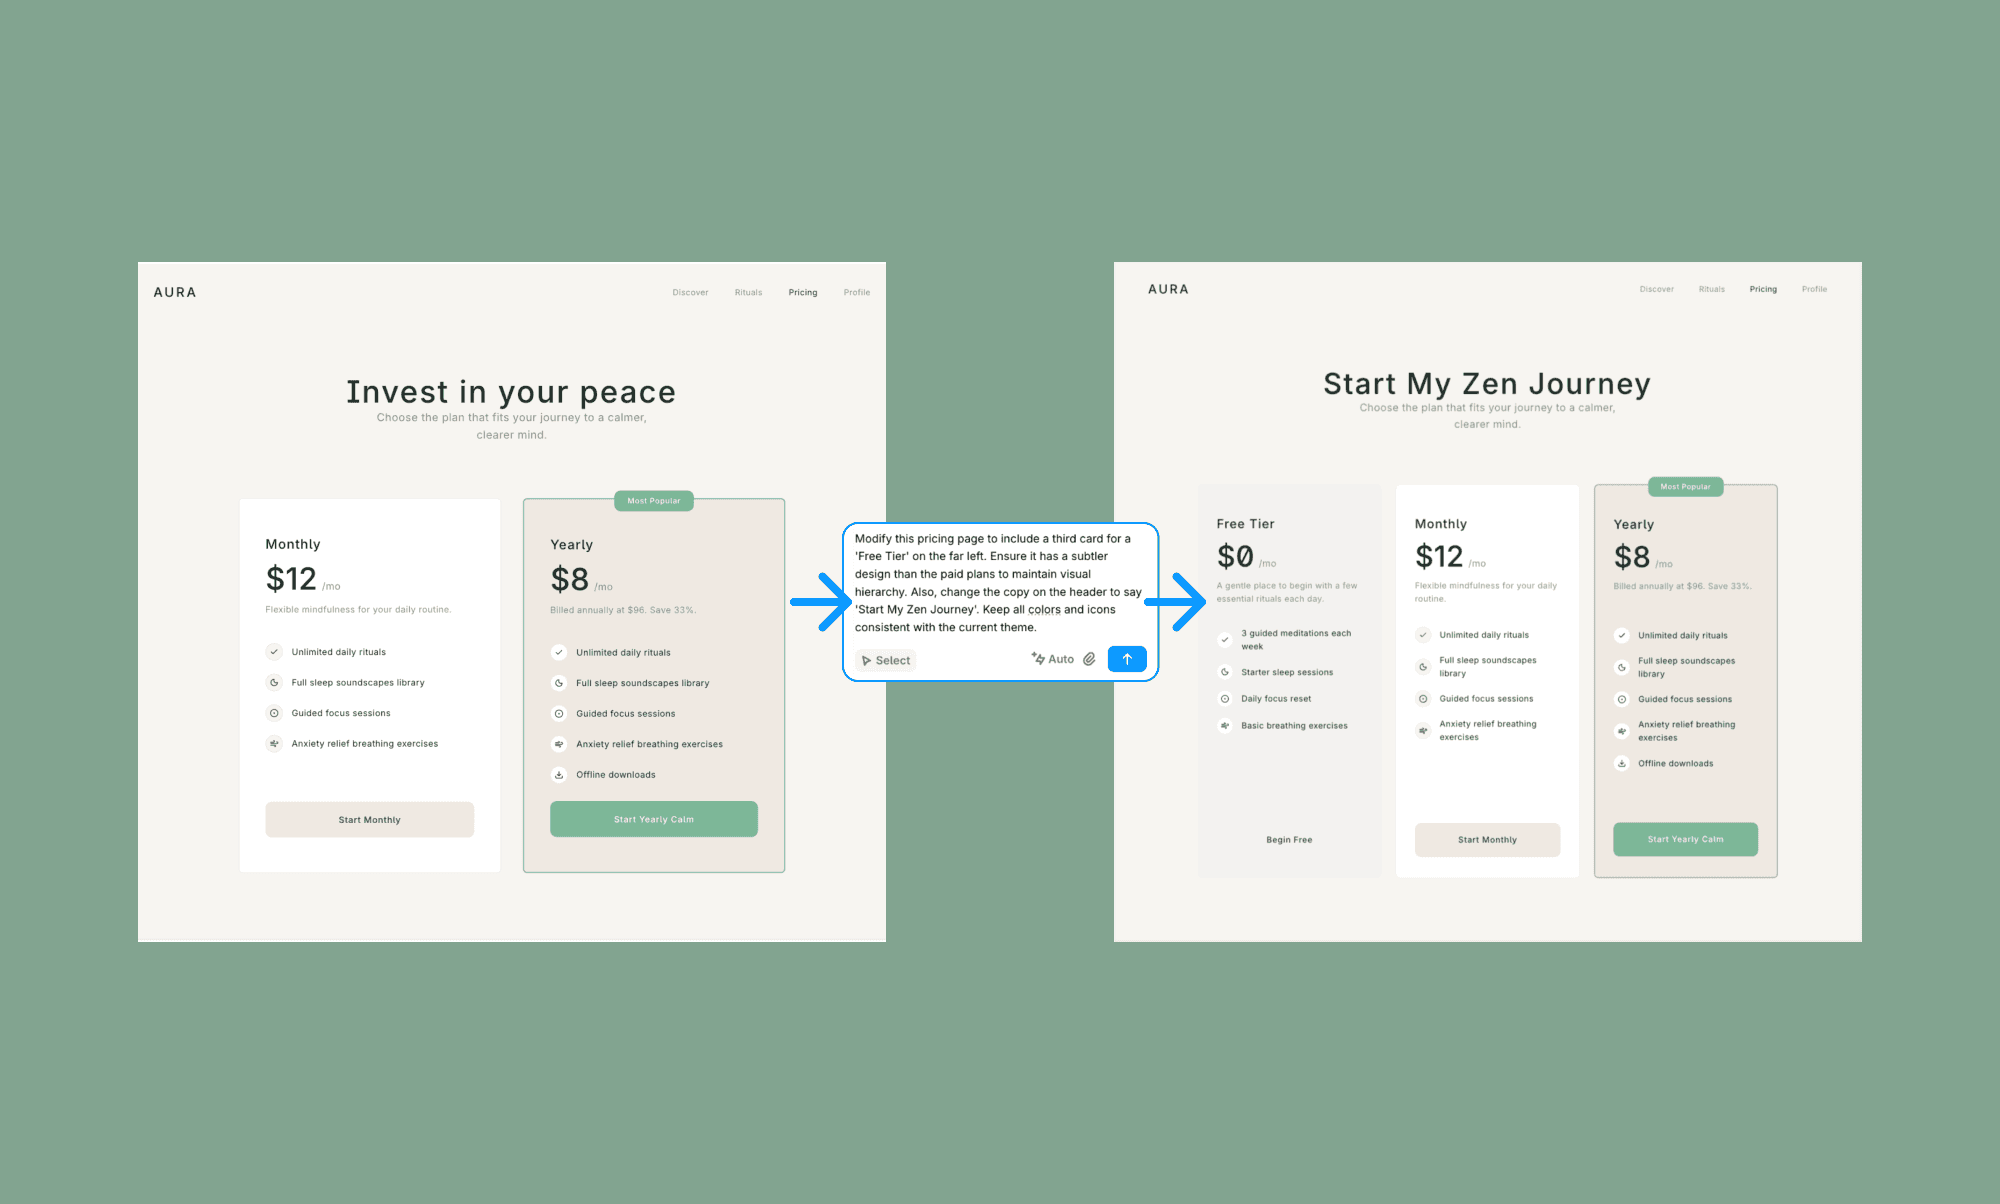
Me gusta la página de precios vibe-designed, pero quiero añadir una tarjeta para 'Plan Gratis' y hacer algunos cambios de copy también. Así que simplemente selecciono este canvas y escribo exactamente lo que quiero.
Mi prompt:
"Modifica esta página de precios para incluir una tercera tarjeta para un 'Plan Gratis' en el extremo izquierdo. Asegúrate de que tenga un diseño más sutil que los planes de pago para mantener la jerarquía visual. Además, cambia el copy del encabezado a 'Empieza mi viaje zen'. Mantén todos los colores e iconos coherentes con el tema actual."
Y si una pantalla no me gustara en absoluto, también podría rehacer todo el diseño con la opción integrada de 'Probar otro layout'. Mira cómo queda para la página Acerca de abajo.
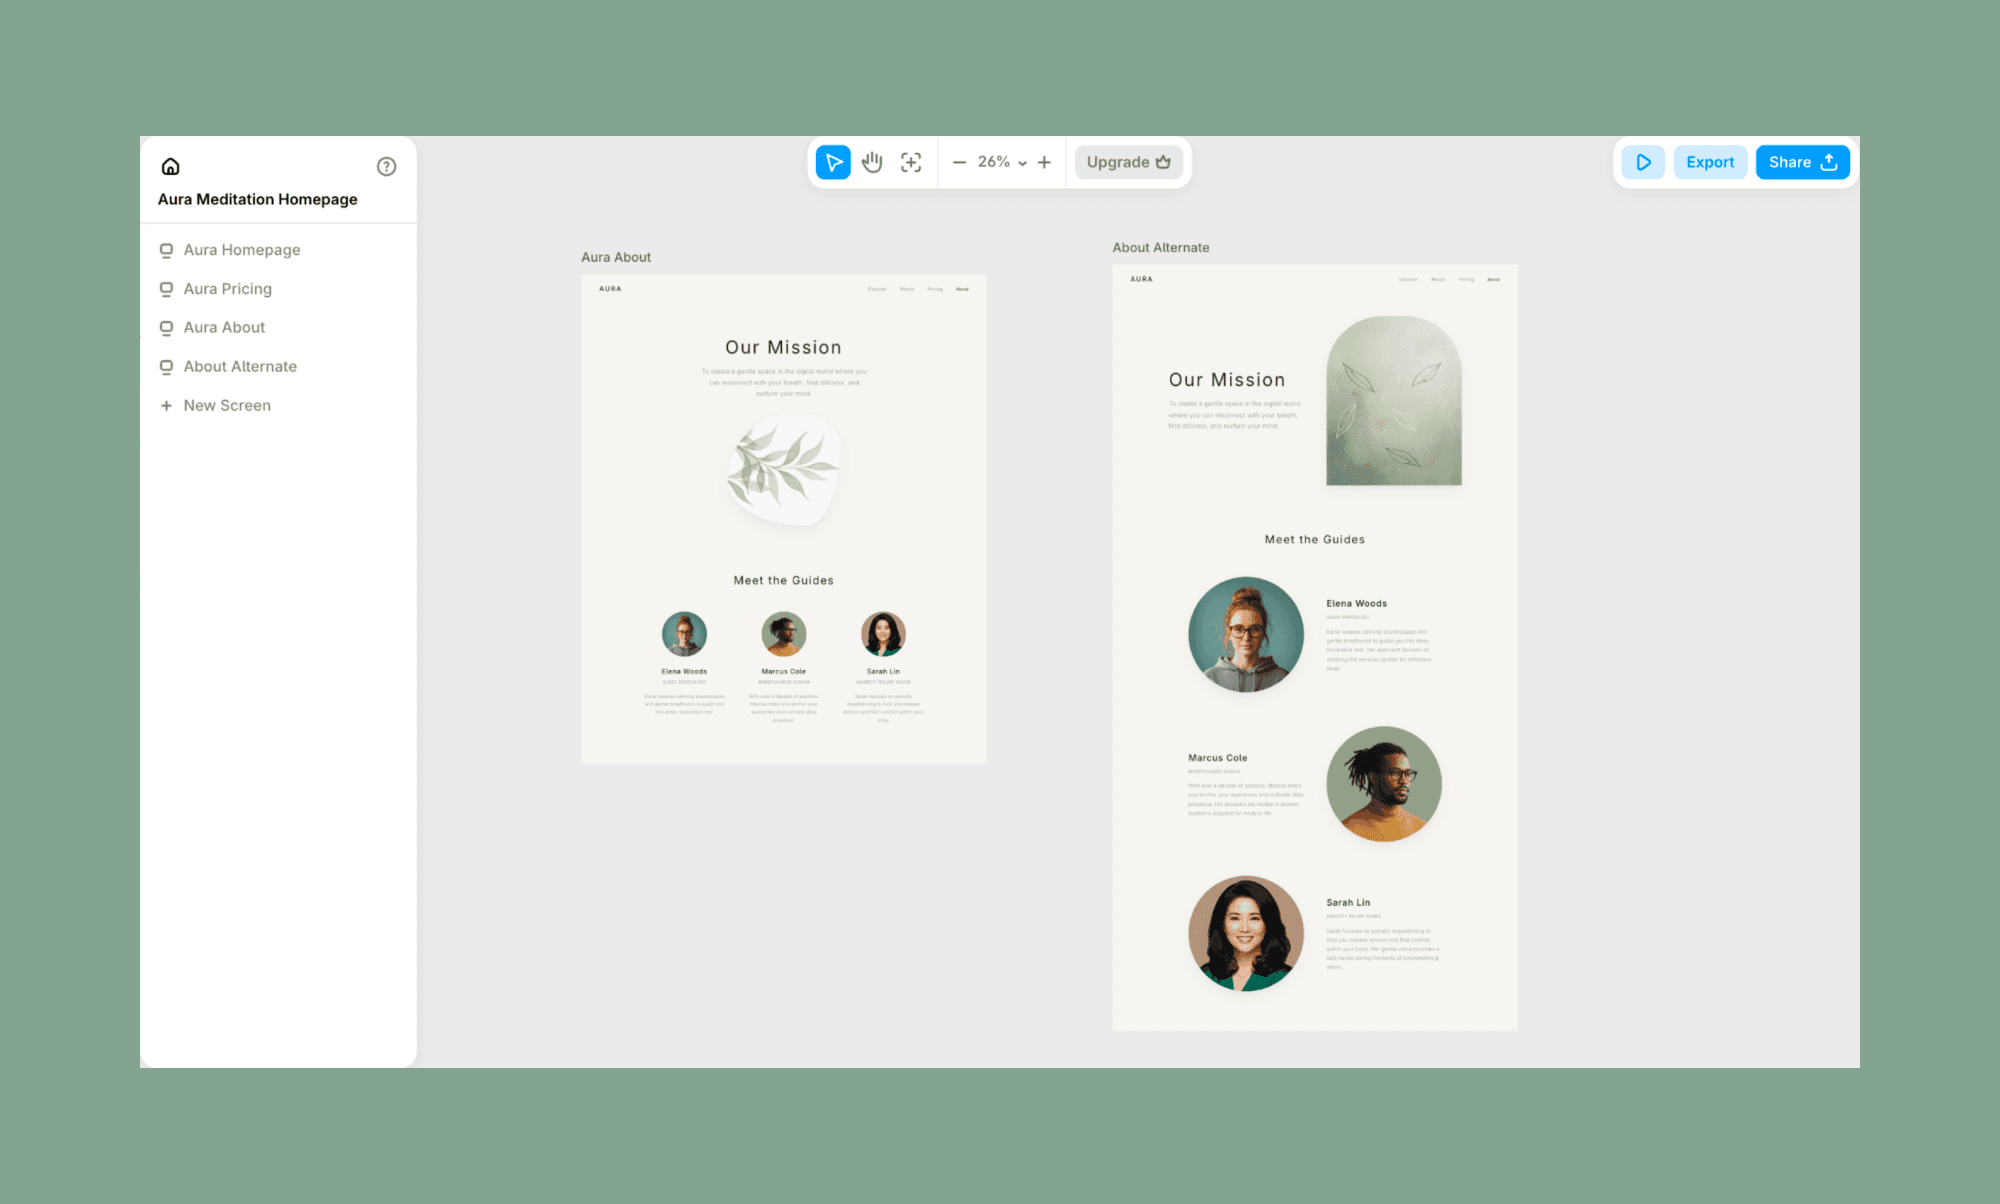
Nota: Todavía me gusta más la primera porque es minimalista, como quería, así que la borré.
Paso 5: Construye la versión móvil
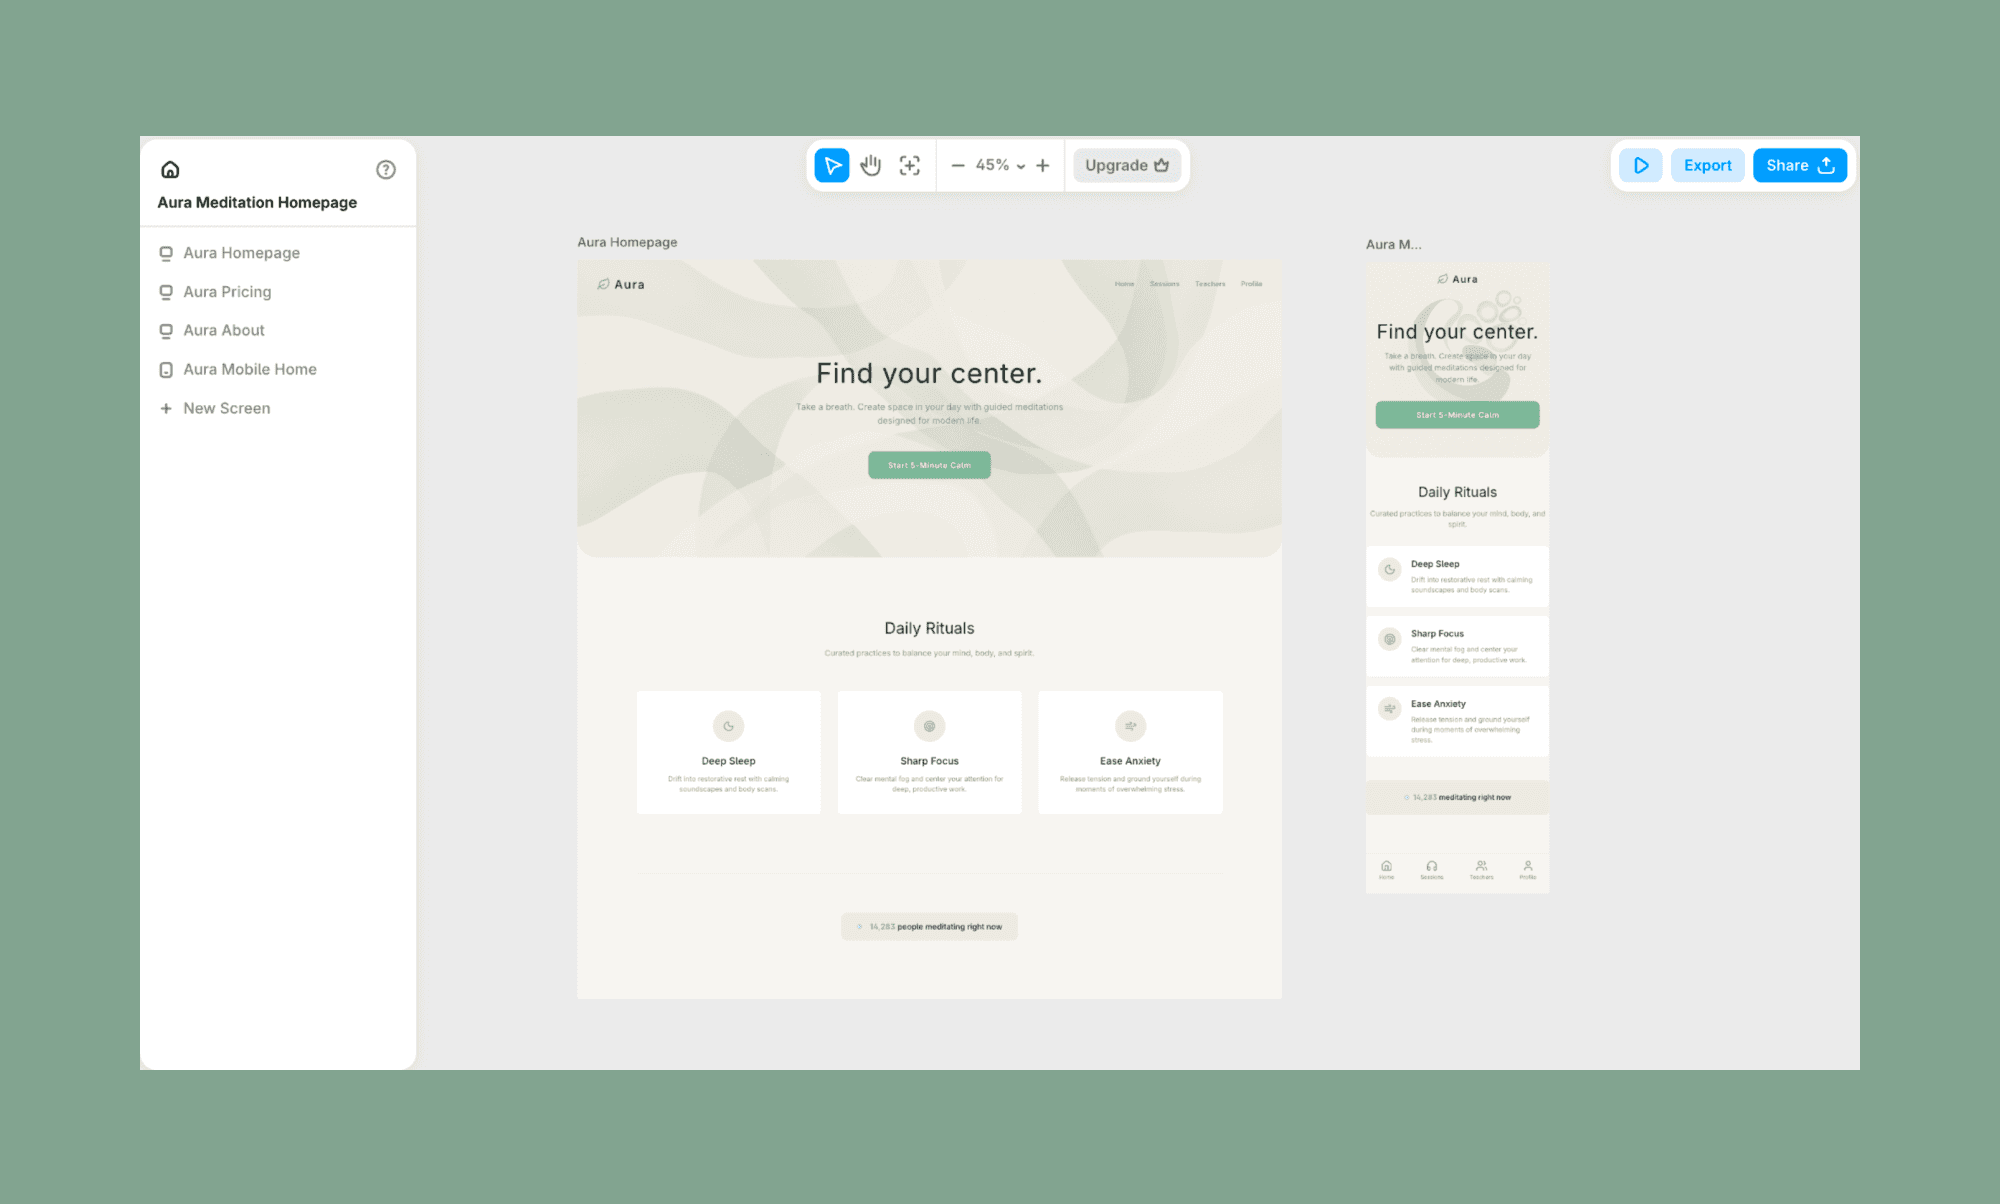
Una vez que estoy contento con las pantallas UI vibe-codificadas de mi app, creo sus versiones móviles. En Banani, tienes un botón para eso. Solo selecciona la pantalla y haz clic en 'Generate Mobile'. (Si primero hubieras diseñado una versión móvil, mostraría 'Generate Desktop'.)
Fíjate cómo el sistema de vibe design mantuvo la jerarquía de forma inteligente, especialmente cómo las pestañas del encabezado en desktop pasaron a ser las pestañas inferiores en móvil.
Paso 6: Prepara el diseño para vibe coding
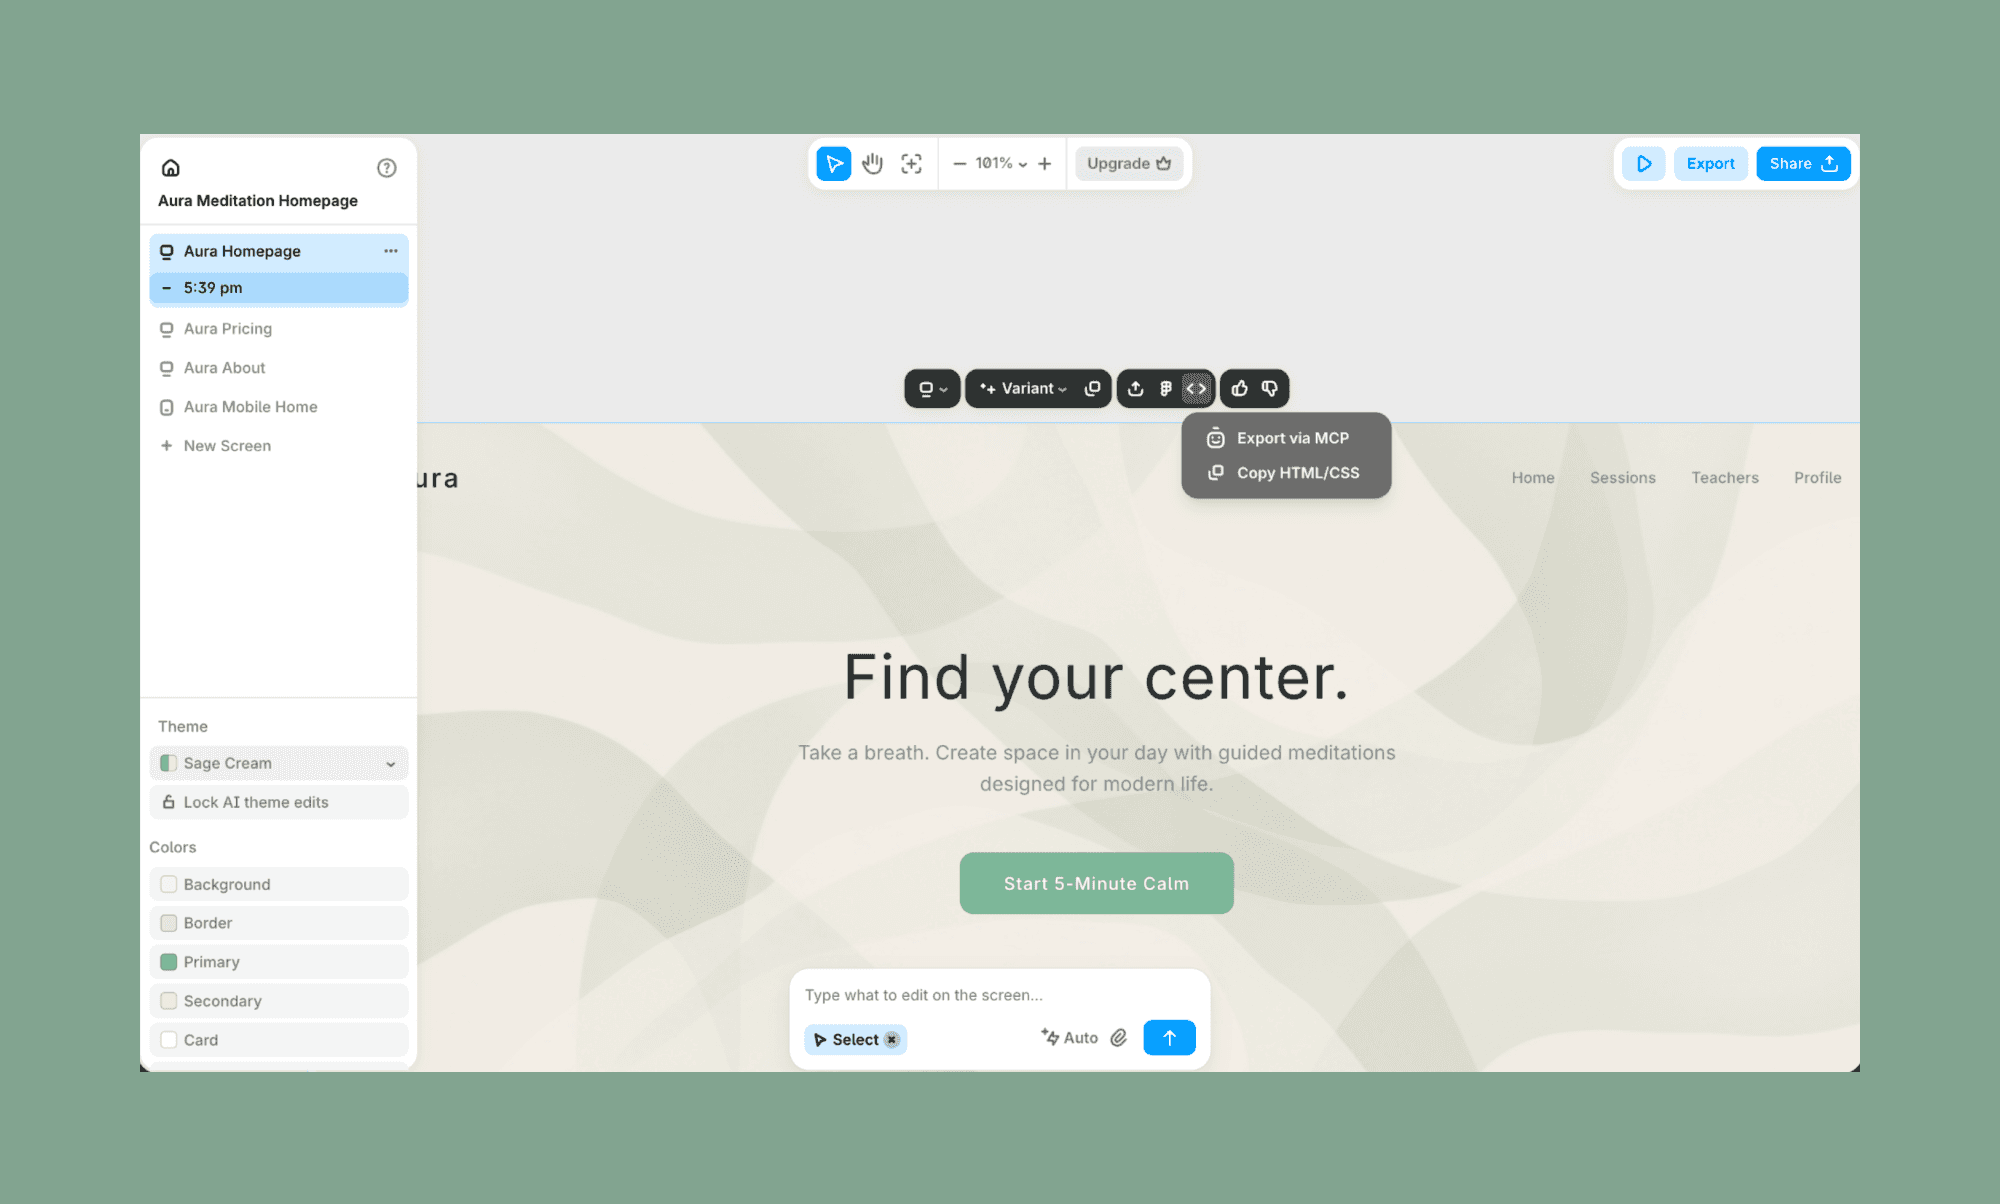
Una vez terminada la UI de vibe coding, el traspaso para el propio vibe coding es bastante fluido. De nuevo, solo selecciono la pantalla deseada, y arriba obtengo la opción de 'Exportar vía MCP' o 'Copiar código HTML/CSS'. Si uno trabaja en el sistema de diseño de Figma, también hay un 'Figma Export' directo.
Plantilla de prompt para Vibe Design
Tu build de vibe design es tan rápido y bueno como tu prompt (¿te suena de algo con vibe coding?). Aunque en mi ejemplo de arriba tomé algunos atajos para mostrar varios aspectos del software de IA para vibe design, en general suelo ser específico con mis requisitos desde el primer prompt. Puedes seguir la plantilla de abajo como referencia:
## Objetivo
Diseña un <screen/feature name> para <app name> que ayude a los usuarios a <primary action>.
## Usuario objetivo
<Describe la persona del usuario y su estado emocional (p. ej., 'Un padre estresado buscando ayuda rápida')>.
## Requisitos clave
Debe incluir: <Feature 1>, <Feature 2> y <Feature 3>.
Debe evitar: <Patrones de UI específicos o el desorden que odias>.
## Intención de diseño
Sensación: <p. ej., Editorial, Orgánico, High-tech o Lúdico>.
Priorizar: <p. ej., espacio negativo, tipografía en negrita o alta densidad de contraste>.
## Referencias visuales
Paleta: <color primario> y <color secundario>.
Inspiración: sigue el <layout/style> de <Competitor Name>, pero hazlo <how you want to differ>.
Empieza a diseñar vibe con IA
Vibe designing es más que hacer que las apps vibe-codificadas se vean bonitas. Se trata de hacerlas más intencionales al pasar de lógica primero a intención primero. Porque cuando construyes para otros, tienes que priorizar cómo interactúan con la app, y todo en el backend debería apoyarlo sin fricción. Y hay varias apps de IA para vibe designing, incluidas Visily y Figma AI.
Si buscas una que pueda generar wireframes de alta fidelidad y también sea compatible con el entorno de Figma, ve por Banani.
Preguntas frecuentes sobre UI de Vibe Designing
¿Qué es vibe designing?
Vibe designing es el proceso de generar y refinar layouts de UI usando prompts de IA en lugar de herramientas de diseño tradicionales.
¿El vibe designing es lo mismo que el vibe coding?
No. Vibe coding se centra en generar funcionalidad y código, mientras que vibe designing se centra en generar y refinar la interfaz visual.
¿ChatGPT puede crear diseño de UI?
No, ChatGPT no puede crear diseño de UI. Al menos no directamente. Pero sí puede ayudar a generar ideas de UI, sugerencias de layout e incluso código frontend.
¿Cuál es la mejor herramienta de IA para vibe design?
La mejor plataforma de IA para vibe design depende de tu flujo de trabajo. Muchos prefieren Banani para diseñar de una sola pasada y un traspaso rápido a desarrollo.
Referencias
[1] https://www.figma.com/blog/2025-shifting-roles-report/?fuid=619944597395242401
[2] https://dev.to/jaainil/ai-purple-problem-make-your-ui-unmistakable-3ono


